MacOS includes a Dock bar at the bottom of your MacBook’s screen. The Dock is among those essential macOS features, providing a quick launch bar to open applications and including entire running applications.
From the System Preferences menu, you can change the settings on a MacBook to have the Dock bar automatically hide and show. Once you turn this setting on, the dock bar will only appear when you move the mouse over the bottom of your MacBook’s screen.
Or, you can use the keyboard shortcut to hide or show it quickly on macOS.
What is a Dock?
Dock is a feature of the macOS operating system that allows users to access and launch applications from a fixed location on the desktop.
The user can customize the Dock to include their favorite apps, and it also provides access to critical functions of the macOS operating system, such as Finder, Launchpad, Mission Control, and more.
Using the System Preferences
Step 1: Click on the Apple icon and select the “System Preferences” option.
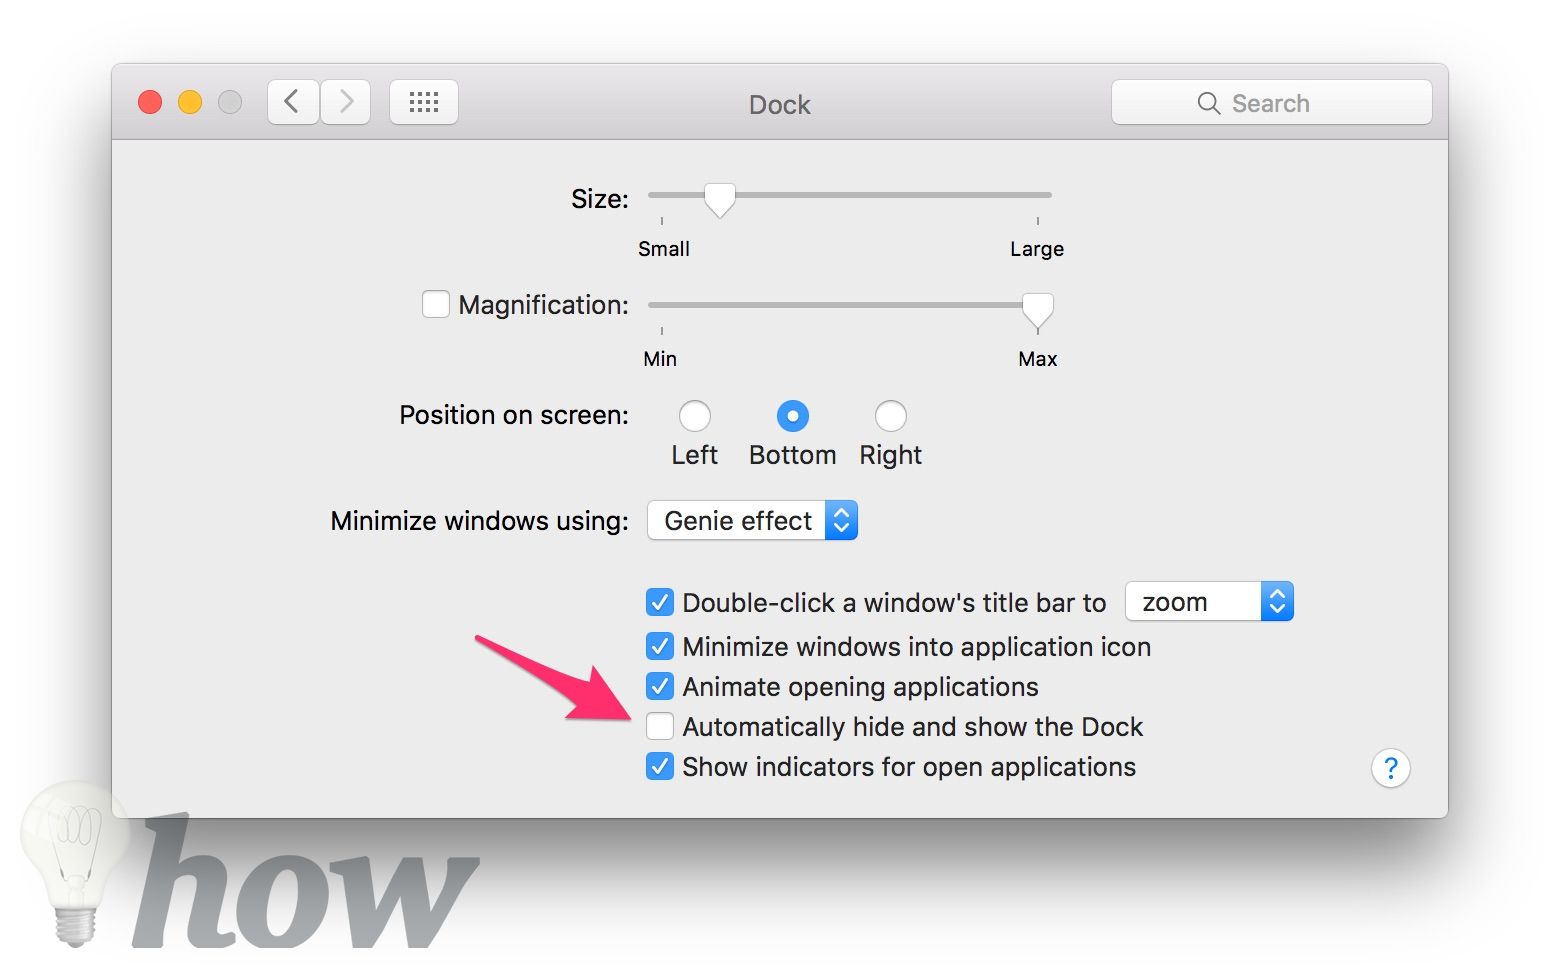
Step 2: Click on the “Dock” icon from the System Preferences window.
Step 3: You can see the option “Automatically hide and show the Dock.” Check the box for hiding and showing the Dock.
Using Keyboard Shortcuts
Command + Option + D
You can use the Command + Option + D button on your keyboard to auto-hide and show the Dock bar. It will immediately hide or show the Dock on Macbook Pro and Macbook Air.
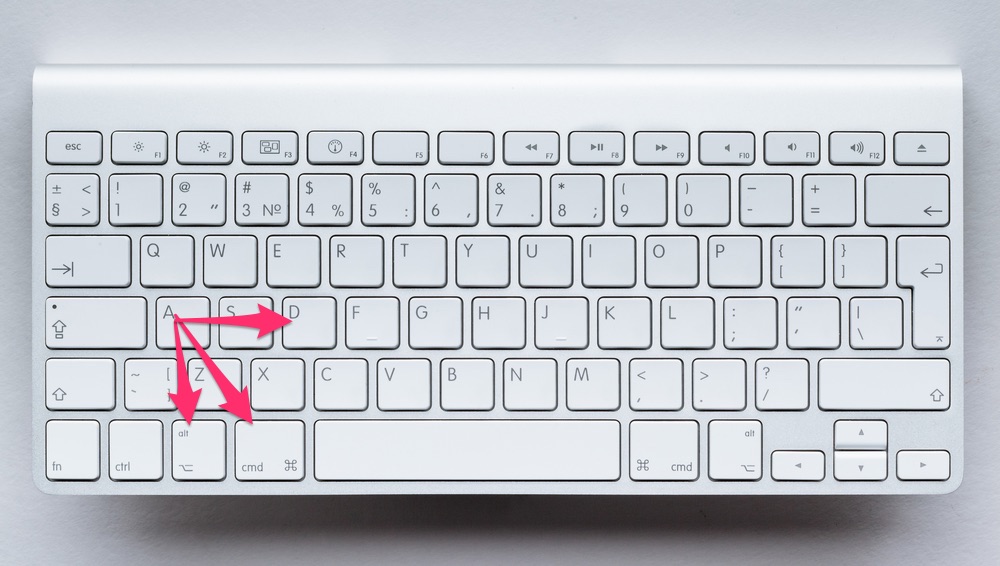
Using the keyboard shortcut is quick and efficient to switch the Dock hides and shows.
Set The Time You Want To Show The Dock
To establish the amount of the needed time to show the Dock (for this example, for 4 seconds), open the Terminal and enter the following command into a Terminal window:
defaults write com.apple.Dock autohide-delay -float 4 && killall Dock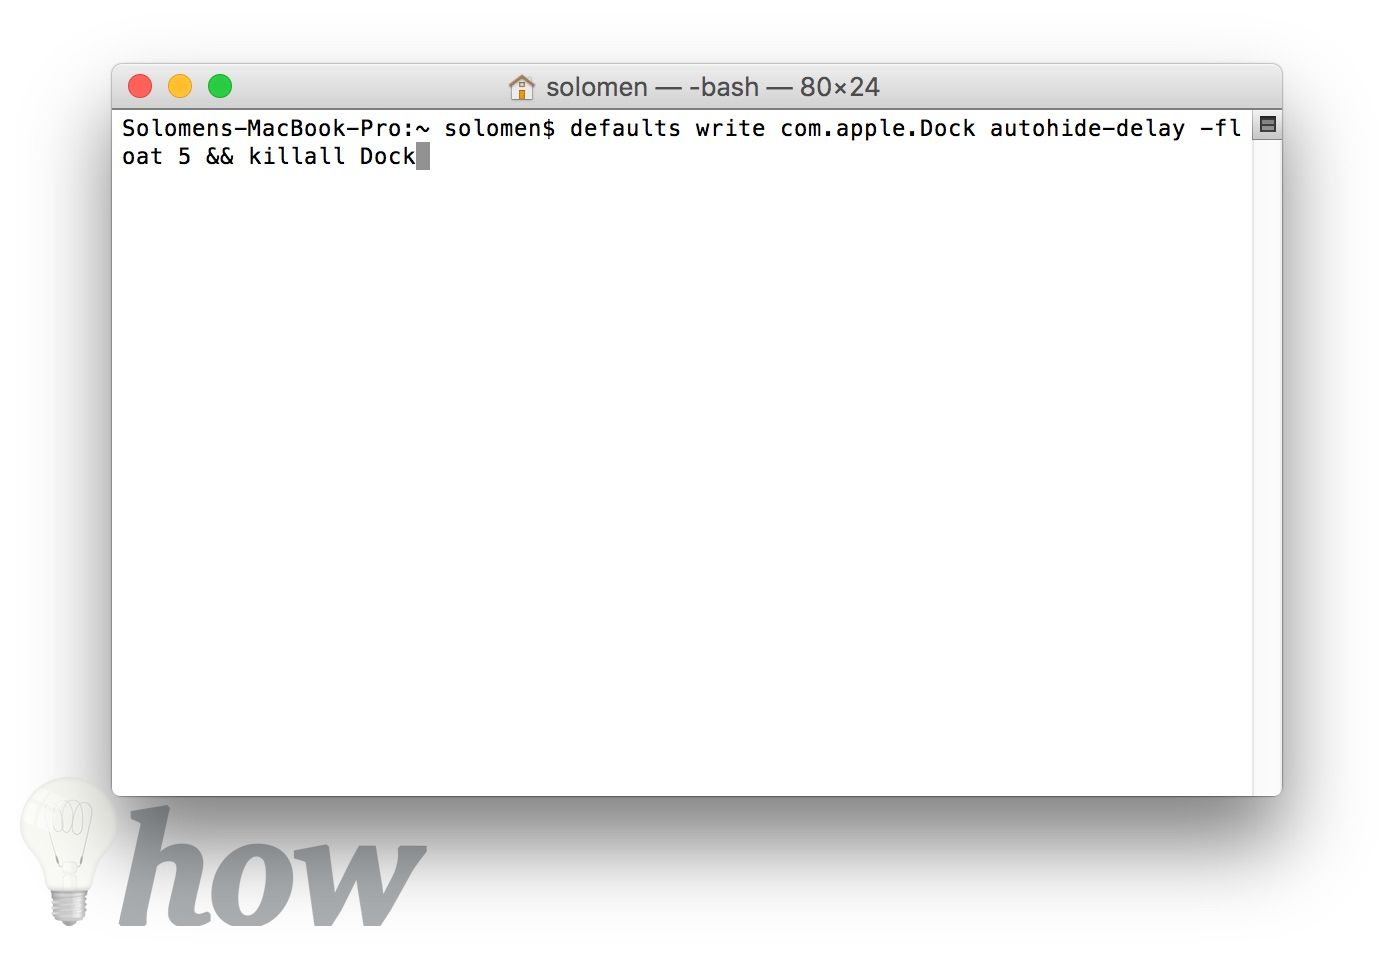
This will keep the Dock hidden until you move the mouse at the Dock’s screen edge for a full 4 seconds. You can modify the number of seconds that you want.
You use the following Command to show the Dock immediately without any delay.
defaults write com.apple.Dock autohide-delay -float 0 && killall DockTo bring the default setting back, enter this command below:
defaults delete com.apple.Dock autohide-delay && killall DockHow to change the Dock size on macOS

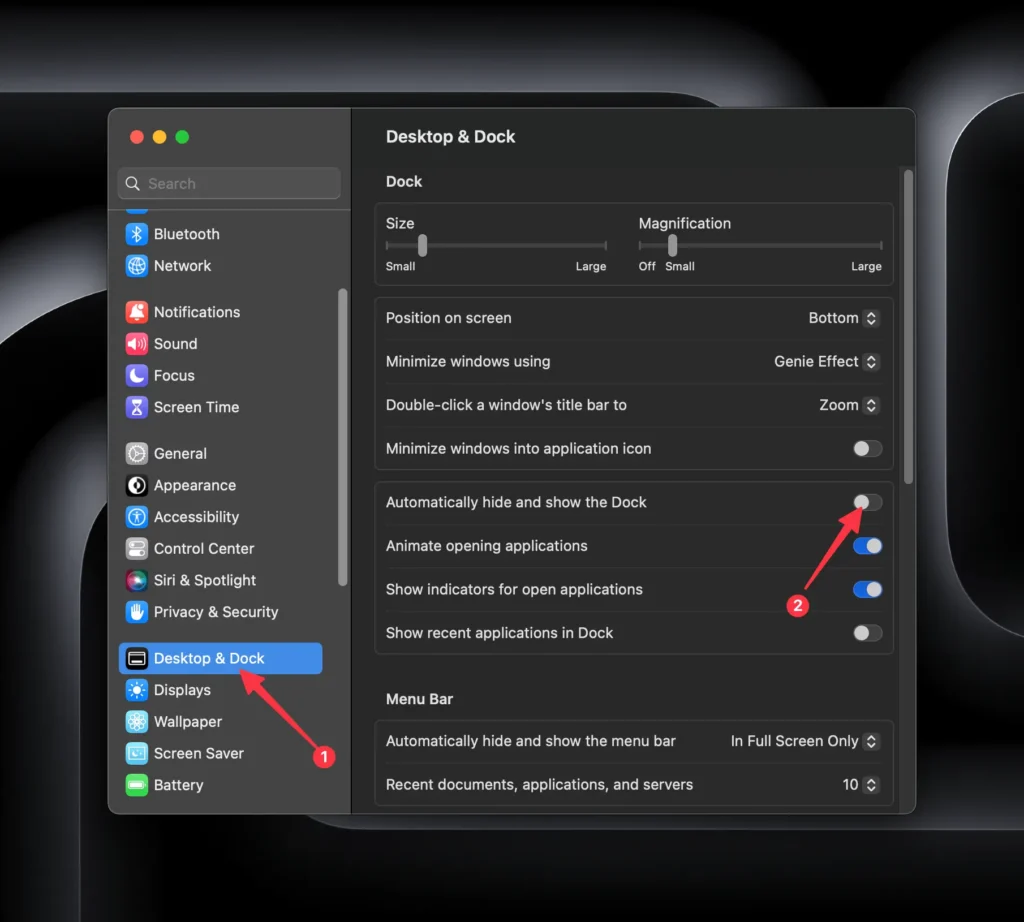
To change the size of the Dock on your Mac, go to System Preferences > Dock. From here, you can adjust the size of the Dock by using the slider at the bottom of the window.
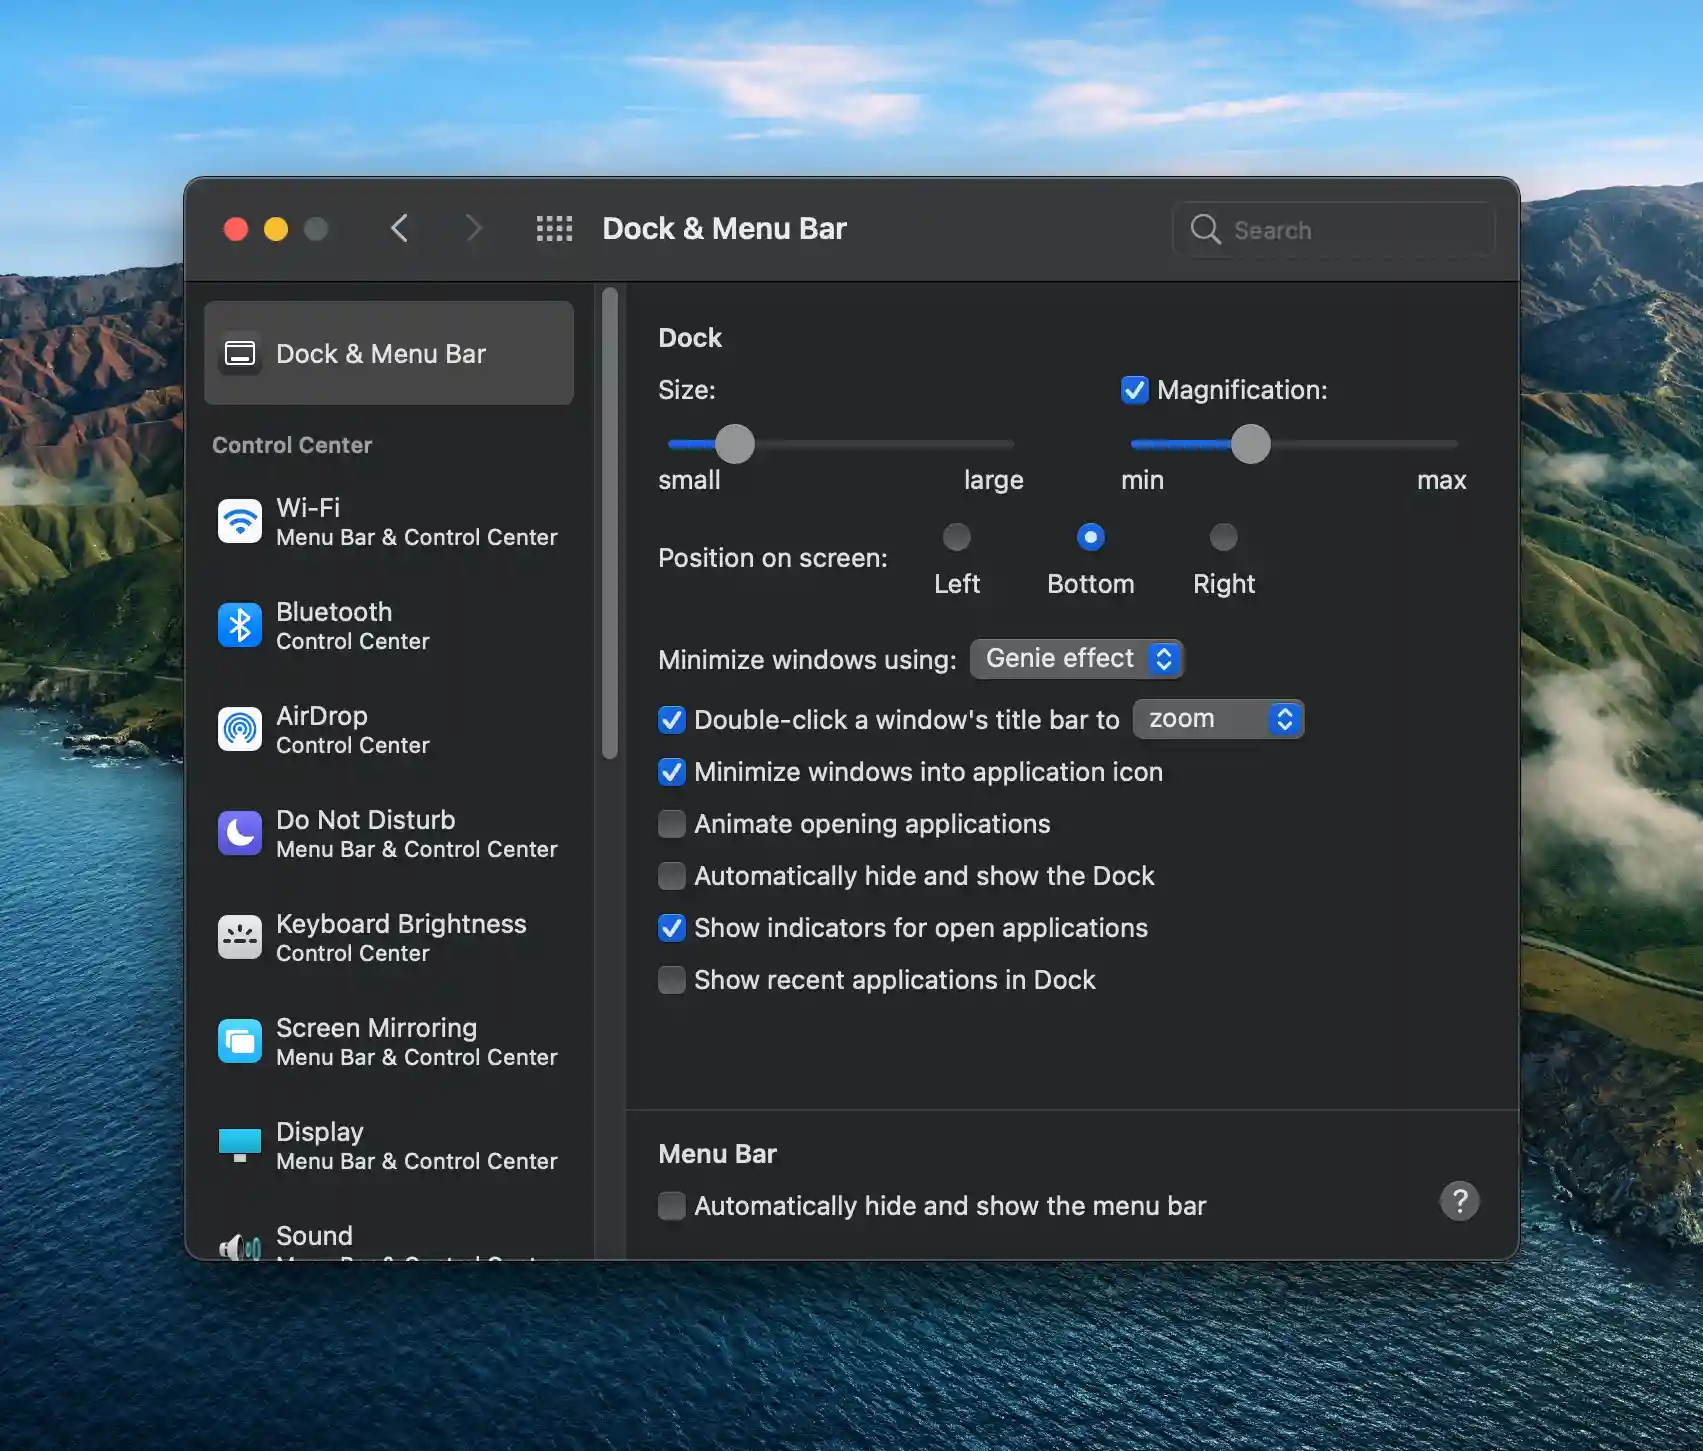
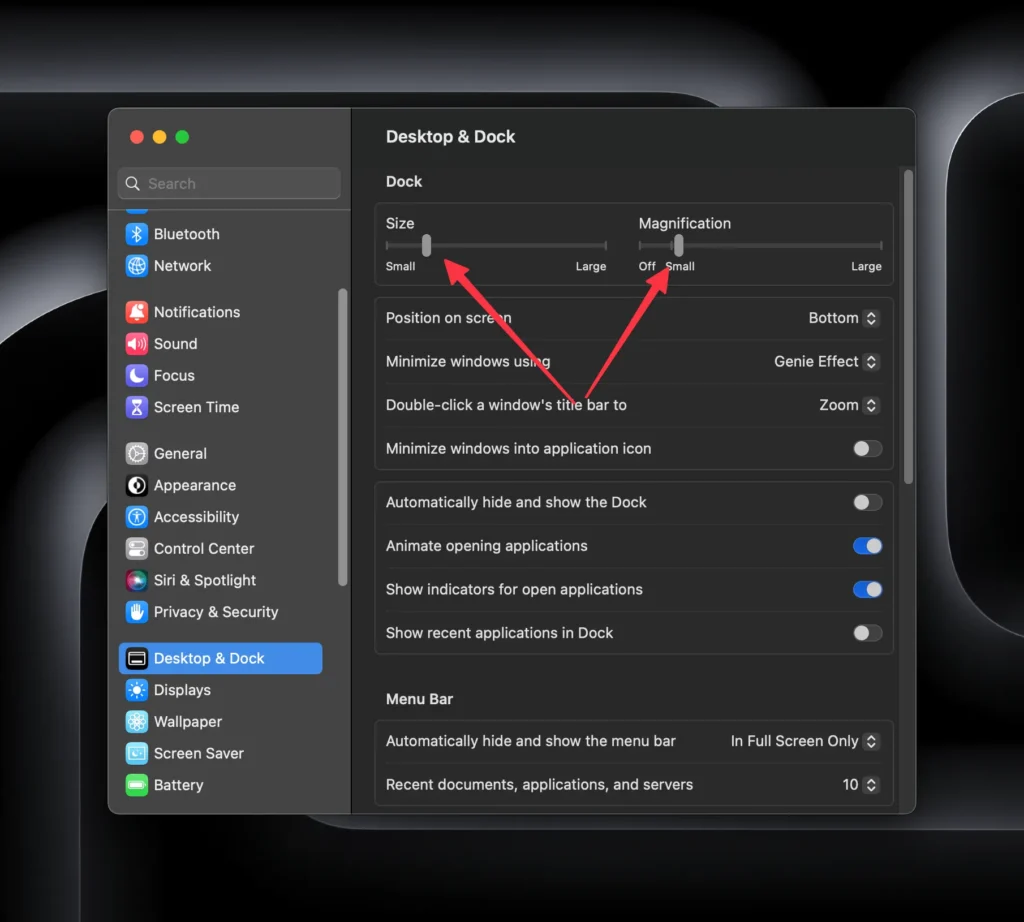
You can also enable “Dock Magnification” to make your apps and icons appear more significant when you hover your mouse over them. Then, you can adjust the slider to change the size of the icons.
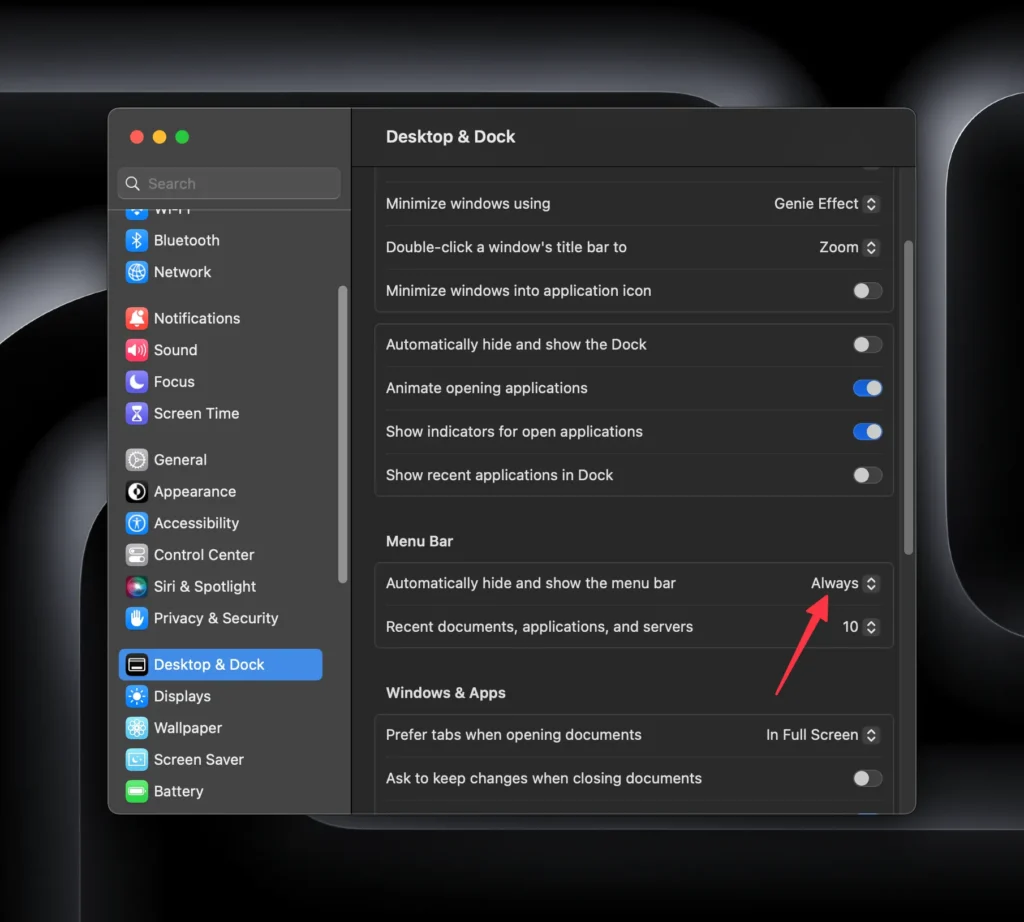
Automatically Hide And Show The Menu Bar
Open System Preferences and go to Dock & Menu Bar to enable auto-hide Menu Bar on macOS Big Sur. From here, check the box for “Automatically hide and show the menu bar.”
This will minimize the Menu Bar when you’re not using it, giving you more space on your screen.
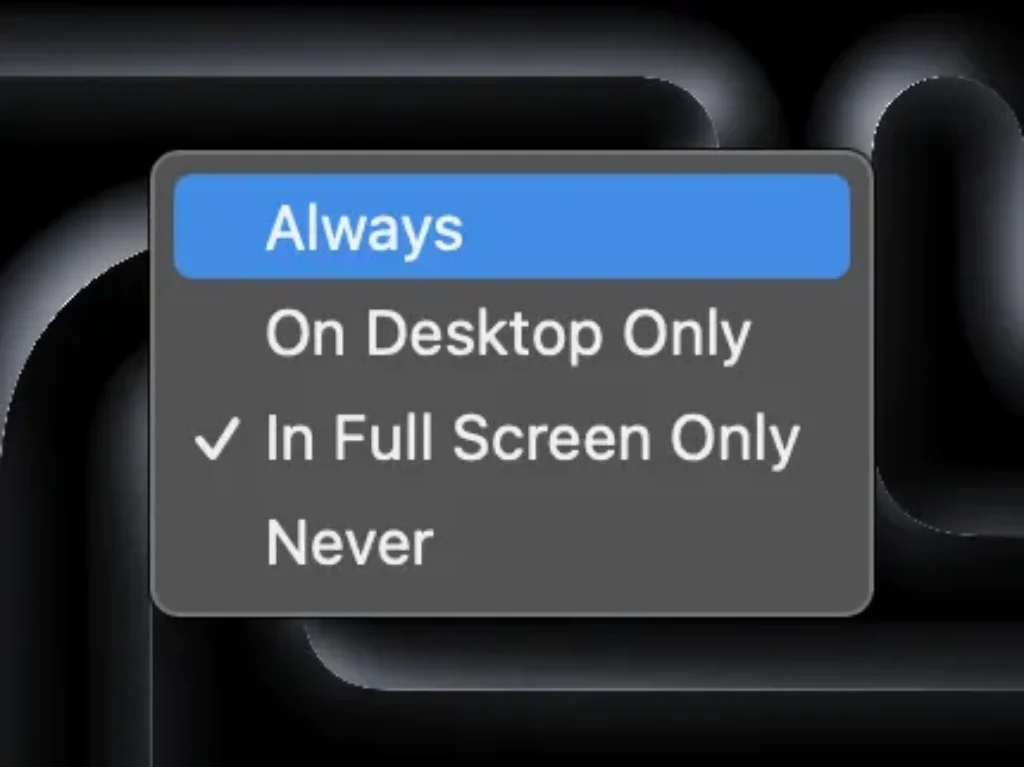
For macOS Ventura and above, choose Always at Automatically hide and show the menu bar.