Nowadays, there will always be some distractions that drag you from working. It can be regularly checking your emails, reading your Instagram, Facebook, Snapchat feed, watching YouTube videos, etc. Blocking these websites can keep you productive during work, and here are some methods that can help you block or unblock websites on Mac.
My Favorite App – Focus
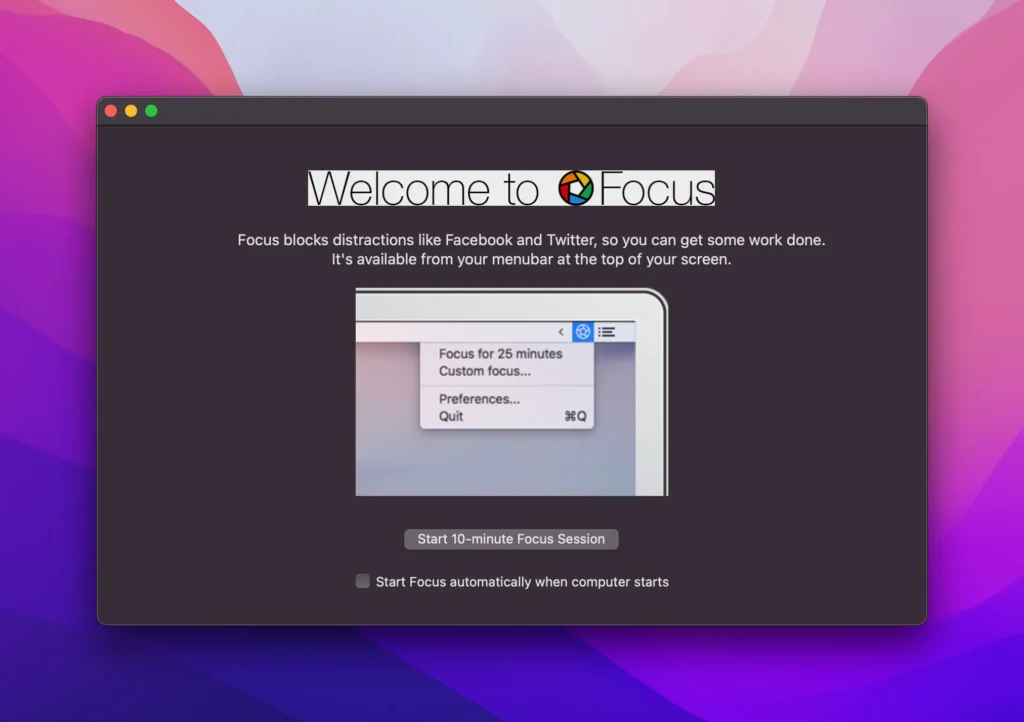
Focus is a productivity app designed to assist users in maintaining concentration and avoiding distractions by blocking access to apps and websites while also allowing for the scheduling of focused work sessions. It is now available for both Mac and iOS platforms.
You can buy it as a one-time purchase starting from $19 or download it if you have a subscription to Setapp account. Click here to learn more about Setapp.
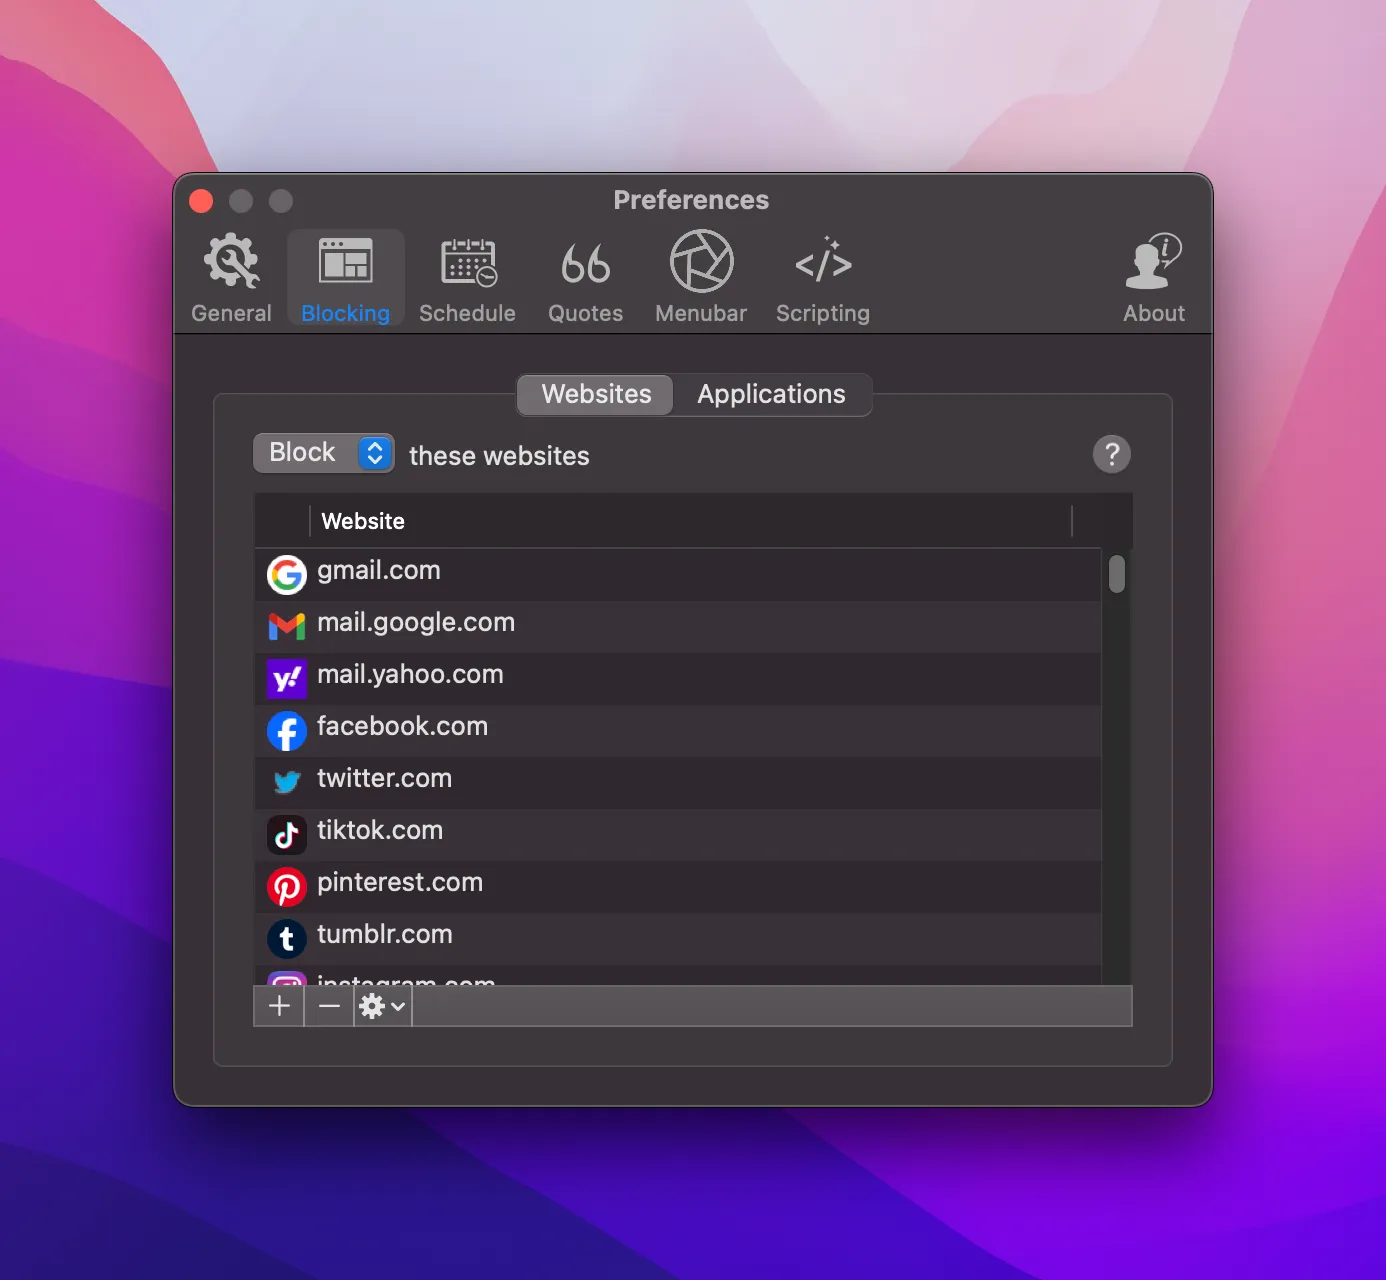
You can customize the websites and applications that need to be blocked during deep work sessions.
Select the time for focus and the duration of breaks within the app.
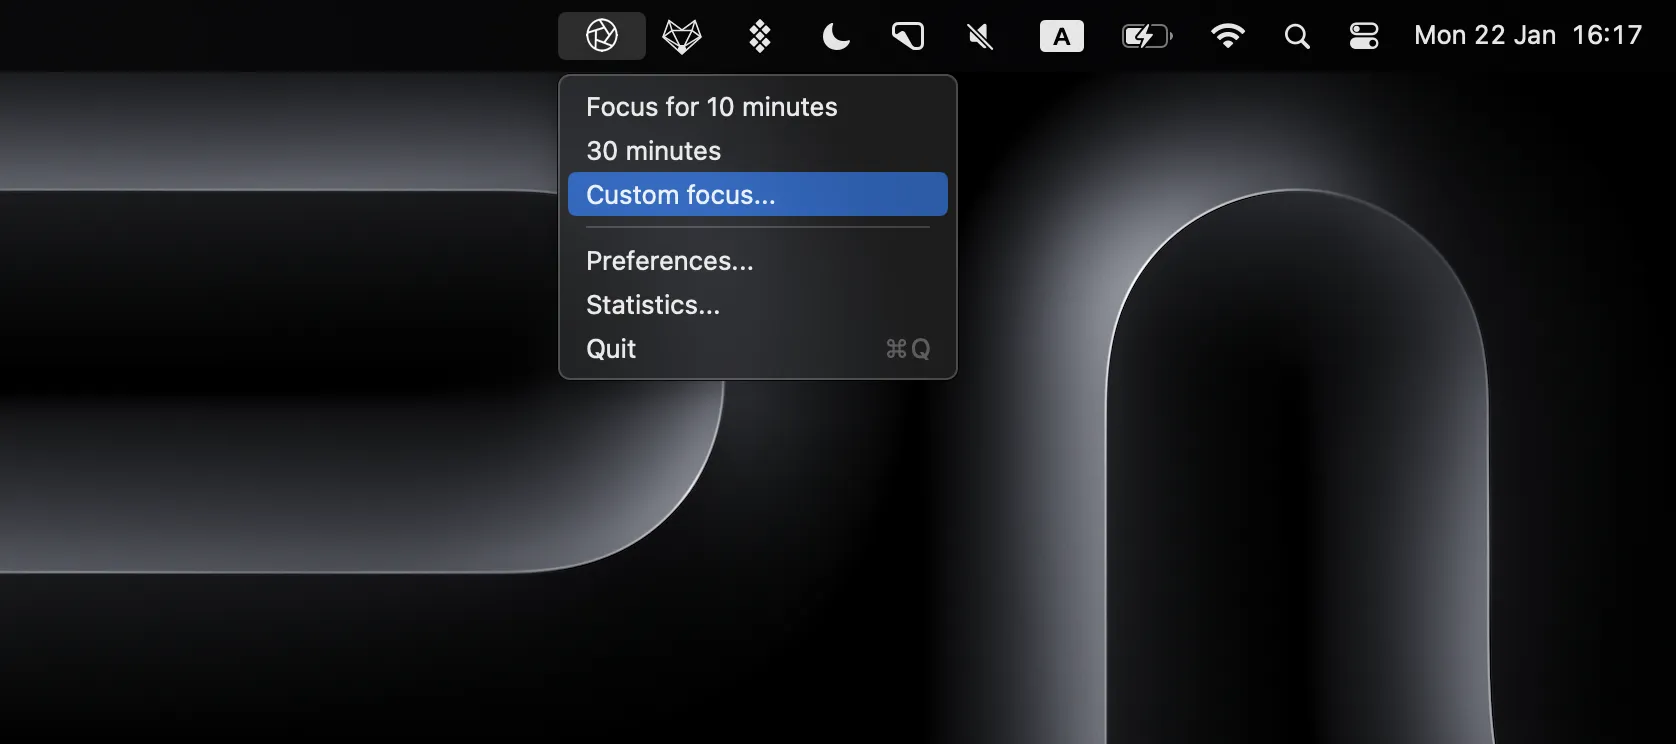
Click on ‘Focus for 10 minutes’ (default), or customize your own time like 30 minutes, 45 minutes…
Once it starts running, you won’t be able to open Facebook, Instagram, or any specific websites you have added.

Instead of displaying an error page, these blocked websites will present meaningful quotes.
Using The Terminal app
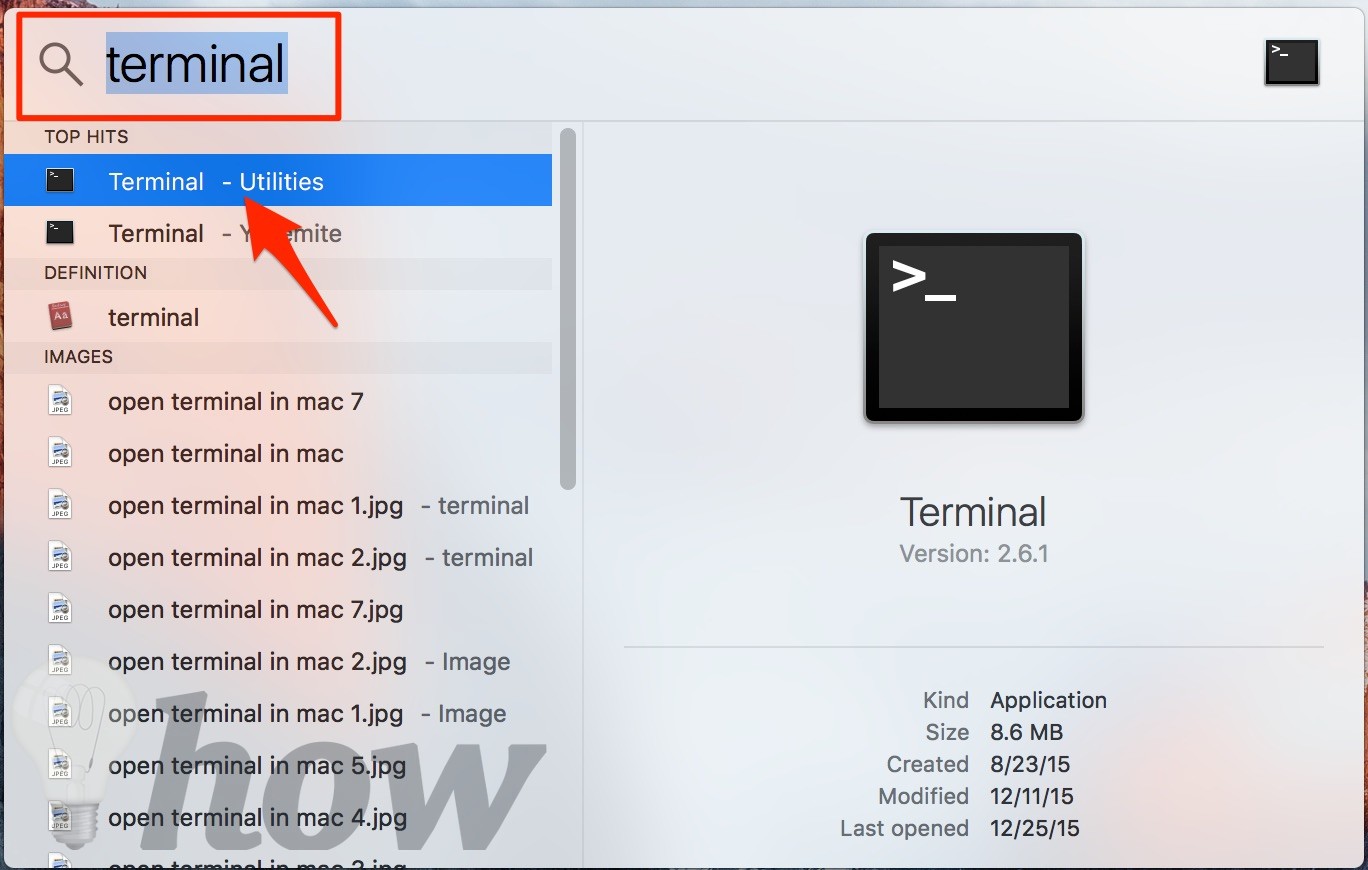
Step 1: Open the Terminal.
Step 2: Type the command line below and hit Enter:
sudo nano /etc/hosts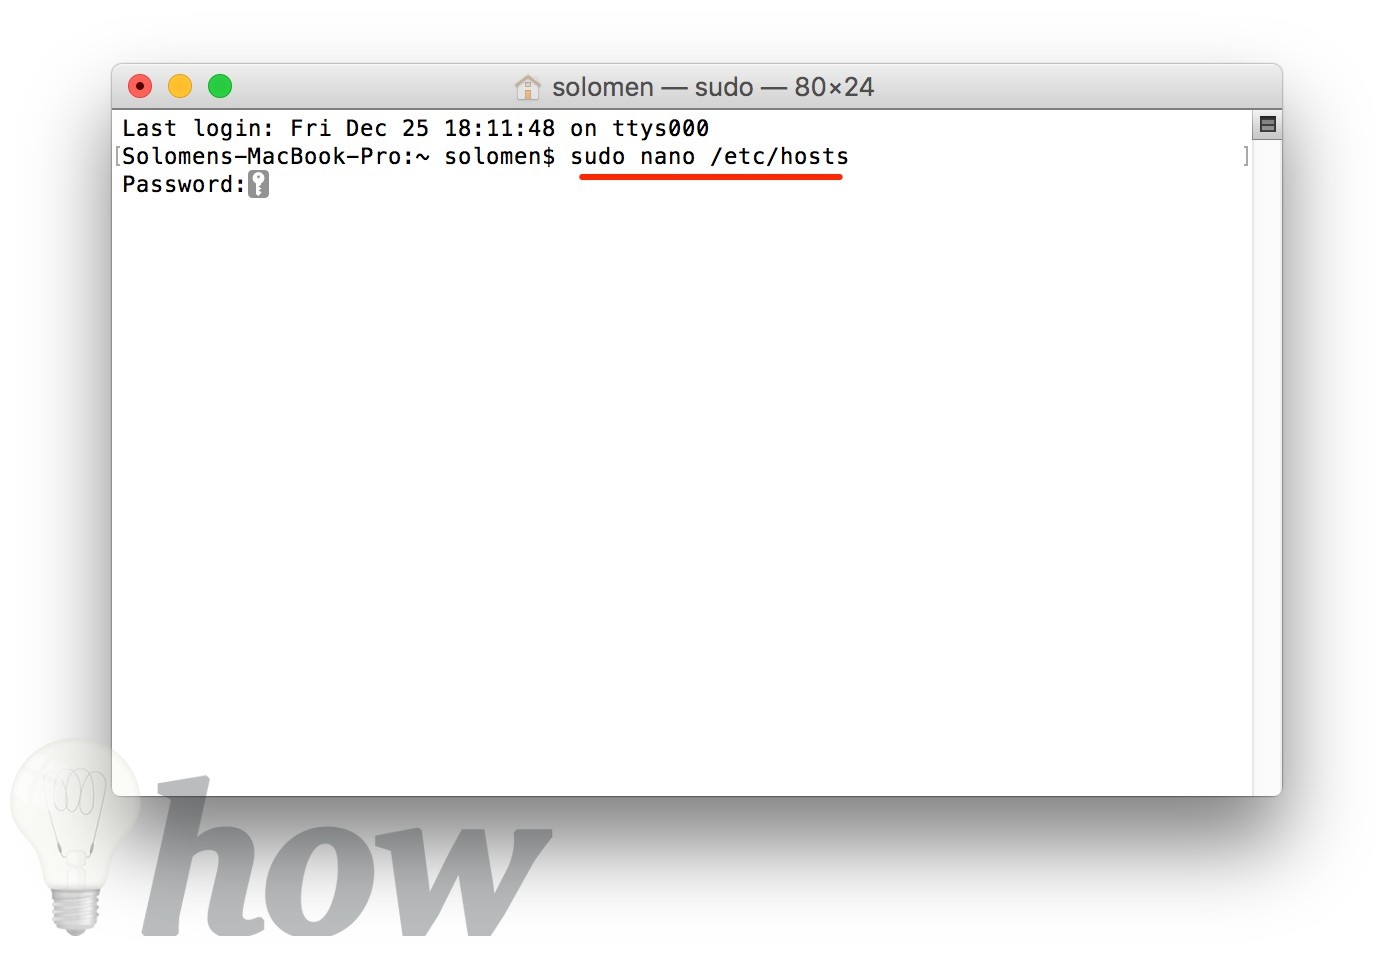
Then, you certainly will be asked about your Mac’s administrator password.
Step 3: Once you type enter the password successfully, Terminal will open the hosts file.
Create a new line by pressing the up or down arrow button and then type the IP “127.0.0.1” + “Space” + “URL or Website address.” And type another URL or Website address following the same steps.
For example:
127.0.0.1 www.facebook.com
127.0.0.1 www.apple.com
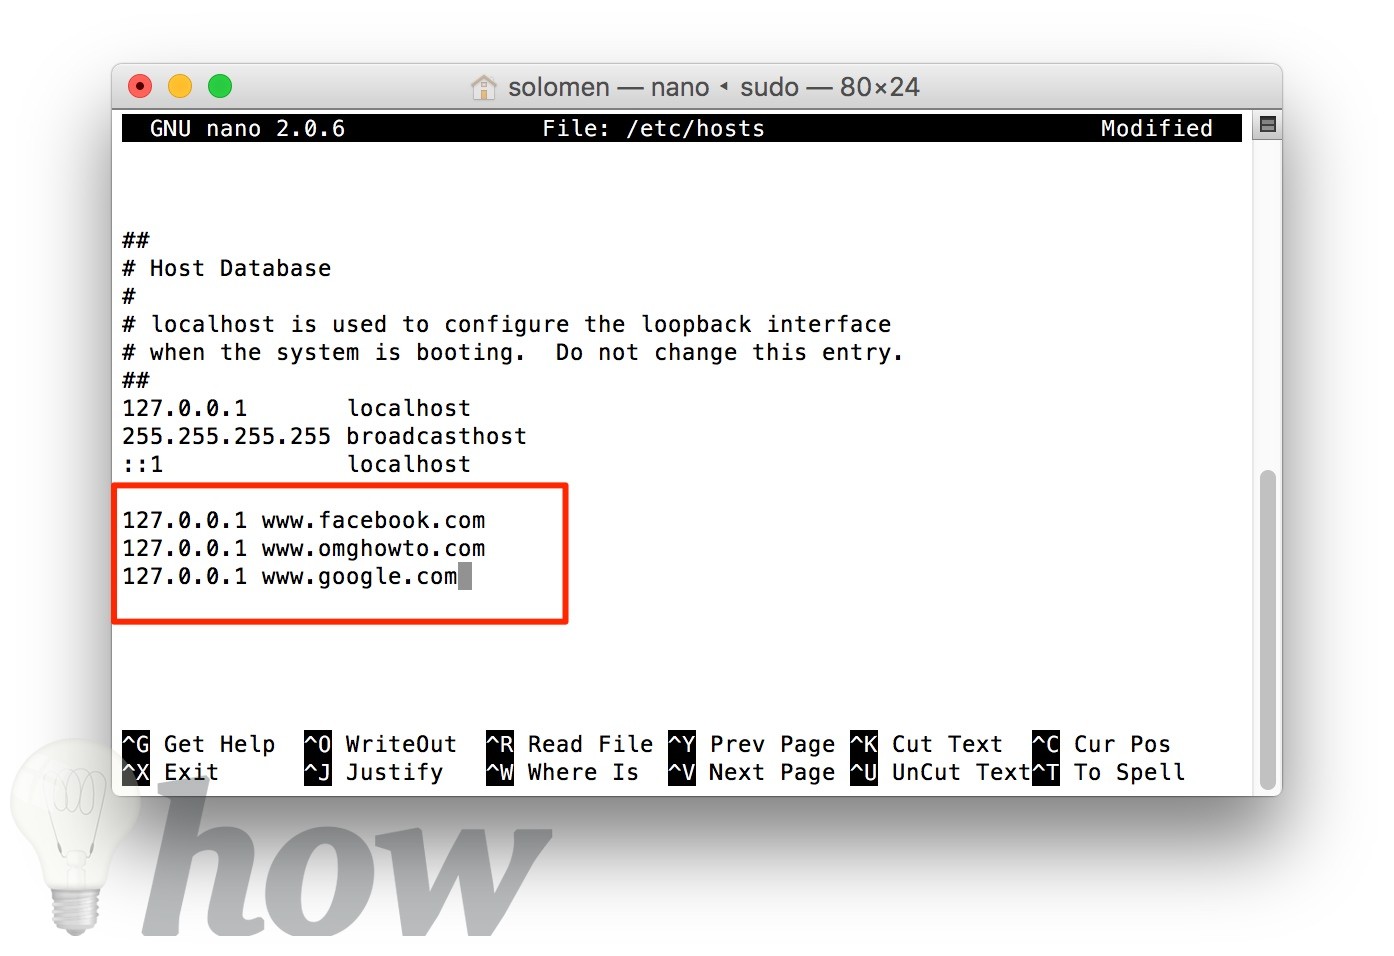
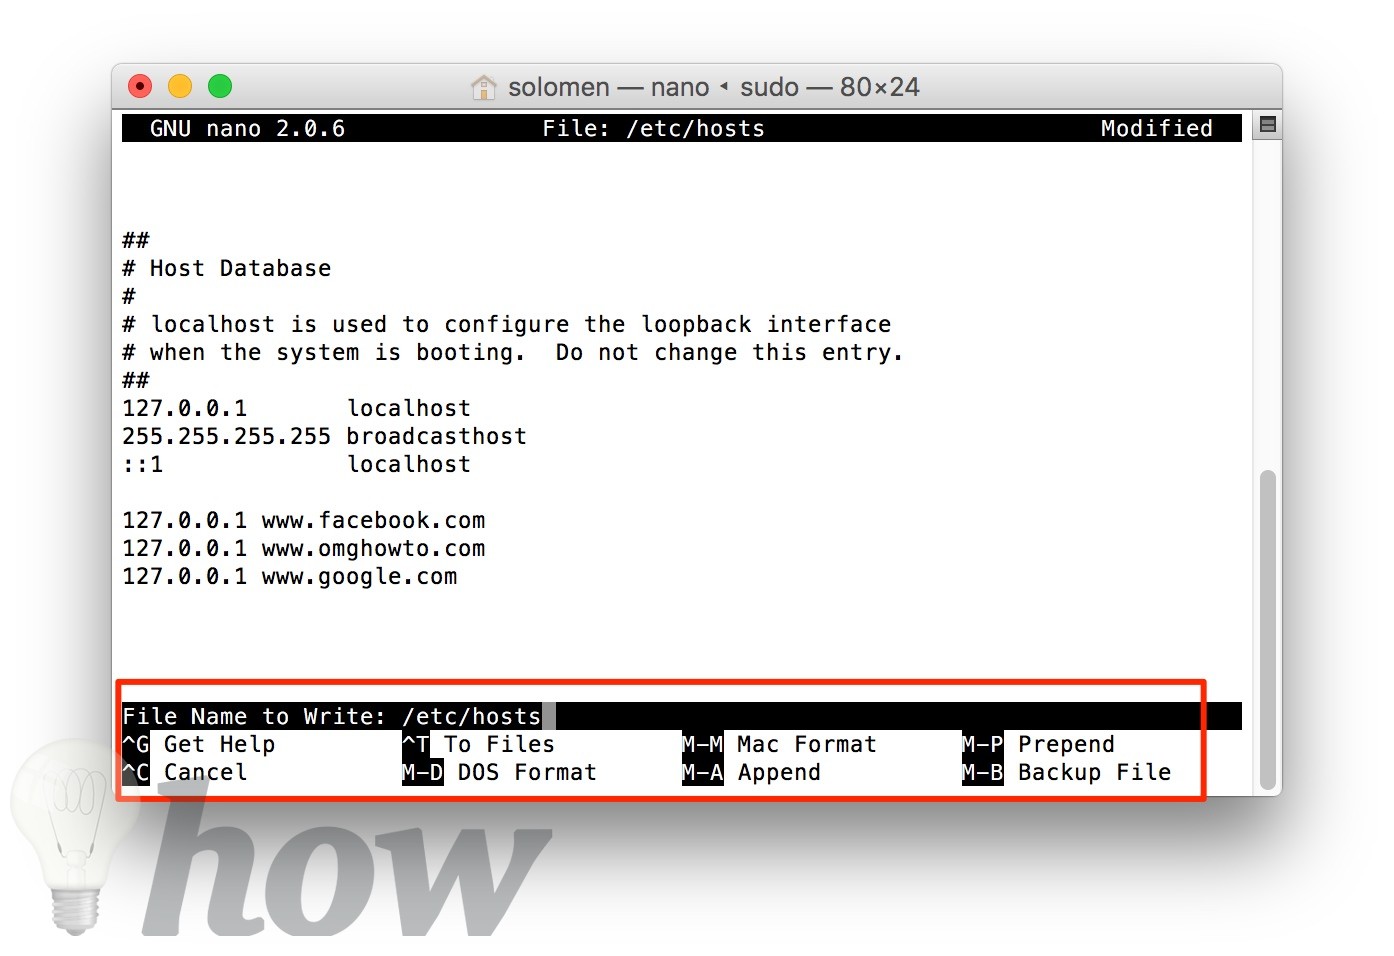
Step 5: When you have made the list of sites or URLs, you can save the host’s file by pressing the Ctrl + O and then hitting the Return button. Finally, press the Ctrl + X to exit the screen.
Step 6: Flush the existing cache by using the command line blow. This will refresh the current cache on the host database.
sudo dscacheutil -flushcache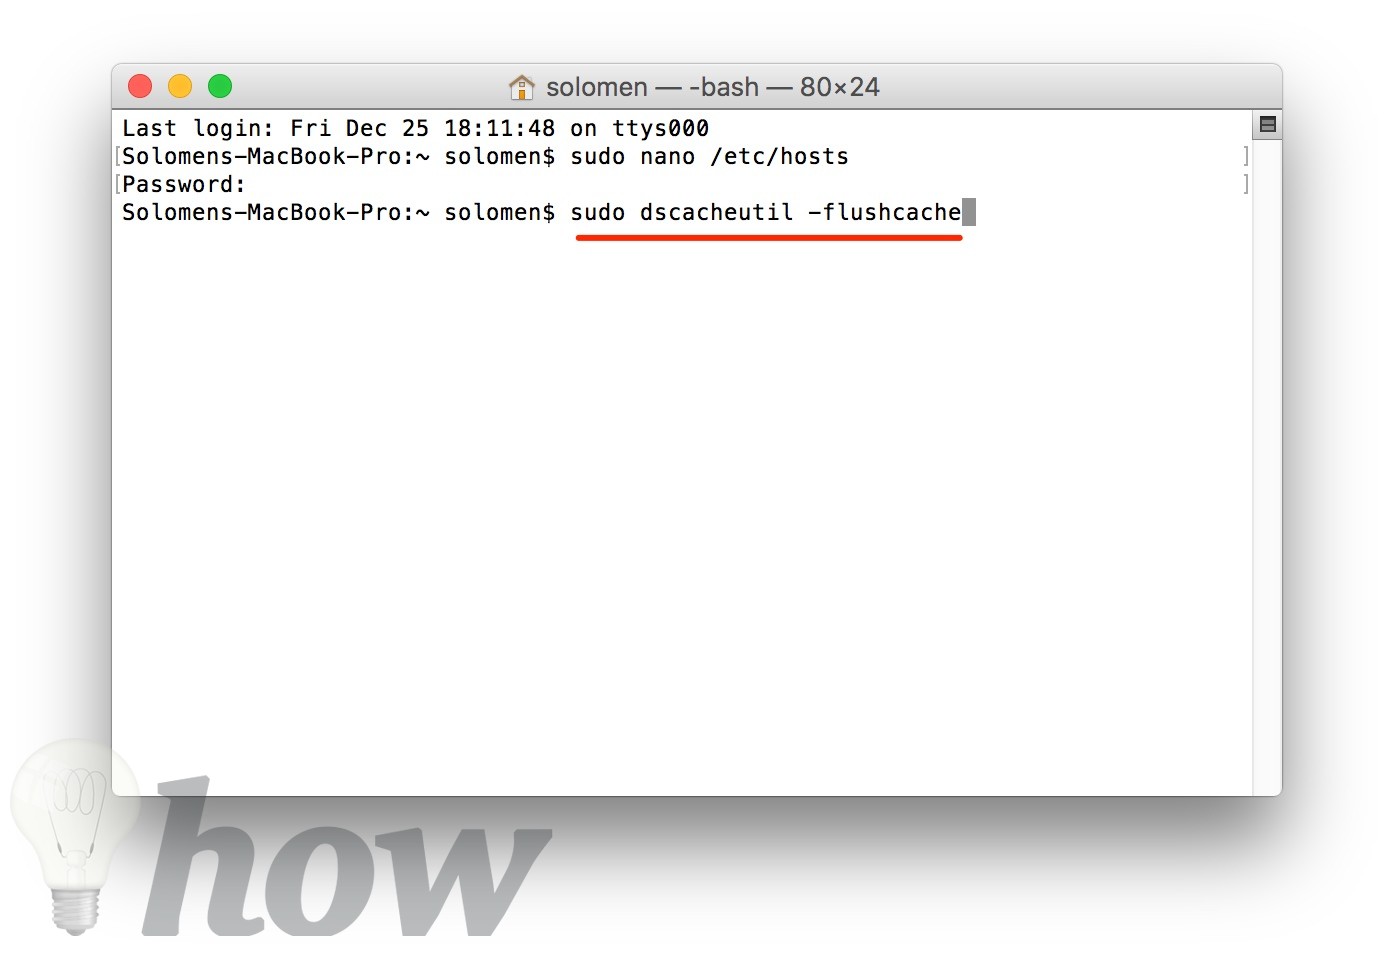
Now, go to the URLs or Sites that you have blocked. If you have already edited the hosts file correctly, you should not be able to access that URL and Site address.

To unblock, delete the sites or URLs you have added to the host’s file, and don’t forget to flush the DNS cache.
Using The Built-in Parental Controls
For macOS (Big Sur and Newer)
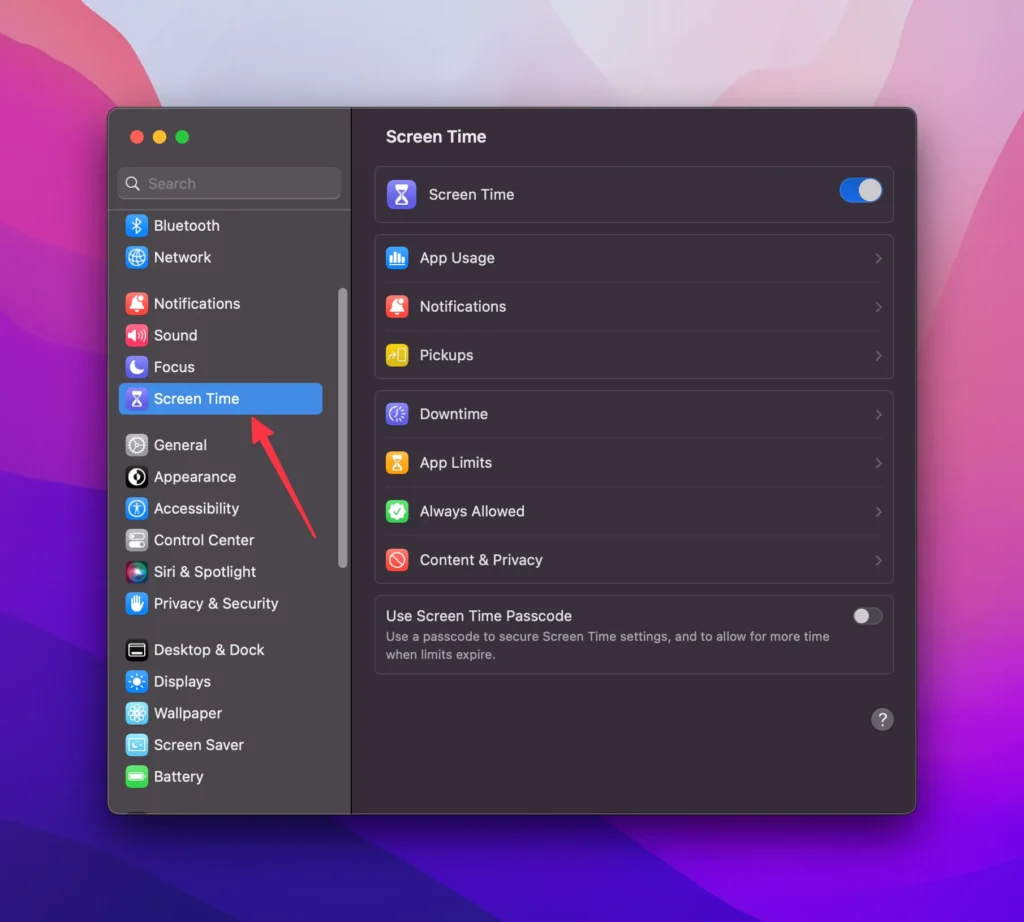
For Mac users running Big Sur or a newer version, whether you’re configuring parental controls through Family Sharing or on your child’s account, navigate to System Preferences and access Screen Time.
If you’re utilizing Family Sharing, select the specific child for whom you wish to implement controls.
Navigate to Options on the left-hand panel, and then activate the controls by clicking Turn On in the upper-right corner.
You can tailor your parental control preferences, including setting up scheduled downtime, defining app limits, and managing content/privacy restrictions.
Click here to learn more…
For macOS (Mojave and Older)
You can easily use the built-in Parental Controls on MacOS to block user accounts directly from accessing some websites. This will explain in detail how you can block websites by using Parental Controls.
Step 1: Create an individual User Account for your children.
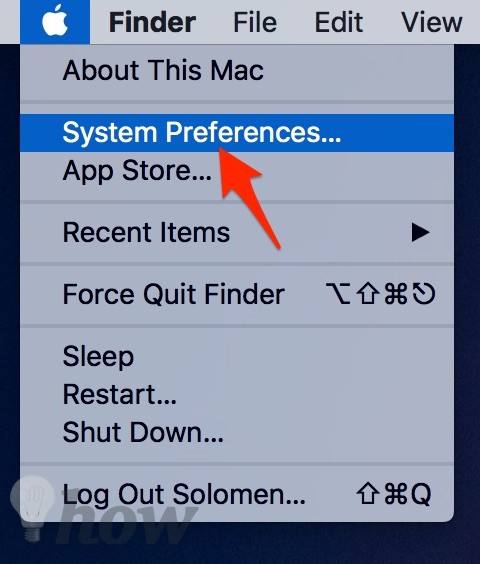
Step 2: Browse to your Apple menu and click “System Preferences.”
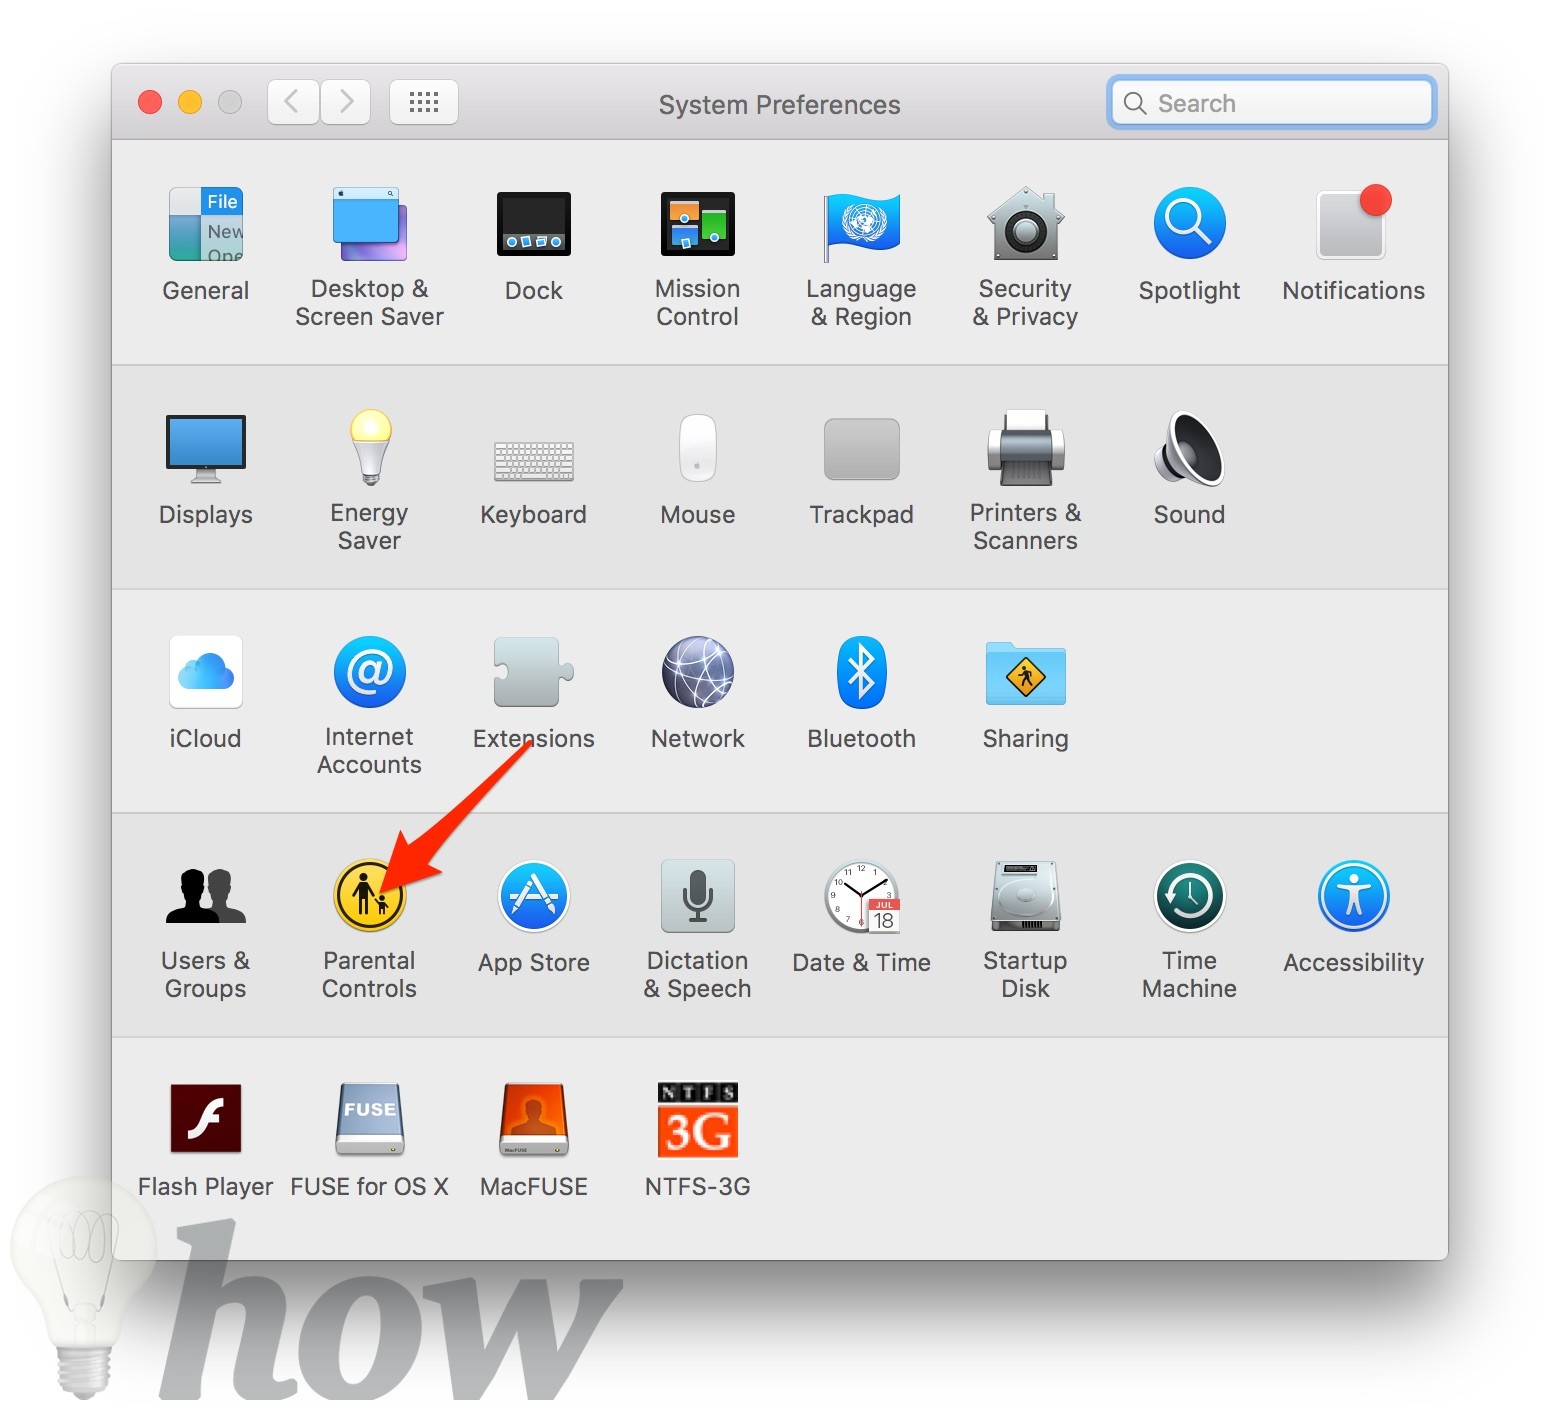
Step 3: Select the Parental Controls icon.
Step 4: Select the Lock icon ( displayed at the end of the window).
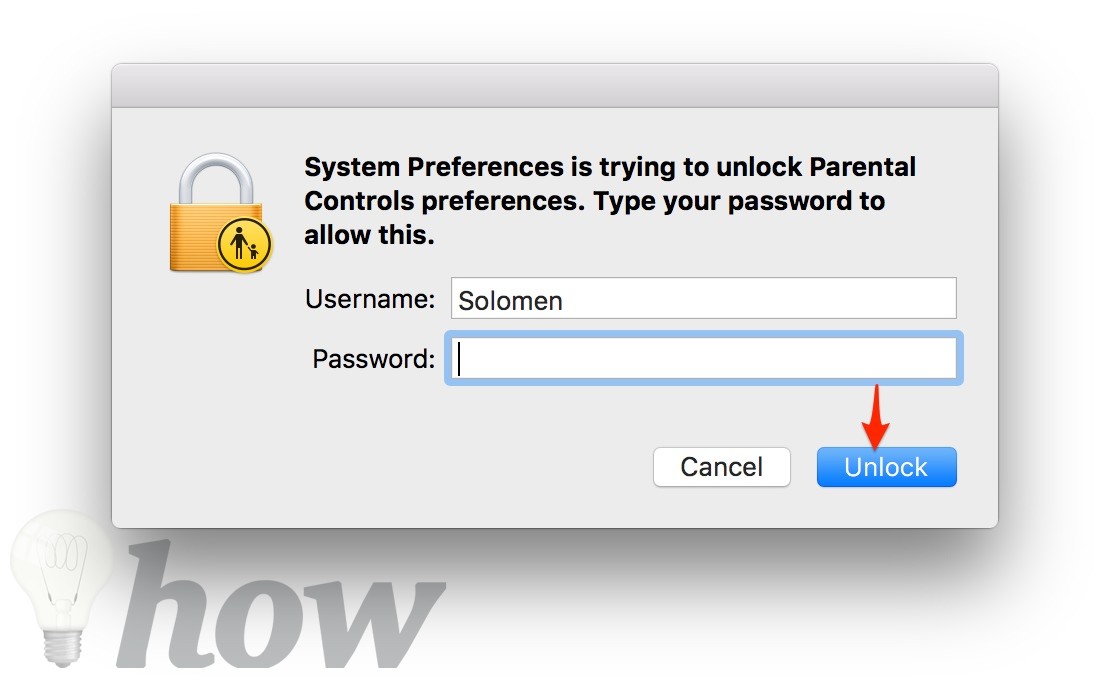
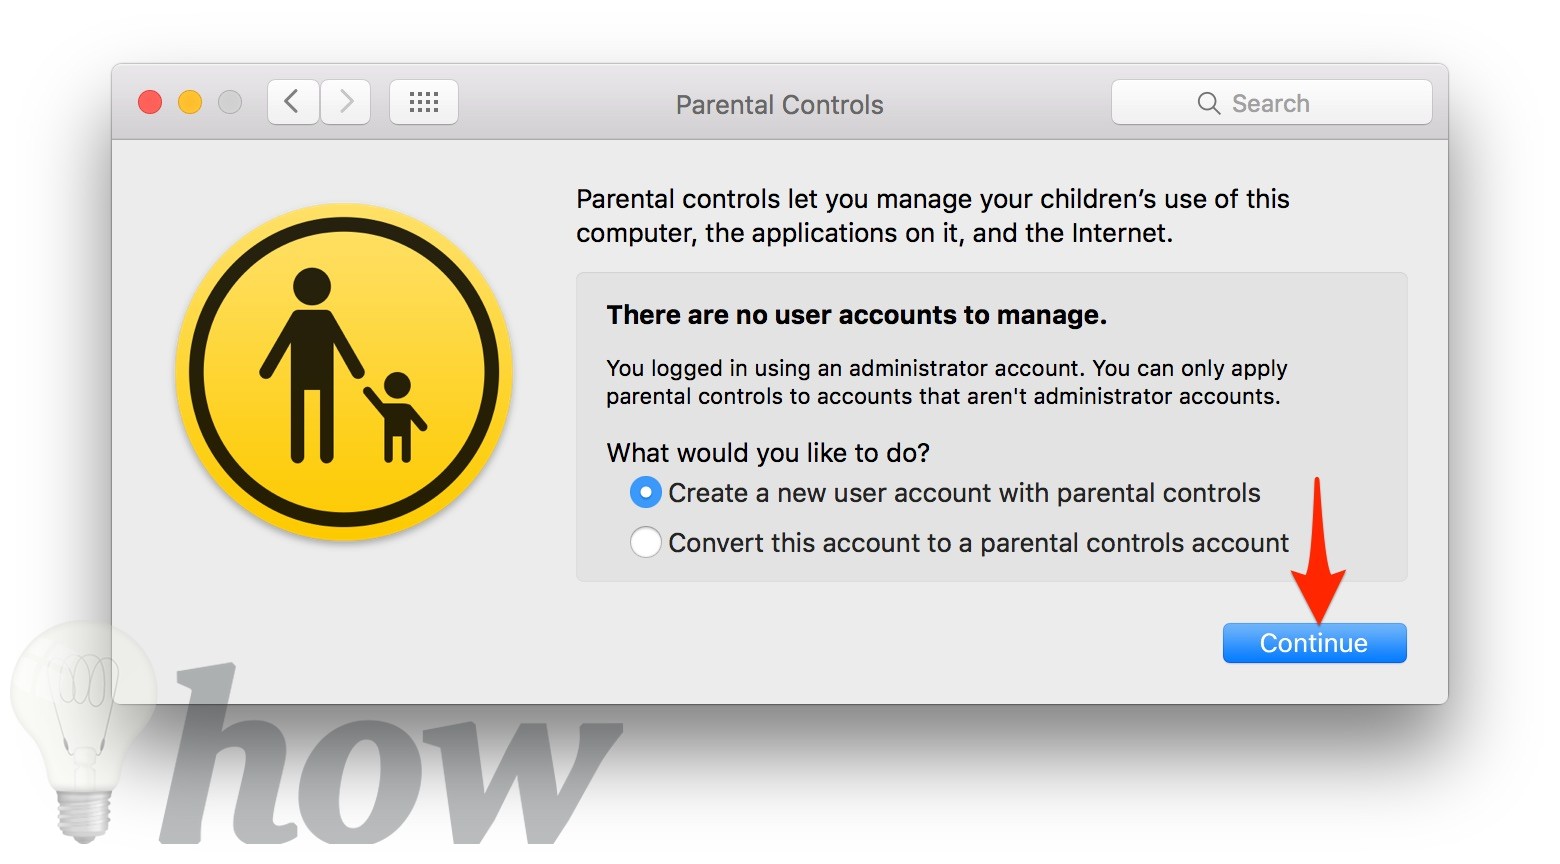
Step 5: Select the Lock icon. You will undoubtedly be asked to type in your Mac password. Click on Unlock. Select Create a new user account with parental controls >> Click Continue.
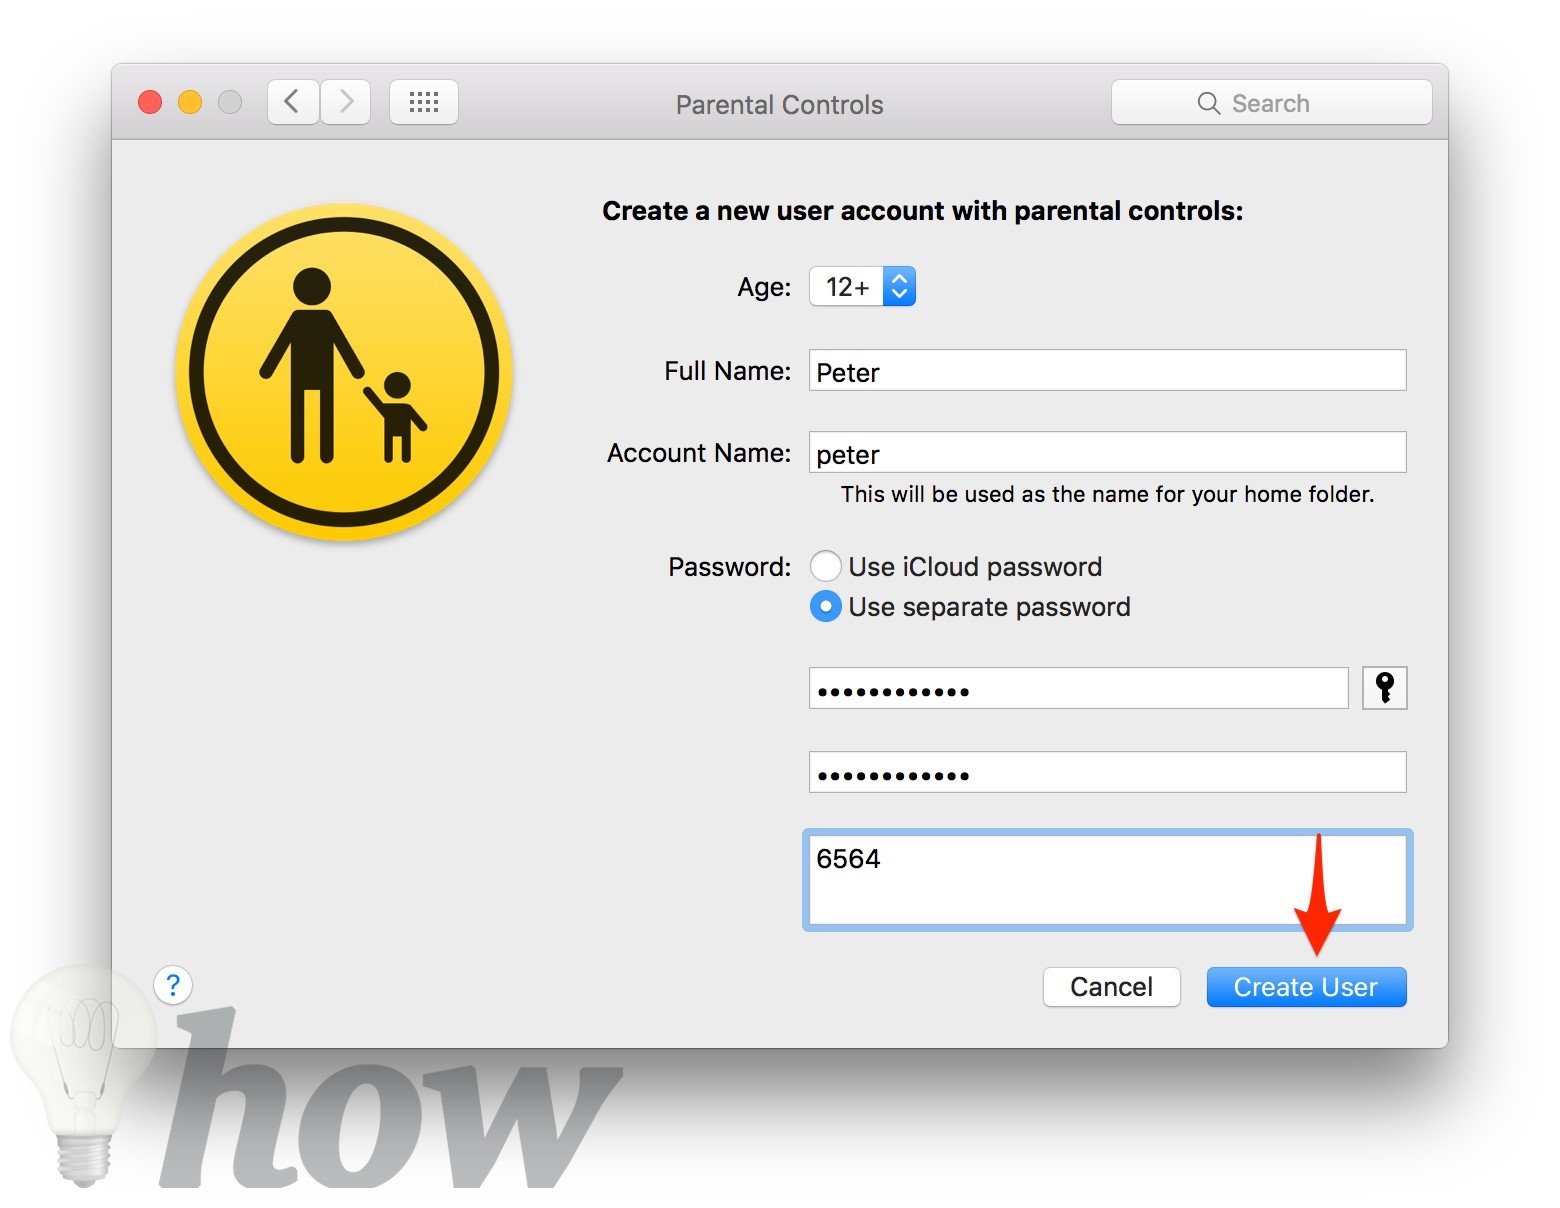
Then, fill out the user’s age, full name, and account name, make a password and a password hint (if needed), and click “Create User.”
Step 6: Then select the User account that you need to lock. MacOS provides you with controls under five categories: Apps, The Web, People, Time Limits, and Others.
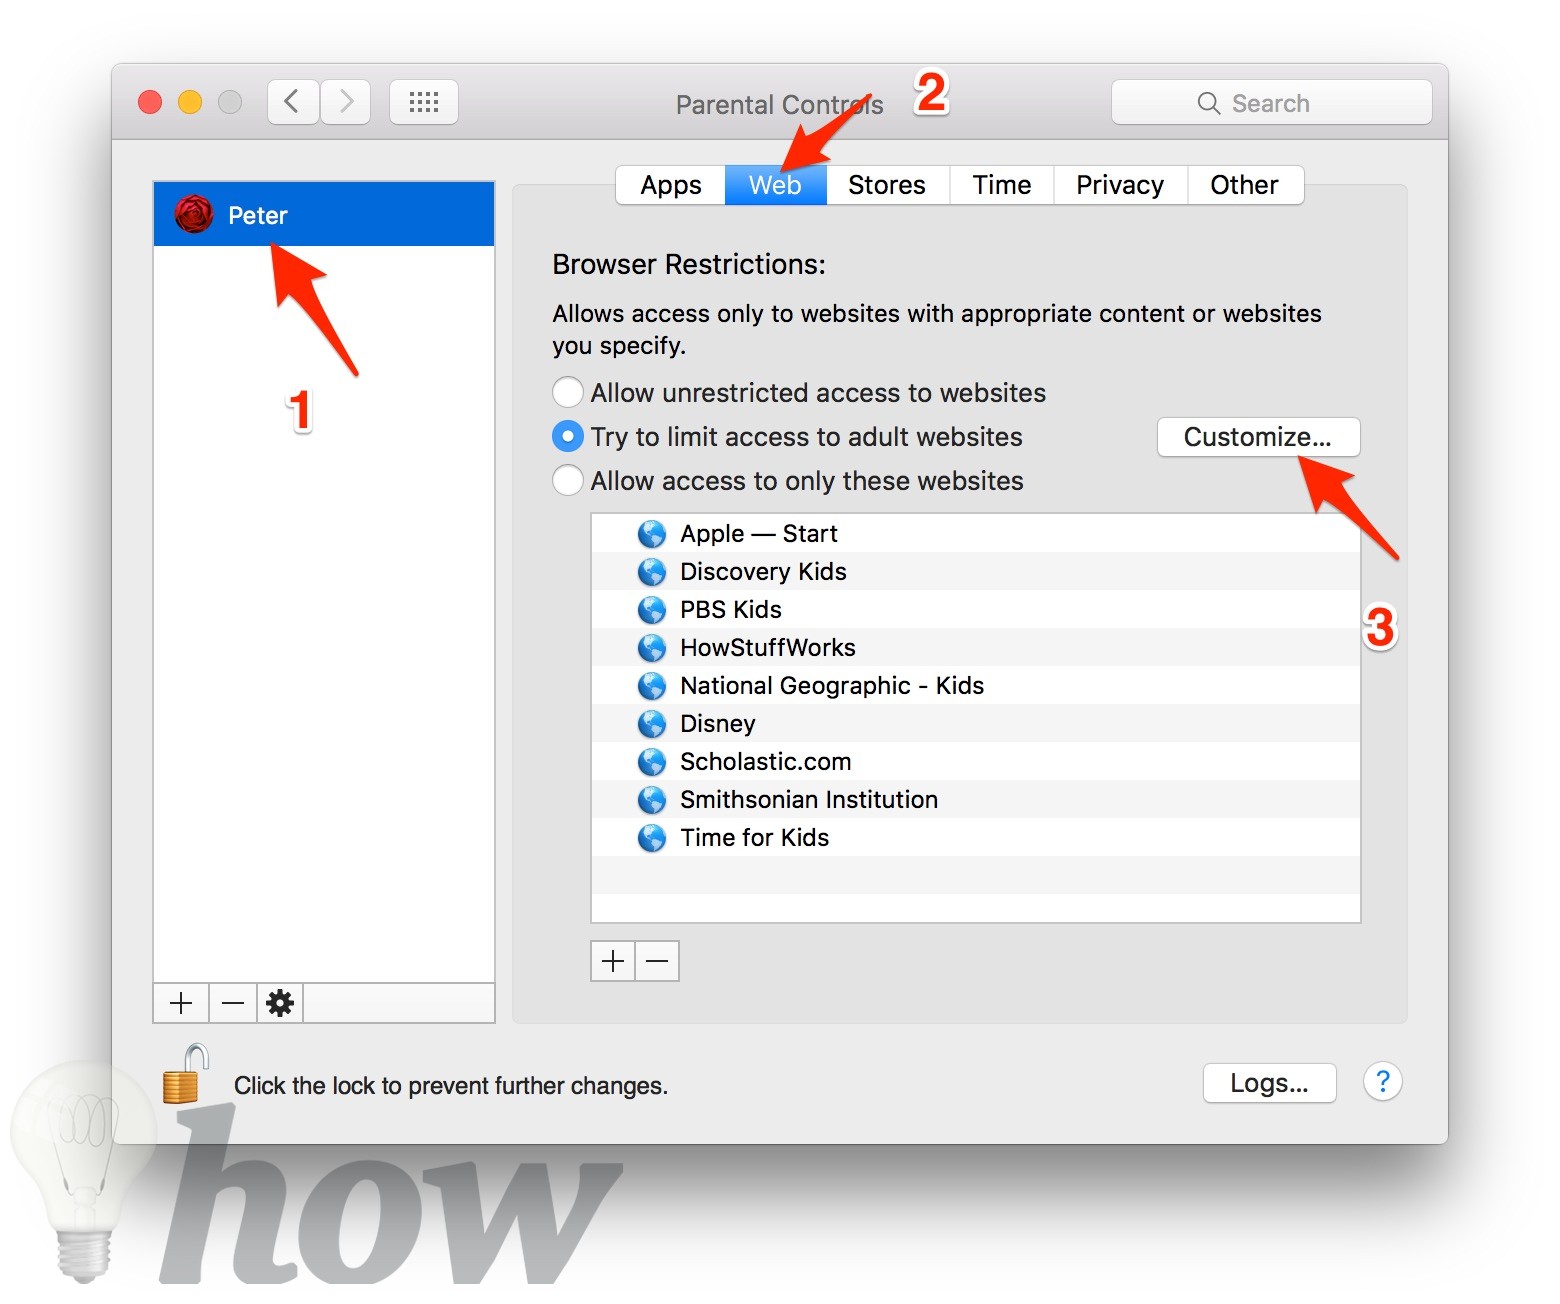
Step 7: Choose the Web tab, select Try to limit adult websites automatically, and click the Customize… button.
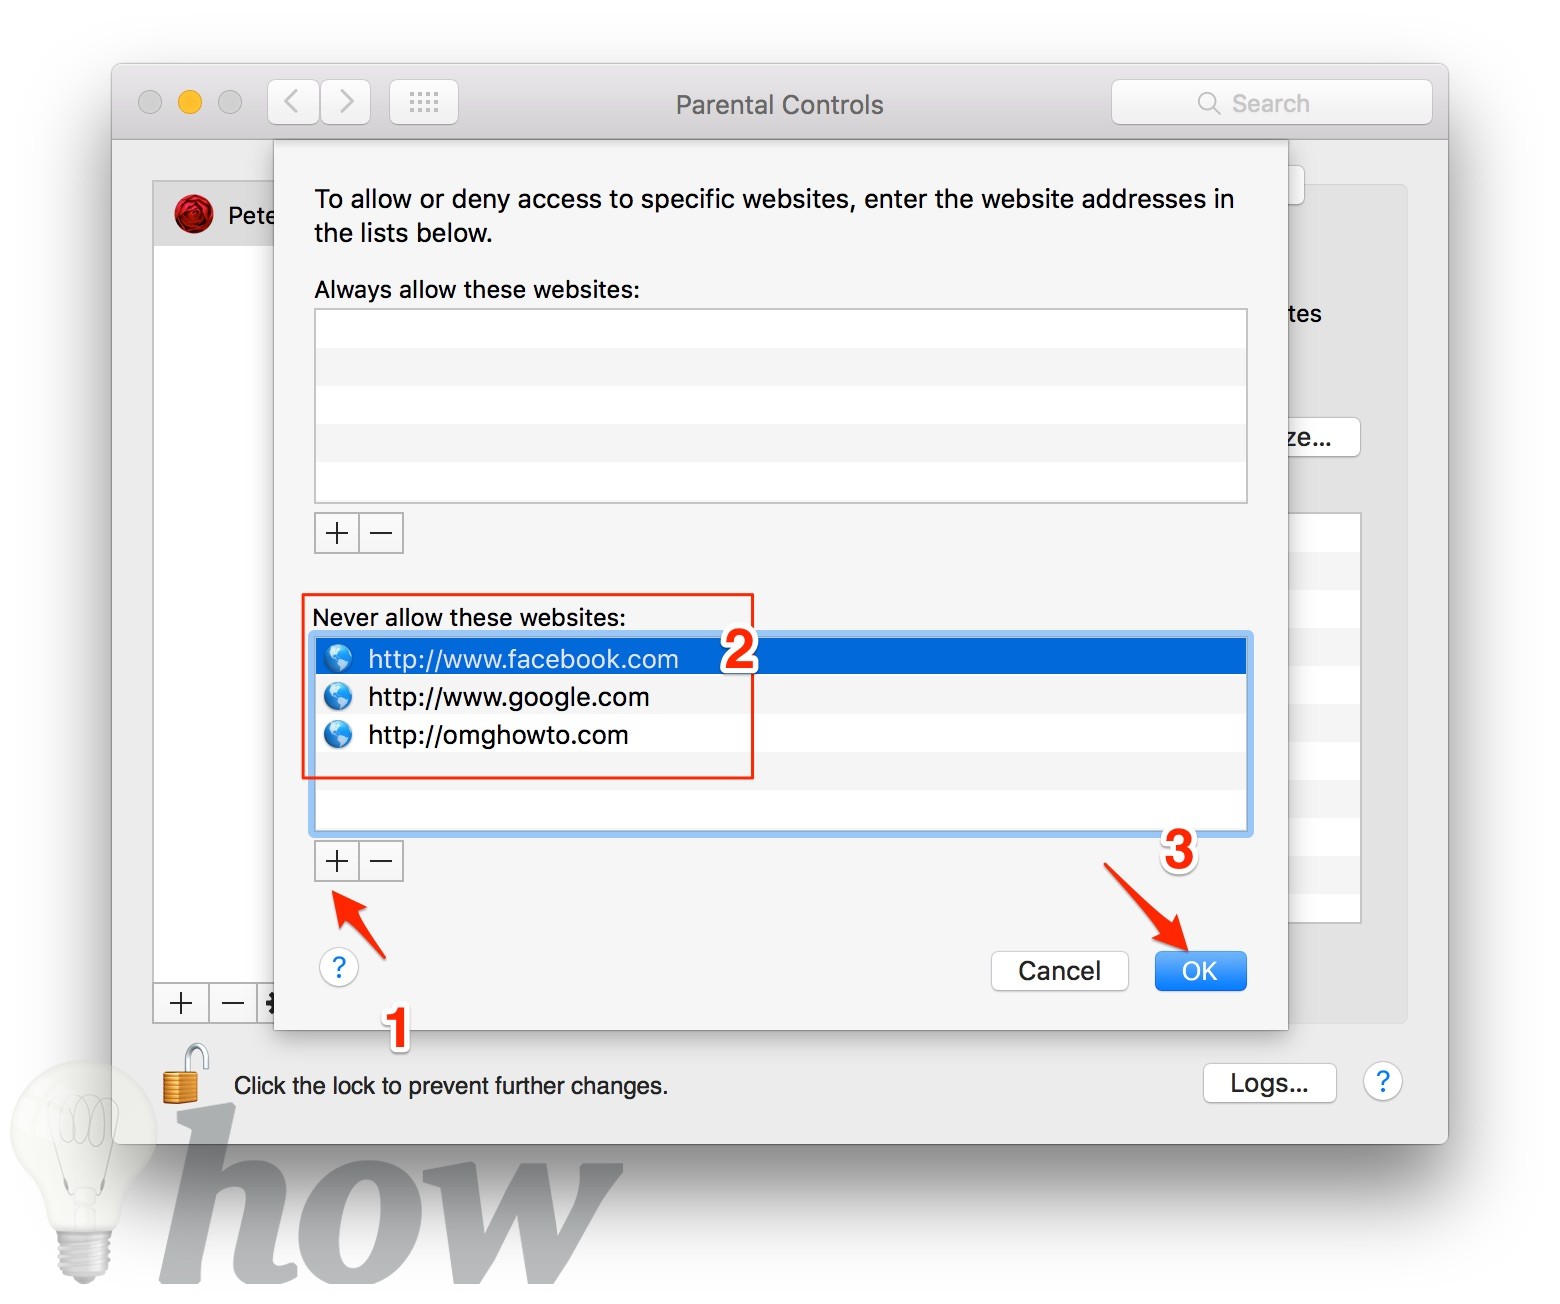
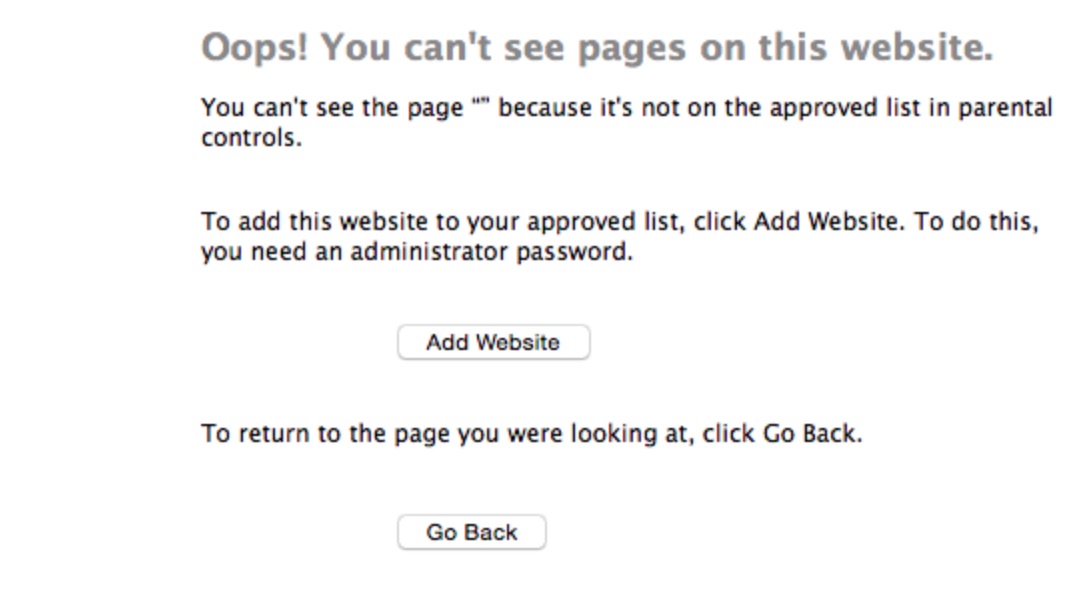
Step 8: Under Never Allow these websites, select the “+” button and type the URLs and Websites that you need to block. Now, if a kid user has access to sites you have prevented, they’ll receive a notification such as this.
Using SelfControl app
SelfControl is a free and open-source app for macOS that allows you to to block your own access to sidetracking sites, your webmail, or something else on the web. It enables you to secure a specific website or websites for a particular time.
When you need to focus on a project for three or four hours without being able to use Facebook or Twitter, you can easily set the timer for three or four hours to block the sites. It will only be unblocked when the time limit expires. If this seems like it’ll be significant to you, keep reading!

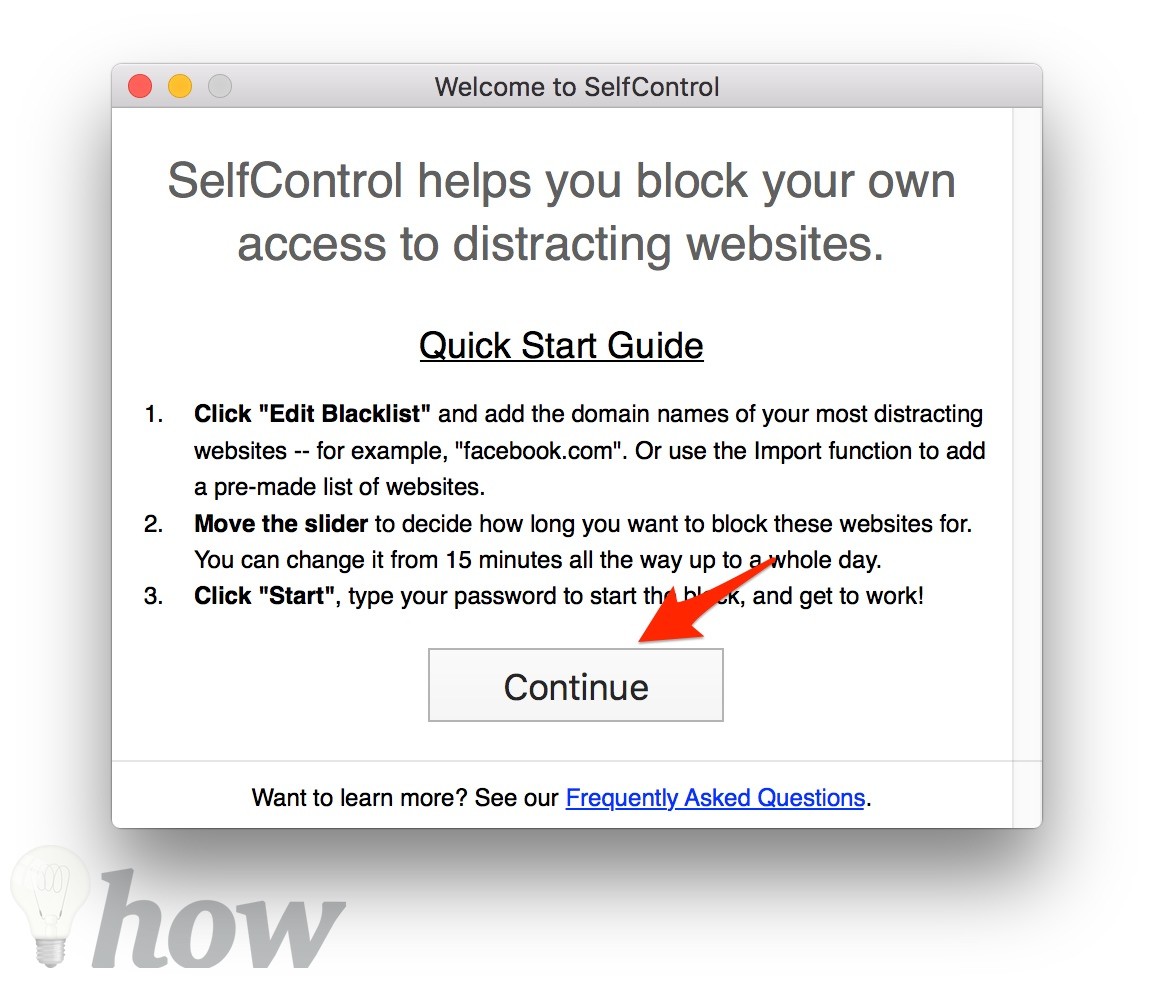
Step 1: Download and open the SelfControl app from here.
Step 2: Click on the Edit Blacklist button.
Step 3: Click the (+) button to add the site you want to block on Mac.
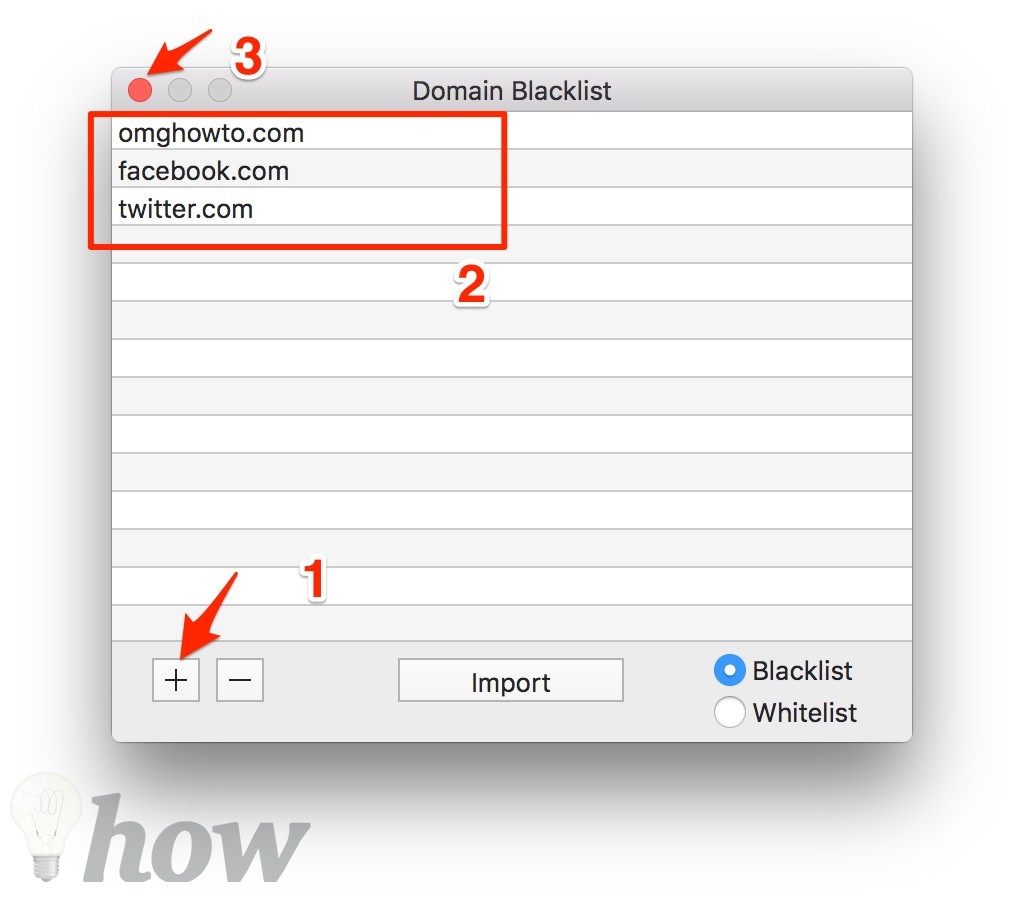
Step 4: Your blocklist window may look like the image above. Then, close the blocklist window now, and drag the slider in the main window to set the time you want the sites to be blocked for a min of 15 minutes and a max of 24 hours. Click on the Start button.


I also used the first method and would like to know how to undo the commands
There is no way to undo the commands, however you can save it first and edit it correctly then.
Hey! I did try the first way and it worked! Although now I need to unblock it and I am unable to do so…I would appreciate a step-by-step process on how to unblock the sites. Thank you!
You’re welcome 🙂