Once you sign up for an internet connection for your residential or commercial use, the Internet Service Provider takes care of setting up all the network configurations. Such setup encompasses DNS addresses that facilitate accessing and surfing top-choice websites, using online services like Google Docs for remote work, and retrieving files from platforms such as Dropbox.
If you are experiencing slow internet speed or difficulty connecting to websites, it is possible that your DNS server may be the problem. This article will explain how to change your DNS server on Windows 11 and why it’s essential.
What is a DNS Server?
A DNS Server is a critical part of the Internet. It translates domain names into IP addresses so that you can connect to websites and online content. A bad or down DNS server means your connection will be slow, interrupted, or not work. There are many ways to find and solve the problem, but one is by changing your DNS setting.
Changing your DNS will help prevent issues with slow Internet or connections dropping altogether. If you are on Windows 11 and having problems with your internet connection, this article will show you how to change the DNS settings for faster connections.
How to Change DNS Settings on Windows 11
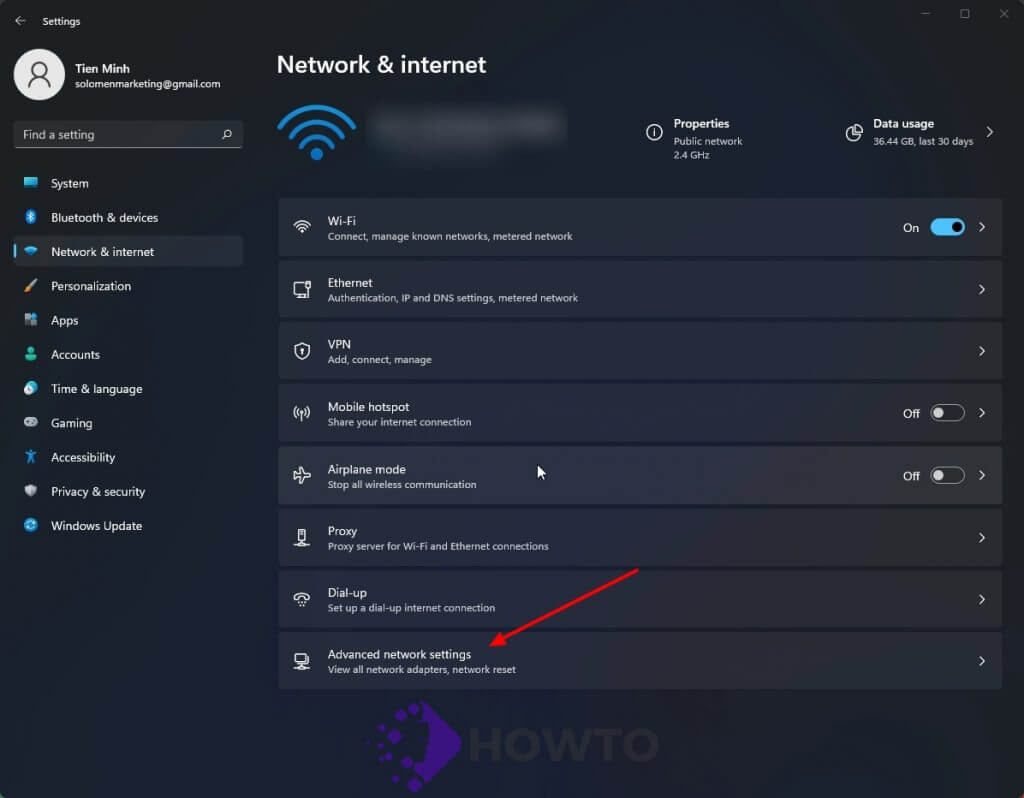
First of all, open the Windows Settings app by pressing your keyboard’s Windows + I key at the same time. From the Settings, select “Network & Internet” from the left side.
You need to click on the “Advanced Network Settings” option to see it.
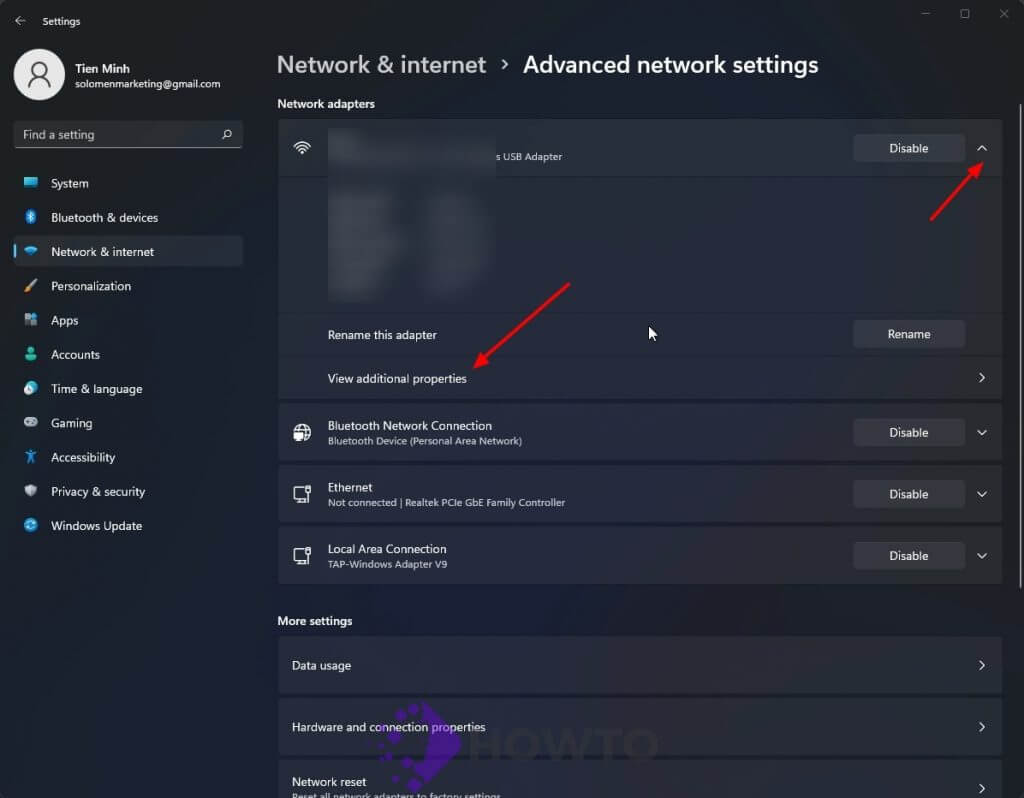
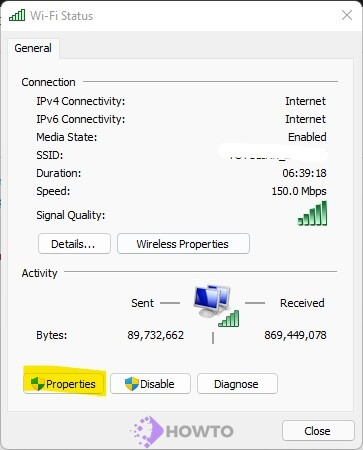
When using the Internet over WiFi, click on your WiFi adapter. If you have a LAN connection, choose Ethernet instead. Click the “View Additional Properties” from the expanded view of your network adapter to get more information about its configuration and statistics.
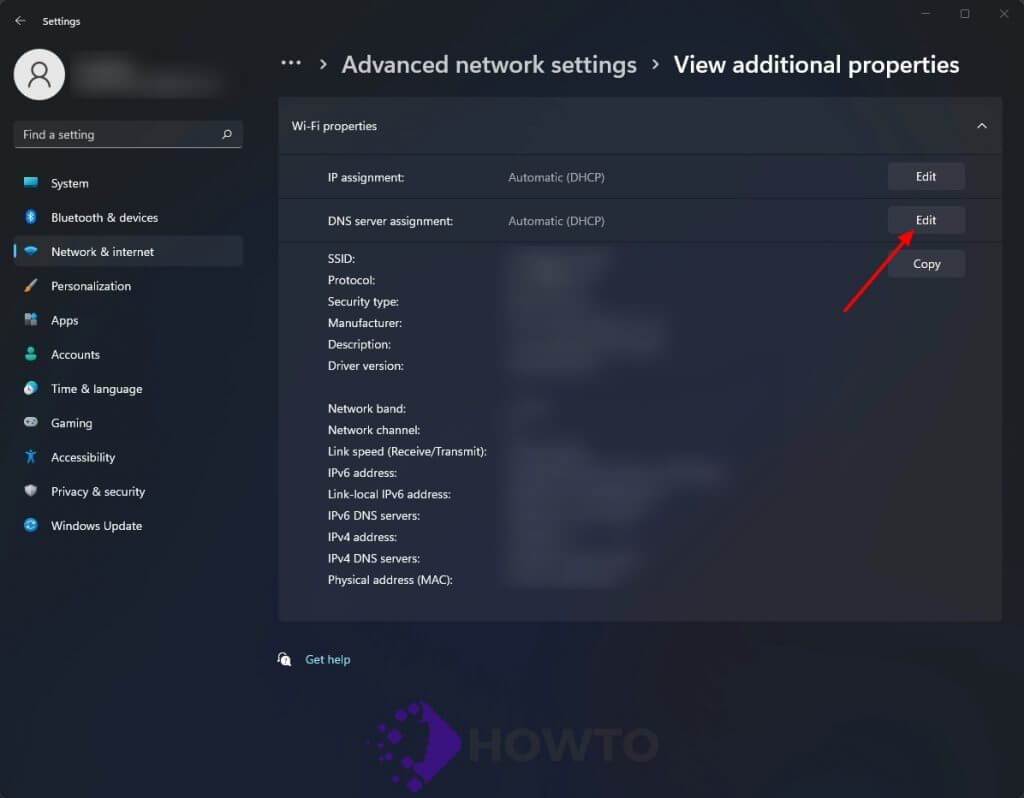
A new window appears. Click the Edit button from DNS Server Assignment.
Now enter your Preferred DNS and Alternate DNS like the image below.
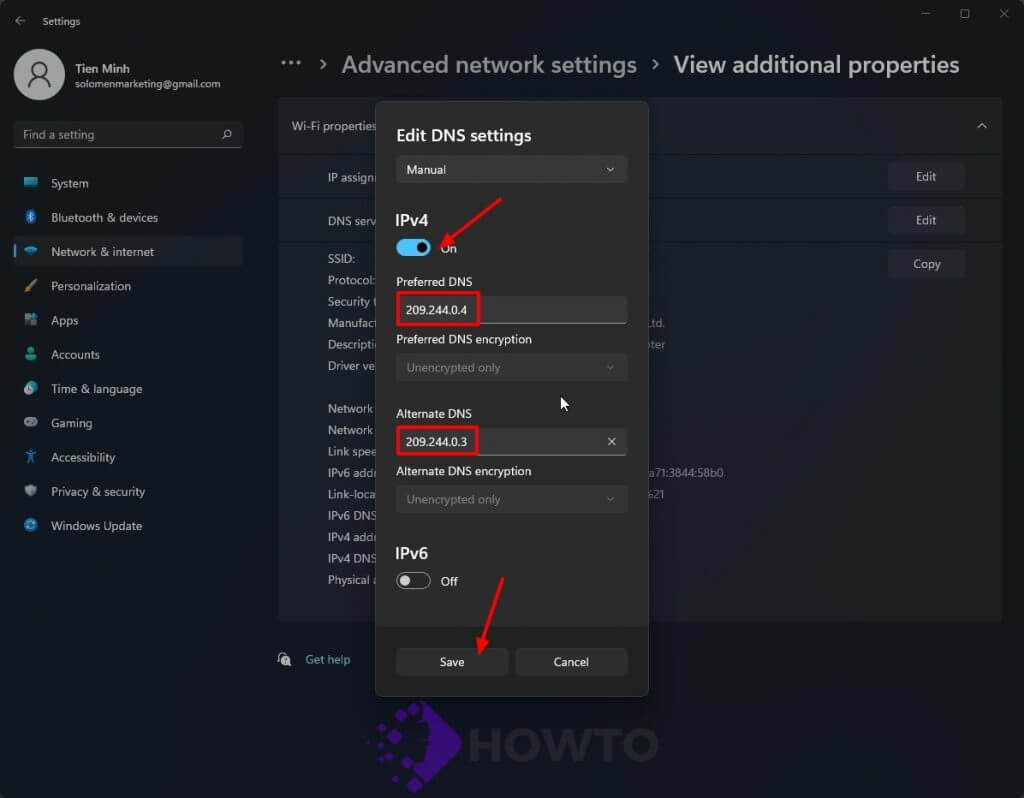
Click on the Save button to save your changes.
How to change the DNS server from the Control Panel
If you prefer the Control Panel over Settings, this guide is for you!
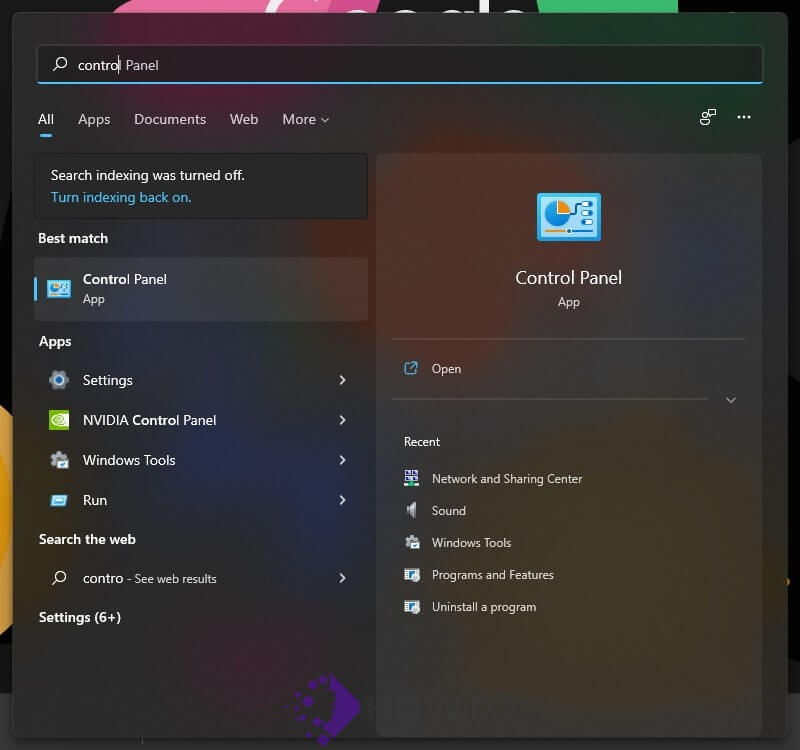
Step 1: Open the Control Panel by entering “control” from the Search on Taskbar.
Step 2: Go to Network and Internet.
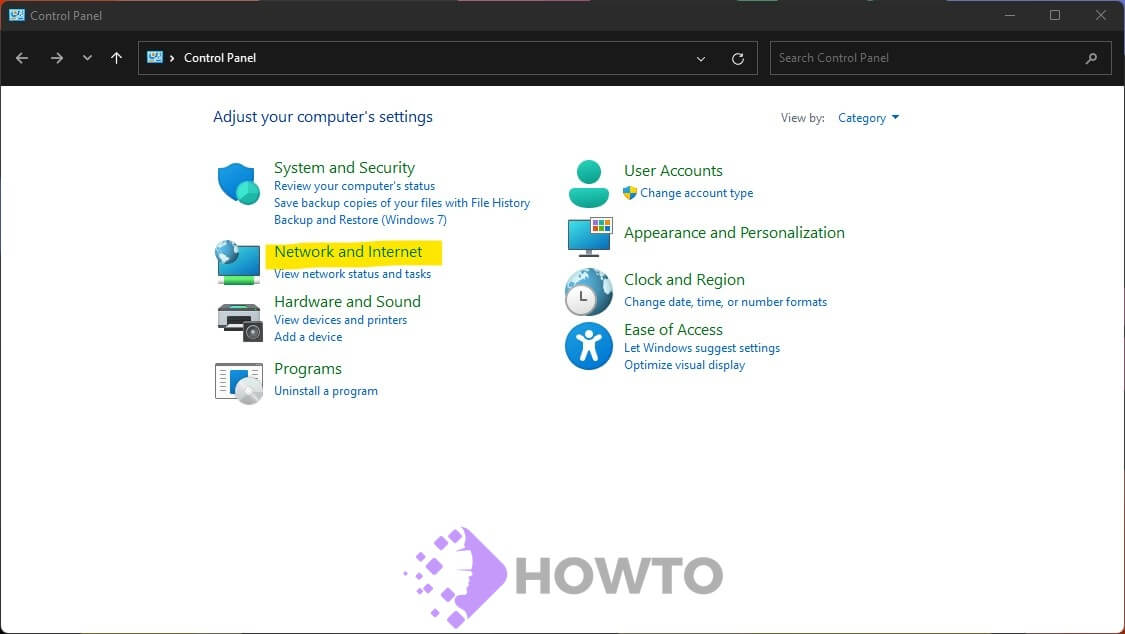
Then select Network and Sharing Center.
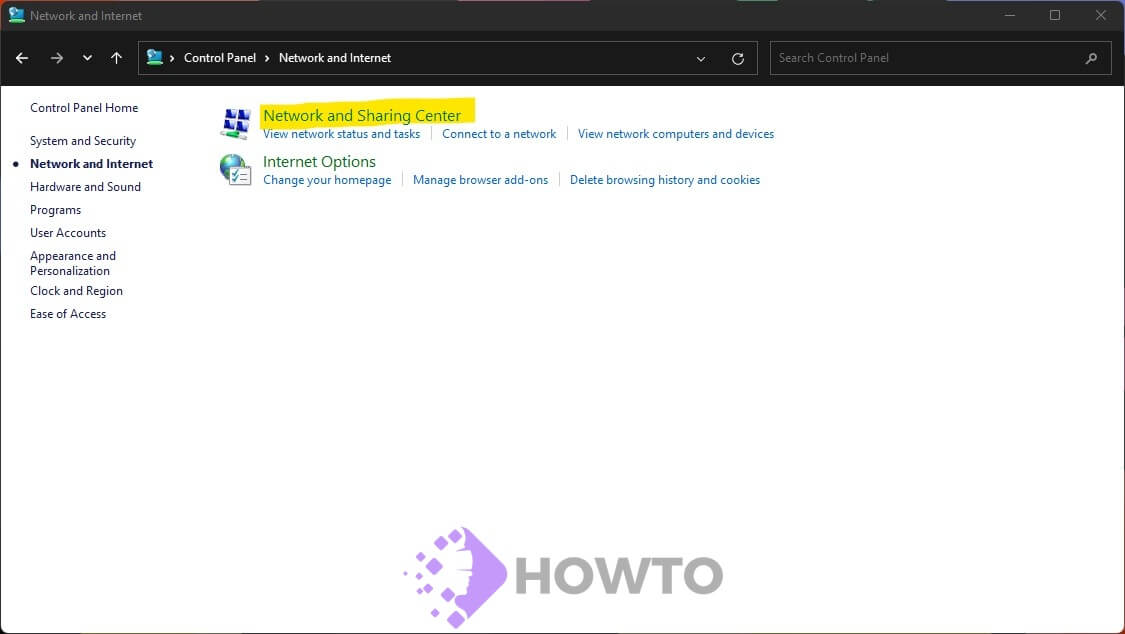
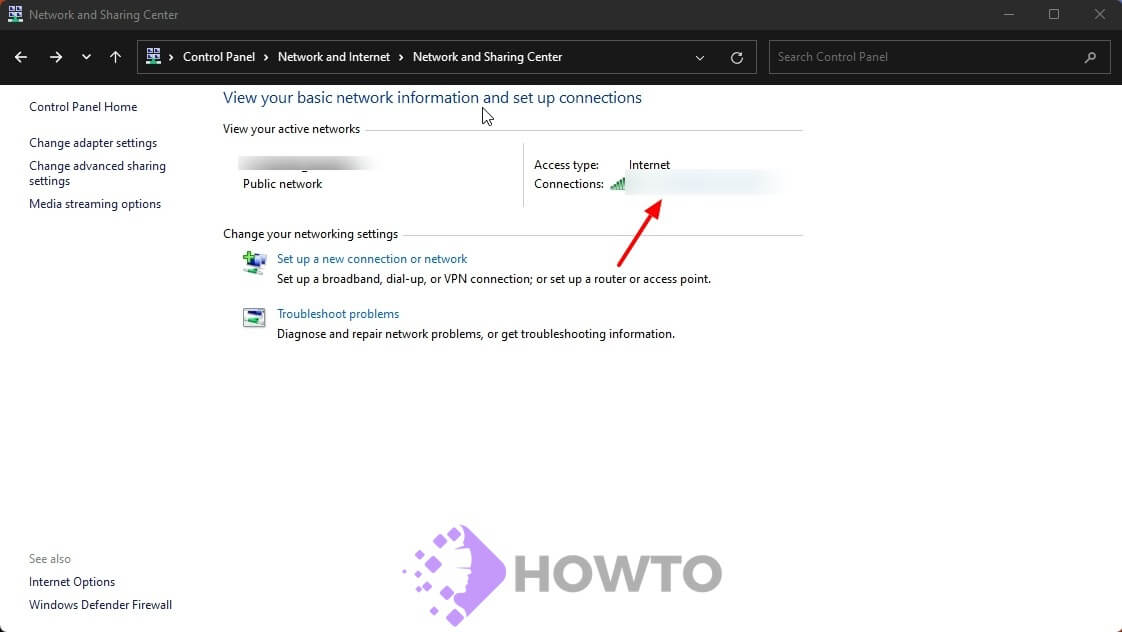
Step 3: Select Change adapter settings from the left side of the window.
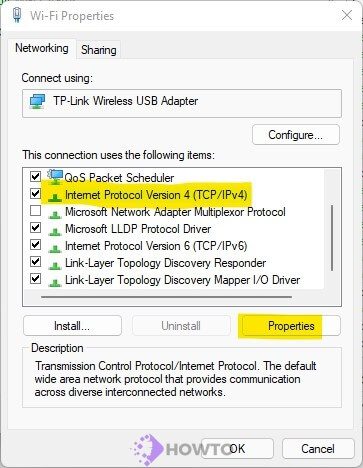
Step 4: Click on your Internet connection and select Properties.
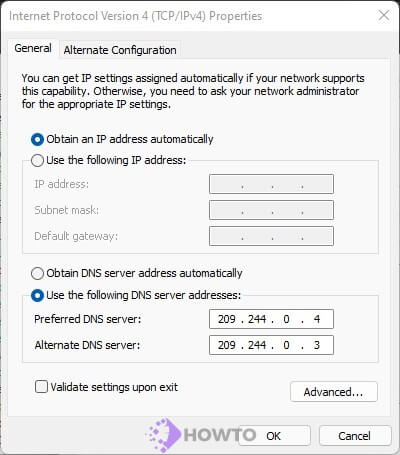
Check on Internet Protocol Version 4 (TCP/IPv4) >> Properties.
Enter your DNS server and click OK to save all settings.
How to choose the best DNS server
Your DNS server setting is set to Automatic (DHCP) by default. This means that your internet service provider chooses which DNS you use when accessing the Internet. There are many reasons why you should avoid this. You know how to change the DNS server on Windows 11, but which fastest DNS should you use?
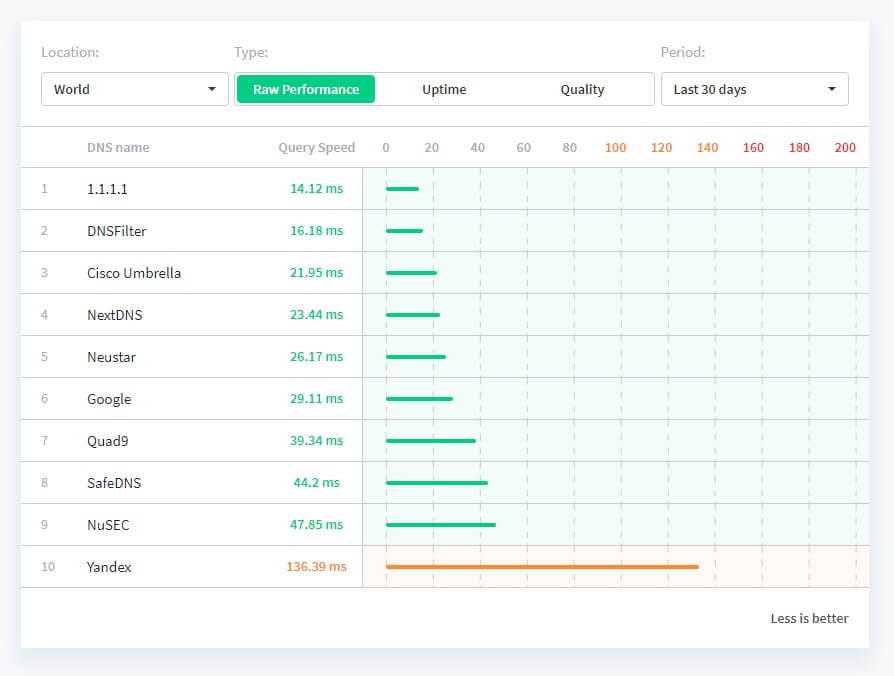
Using The Best Public DNS Benchmark
You may be wondering which DNS server to use, so here is a list of popular and reliable ones you can choose from.
| PUBLIC DNS SERVER | BEST FOR | DNS 1 | DNS 2 |
|---|---|---|---|
| Google Public DNS | Speed | 8.8.8.8 | 8.8.4.4 |
| Cloudflare DNS | Security | 1.1.1.1 | 1.0.0.1 |
| Neustar DNS | Security | 64.6.64.6 | 64.6.65.6 |
| Quad9 DNS (IPv4) | Security | 9.9.9.9 | 149.112.112.112 |
| Cisco Umbrella (IPv4) | Security | 208.67. 222.222 | 208.67. 220.220 |
| Cisco Umbrella (IPv6) | Security | 2620:119:35::35 | 2620:119:53::53 |
| OpenDNS | Security | 208.67.222.222 | 208.67.220.220 |
| OpenDNS FamilyShield | Content Blocking | 208.67.222.123 | 208.67.220.123 |
Using Third-Party Software
To find the fastest DNS servers, you can use a third-party app and run it. Your server’s speed depends on many factors relative to where you live and your connection.
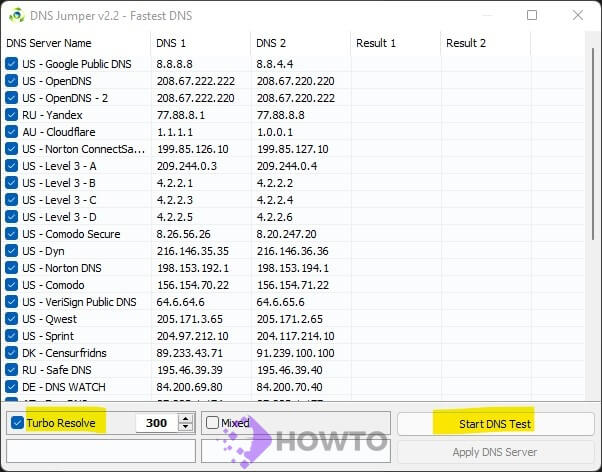
DNS Jumper is a free DNS changing tool that will help you find the fastest DNS server in your area. It’s straightforward to use and set up. It’s like speed testing for DNS servers. So give it a try and see if it helps!
Step 1: Download and Install the DNS Jumper 2.0 from Sordum.org
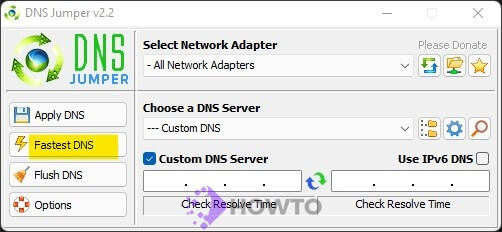
Step 2: Open DNSJumper.exe and click on Fastest DNS.
Check on Enable Turbo Resolve and click Start DNS Test now.
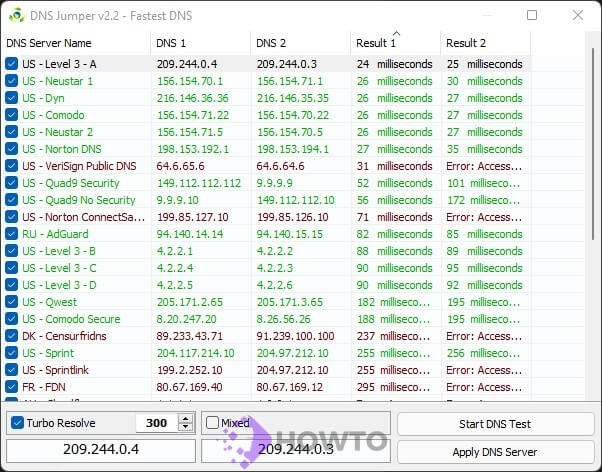
After the test is complete, you will see a list of all DNS servers that have been tested. The fastest one will be at the top, or you can click on Result 1 or Result 2 to see the best ones.
Step 3: Select Apply DNS Server to save this setting, or you can do it manually by following the steps above.
How do you show your current DNS server?
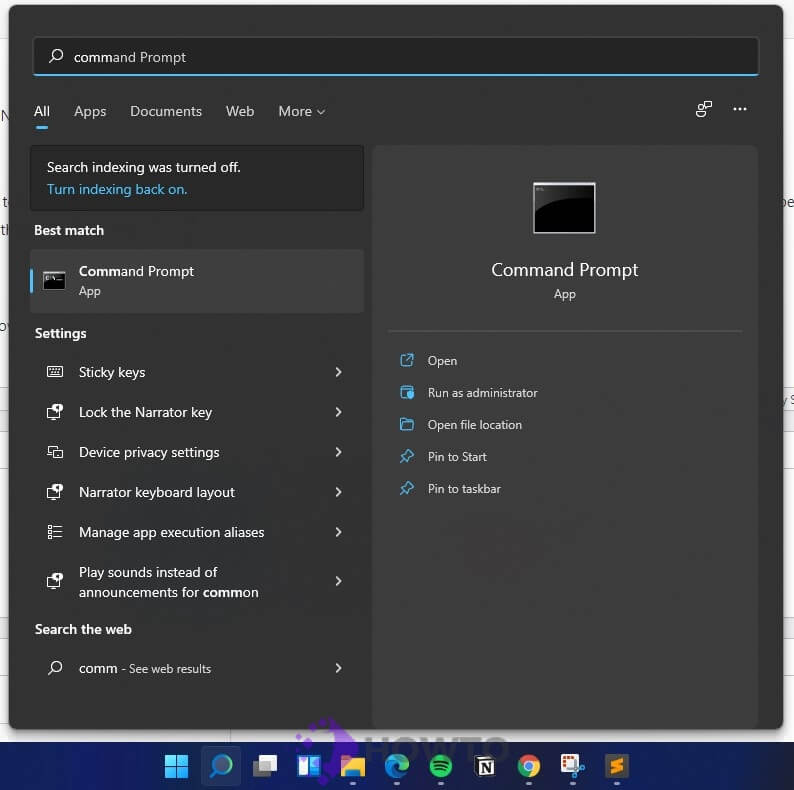
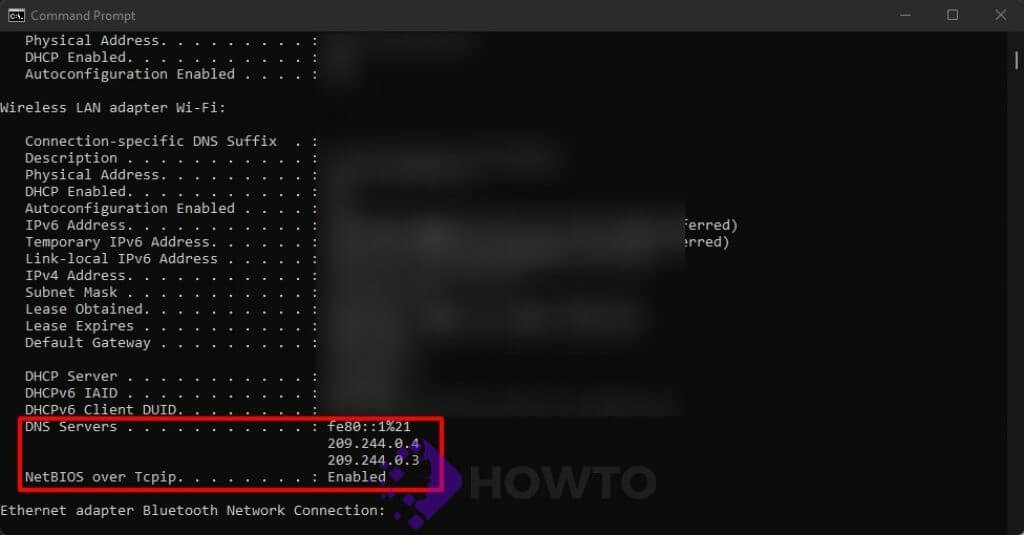
If you want to know your DNS server, you can pen CMD by typing “cmd” from the search. Enter the command to the Command Prompt.
ipconfig /all
Here is my current DNS server.
Conclusion

This post was helpful. Leave your comment below and let us know if you have any questions about DNS settings or anything related to Windows 11!