Windows 11, the latest version of Windows, has some great new features. One of those features is a complete redesign for those who use touch screens, as well as other accessibility improvements for those with disabilities.
The WiFi password is used for all the devices that need Internet access. It enables users to connect their PCs with other devices and share network connectivity. However, it can be challenging to remember a long series of numbers and characters if you want to view/share your password to someone.
Fortunately, there are five simple ways to find the WiFi password on Windows 11! To learn more about this process, follow our post for precise information.
From Settings App
Using the Settings app, you may view the password for the WiFi network you are presently connected to. To do so, follow these steps:
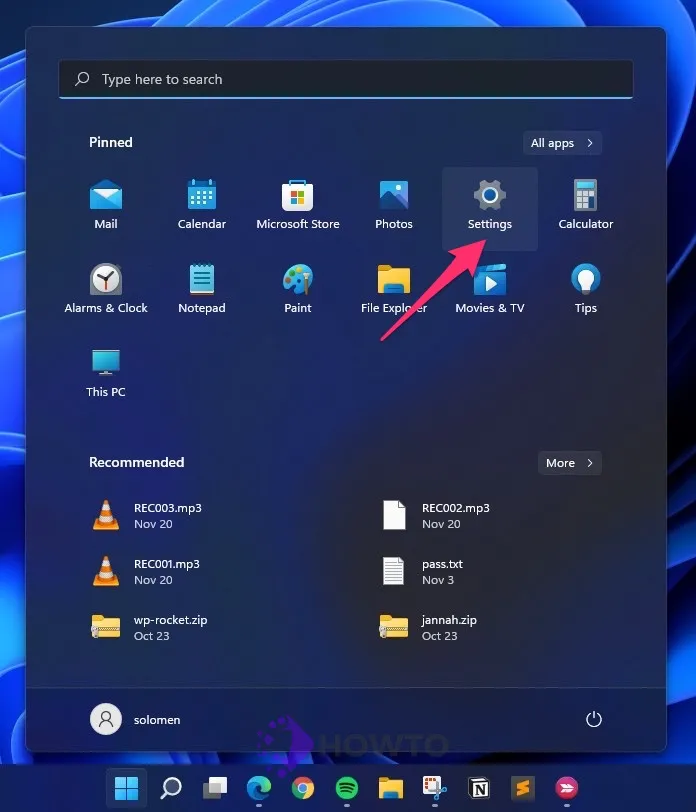
Step 1. First, open the Settings app by pressing Windows + I on your keyboard simultaneously. Select the Network & Internet category in the left sidebar of Windows Settings.
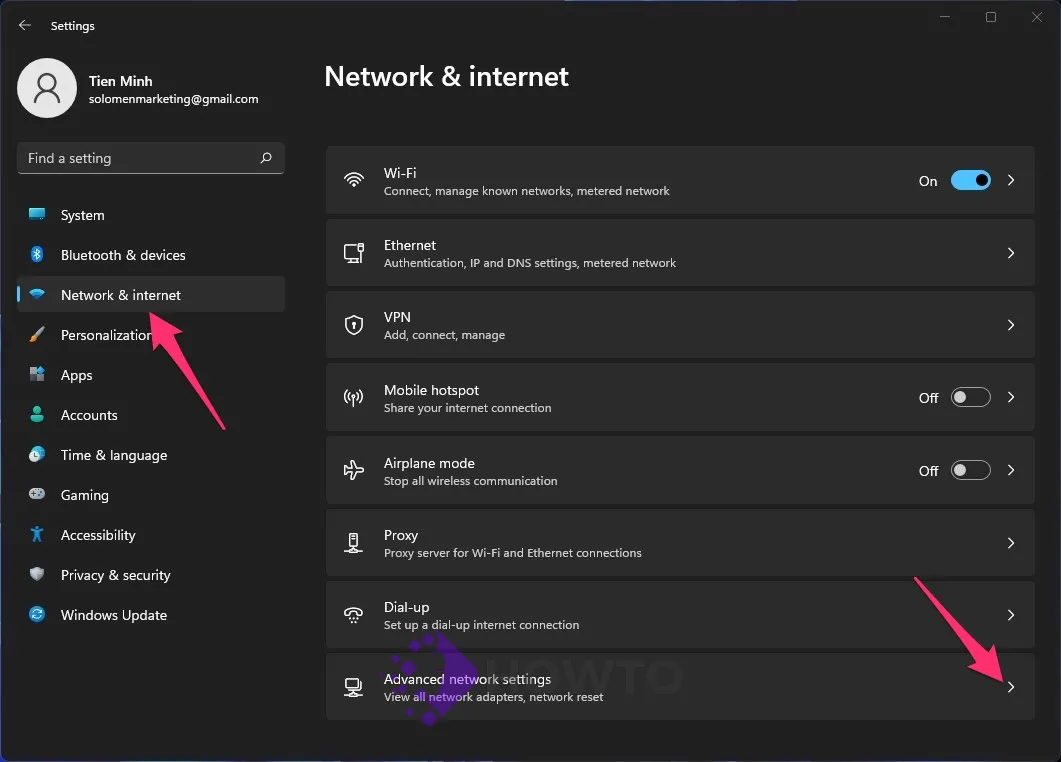
Step 2. Click Advanced network settings on the “Network & Internet” window.
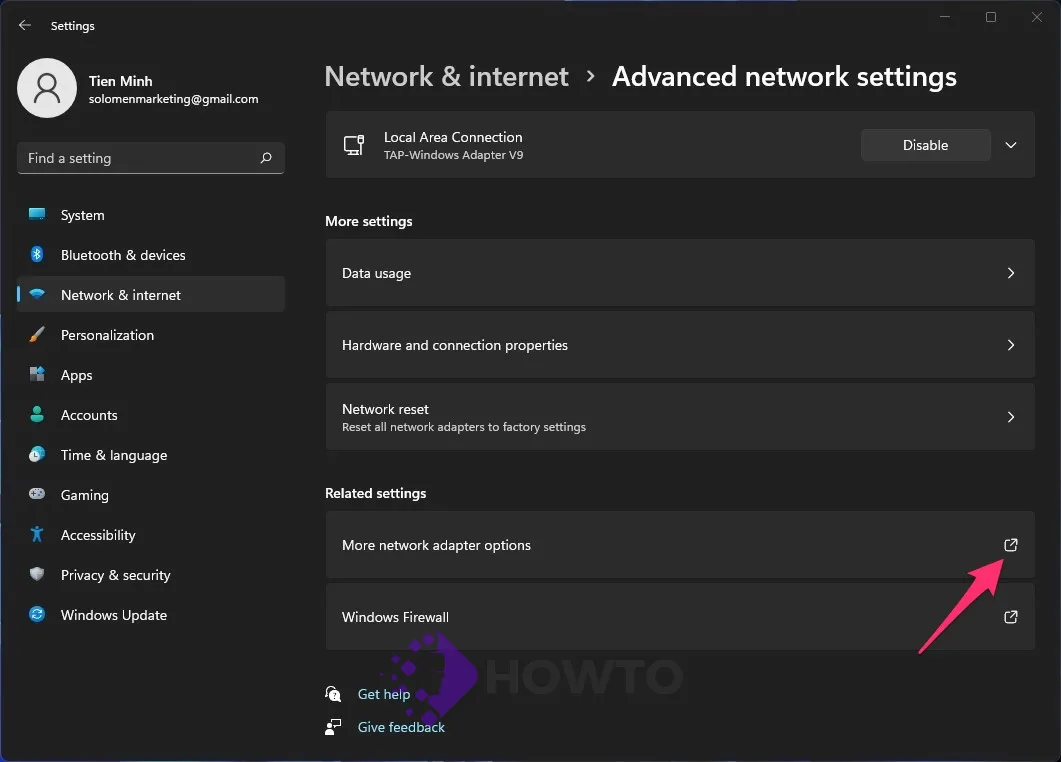
Step 3. Select More network adapter options under the “Related Settings” category.
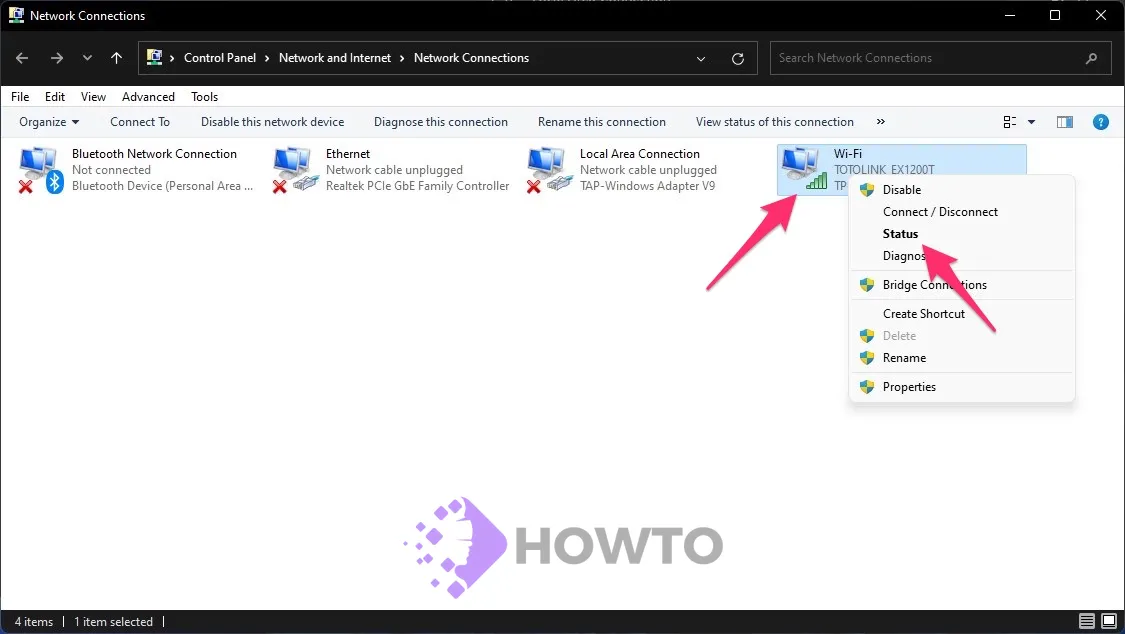
Step 4. Then, the “Network Connections” window appears. Right-click your wireless adapter and choose Status from the menu that pops up.
Click the Wireless Properties button in the “Status” window.
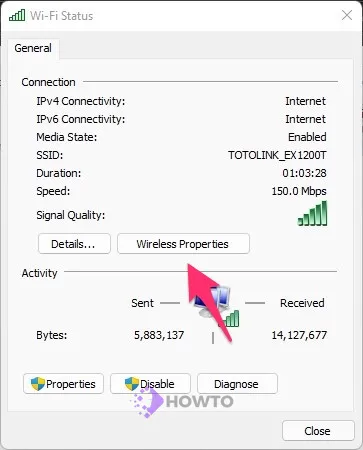
Step 5. Then, in the “Wireless Network Properties” window’s Security section, click Wireless Network Security.
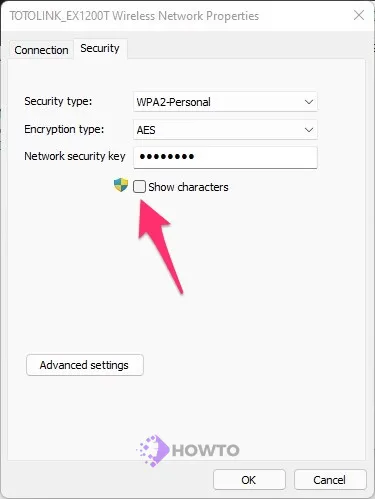
Step 6. Check the “Show characters” checkbox beneath the “Network security key” box.
That’s all there is to it. Your current connected WiFi network password will be displayed in the “Network security key” box immediately.
From Control Panel
Control Panel is a system utility that lets you manage your computer and Windows settings. For example, Control Panel offers tools for managing hardware devices, configuring network security, and accessing services such as the Windows Update tool.
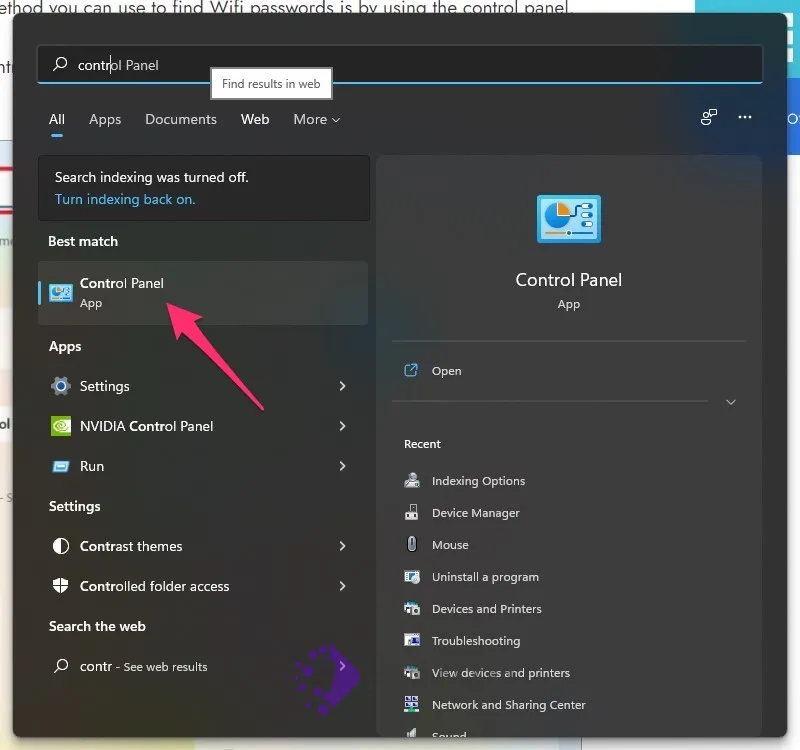
You can also try the same technique as you did previously to discover WiFi passwords if you use the control panel. To begin, open the Control Panel on Windows 11 by searching for “Control Panel” once you click the Start button.
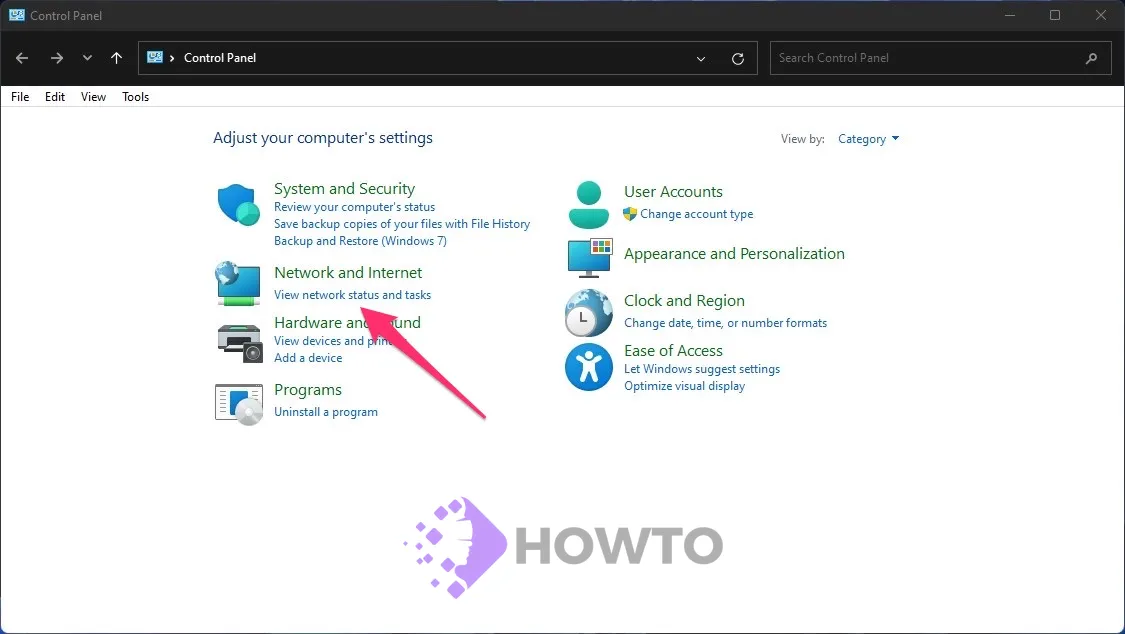
Click the ‘View network status and tasks’ link in the Control Panel under the Network and Internet category.
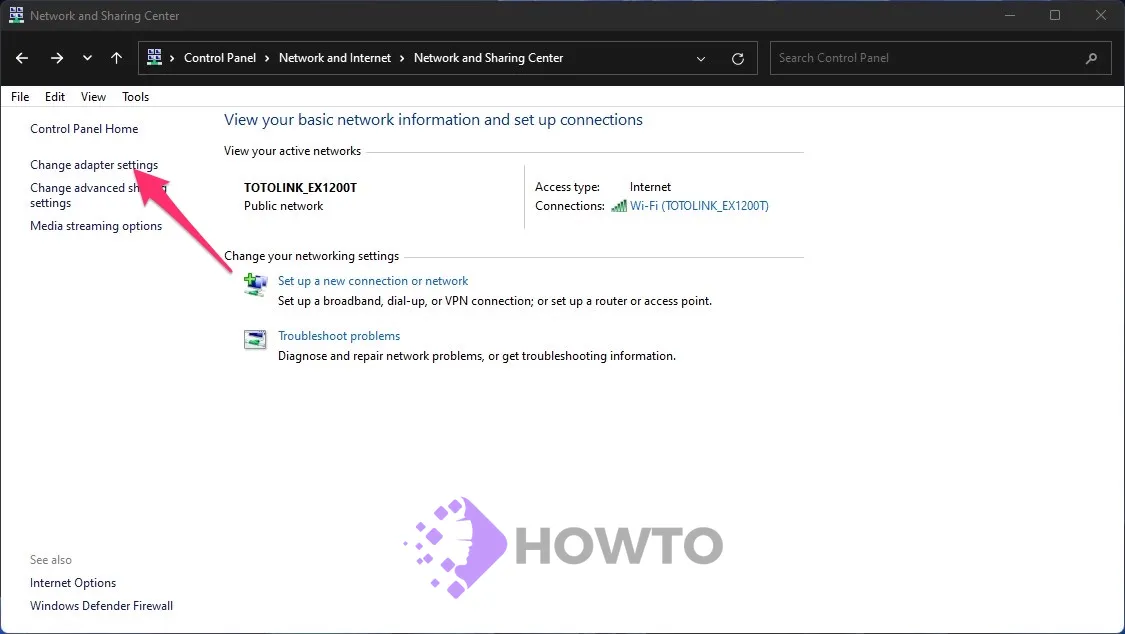
In the Network and Sharing Center, click Change adapter settings.
You can also access the Network Connections in the Control panel by typing the command below in the Run (Press Windows + R to open it) and clicking OK then.
ncpa.cpl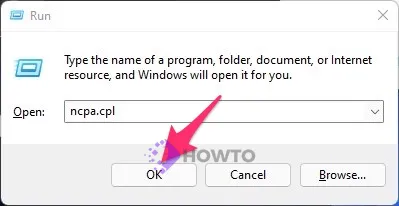
Right-click on your WiFi adapter in the Network Connections window, choose Status, or double-click on it.

Then, go to the Wireless Properties section in the WiFi Status window.

Select the “Security” tab and check the box near “Show characters” to display your WiFi password.

From Command Prompt
You can also check the password of the current network and any previous networks you have connected to by using a command prompt (CMD). To get started, follow these steps below:
Step 1. To begin, open a CMD with administrative privileges.
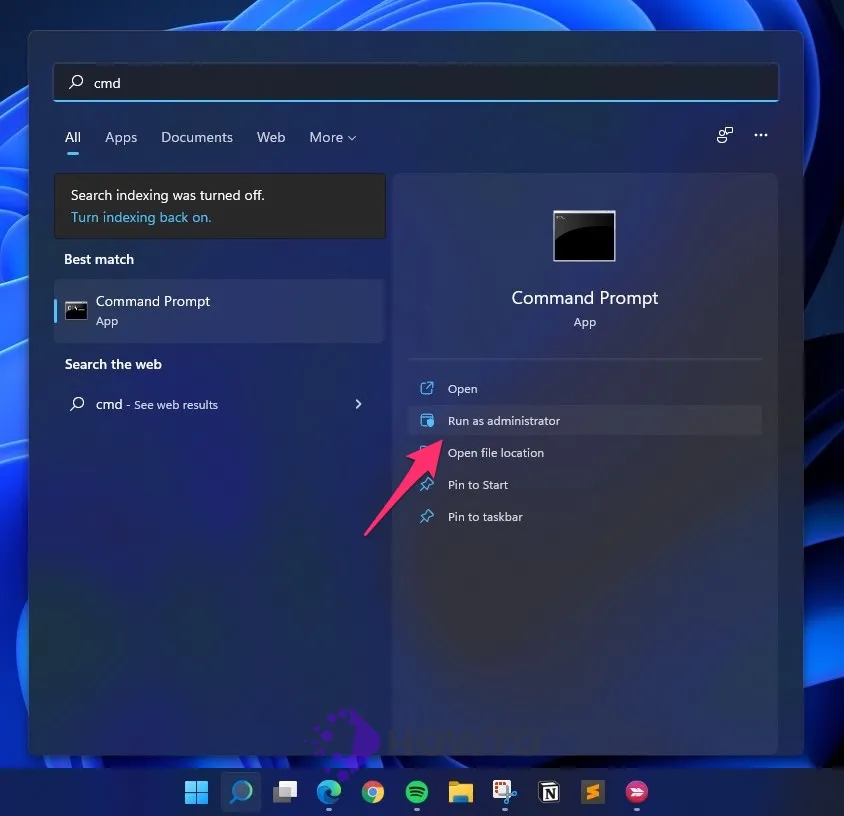
Step 2. Then, on the command line, type the following command and press Enter to display a list of saved WiFi networks on your PC.
netsh wlan show profiles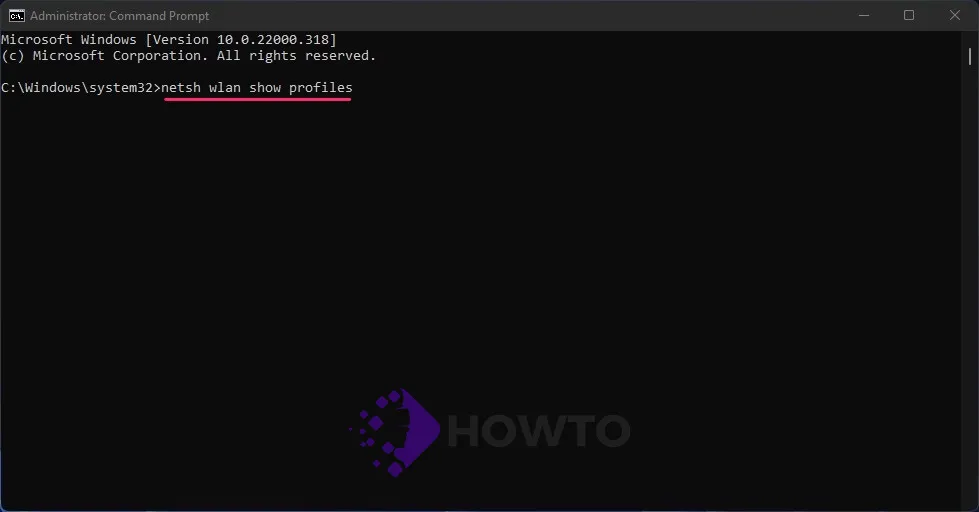
Step 3. Then, in the network list, look for the WiFi network for which you wish to obtain the password.
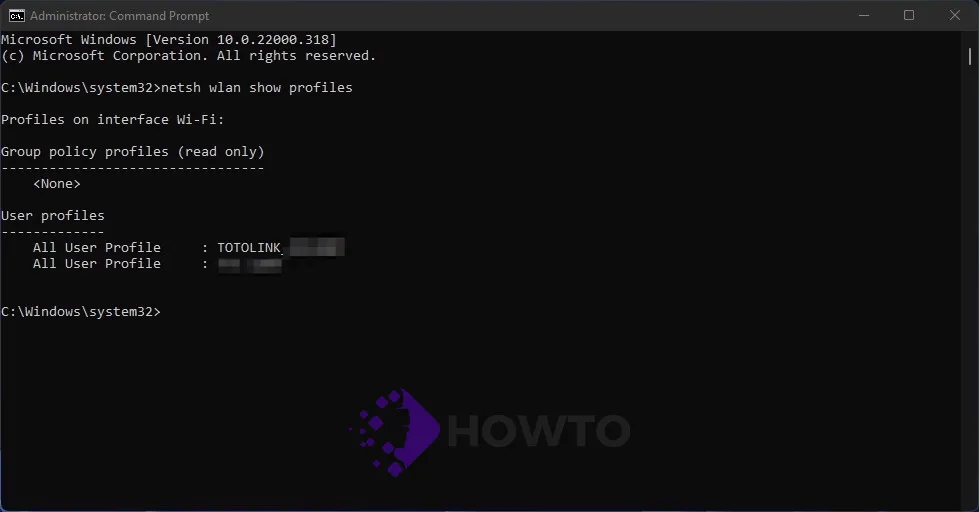
Copy or write down the network’s complete name. Then type the following command and press Enter:
netsh wlan show profile name="YOURWIFI" key=clear | find /I "Key Content"Note: Replace “YOURWIFI” (without quotes) with the complete WiFi network name you recorded in the previous step.
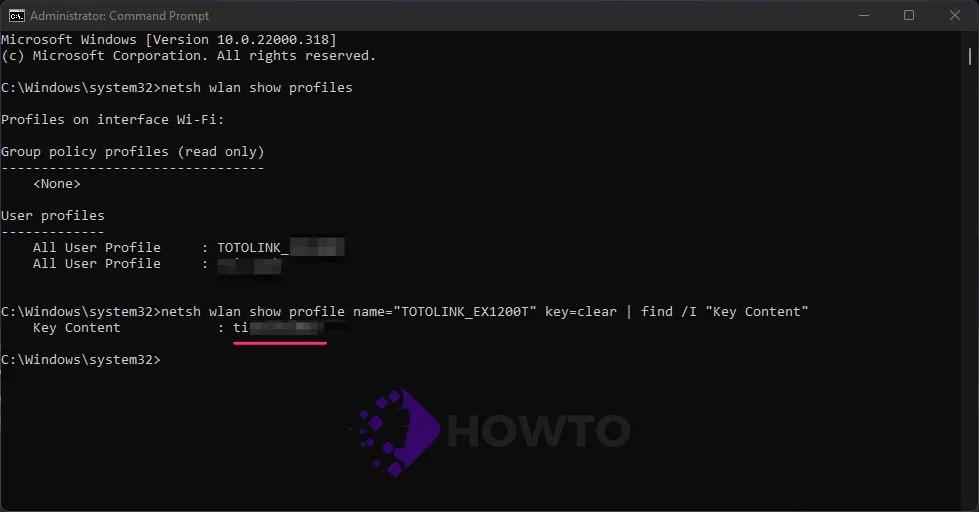
After you finish, the output will include your chosen WiFi network’s password next to “Key Content.”
From PowerShell
Powershell is an operating system shell designed for the Windows environment. Microsoft first introduced it on November 14, 2006, as an integrated task-based command line environment and scripting language with some similarities to Unix shells such as bash and DOS’s cmd.exe.
Yes, of course! You may use PowerShell to retrieve a list of all saved WiFi passwords on Windows 11. To do so, you must first start Windows PowerShell.
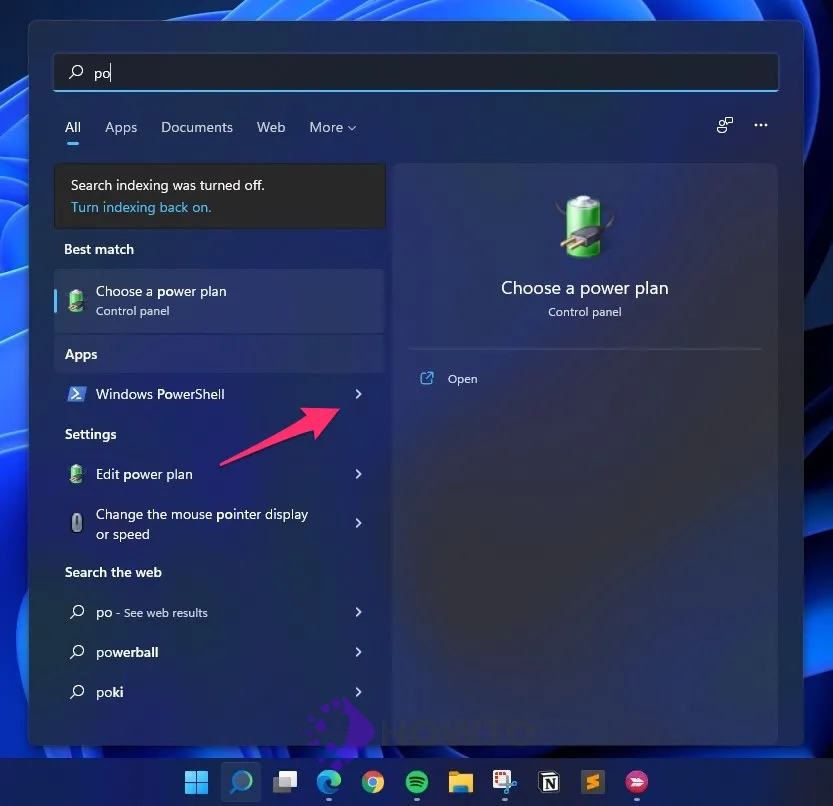
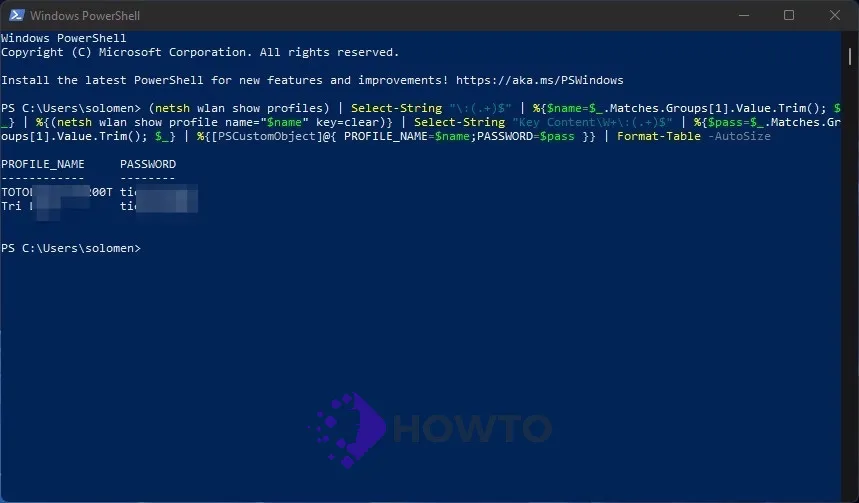
In the window, Copy and paste the following command, then hit the Enter button.
(netsh wlan show profiles) | Select-String "\:(.+)$" | %{$name=$_.Matches.Groups[1].Value.Trim(); $_} | %{(netsh wlan show profile name="$name" key=clear)} | Select-String "Key Content\W+\:(.+)$" | %{$pass=$_.Matches.Groups[1].Value.Trim(); $_} | %{[PSCustomObject]@{ PROFILE_NAME=$name;PASSWORD=$pass }} | Format-Table -AutoSize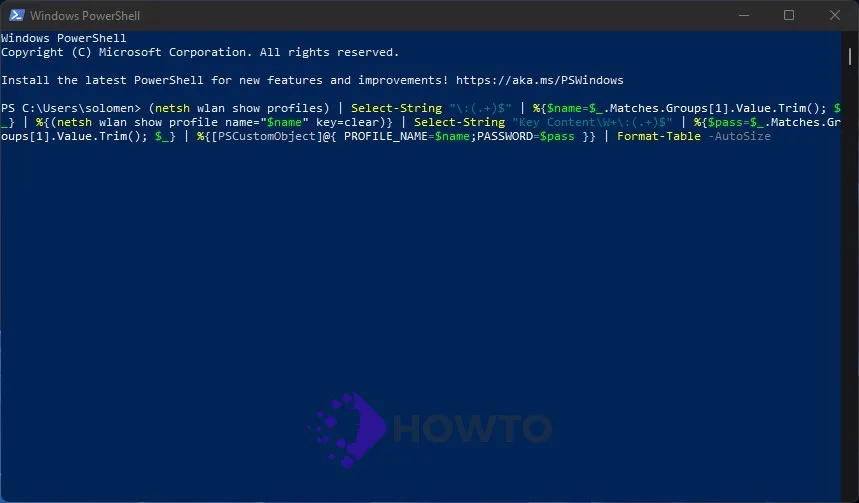
PowerShell now produces a lovely little table with all of the networks your computer is connected to and their passwords, which you can see above.
Using Third-party Software
Using third-party tools, you can also access your saved WiFi passwords on your Windows 11 PC. WirelessKeyView is a free software to display the wireless network passwords stored in your computer. It also allows you to review the history of all networks that have been saved or add new points manually.
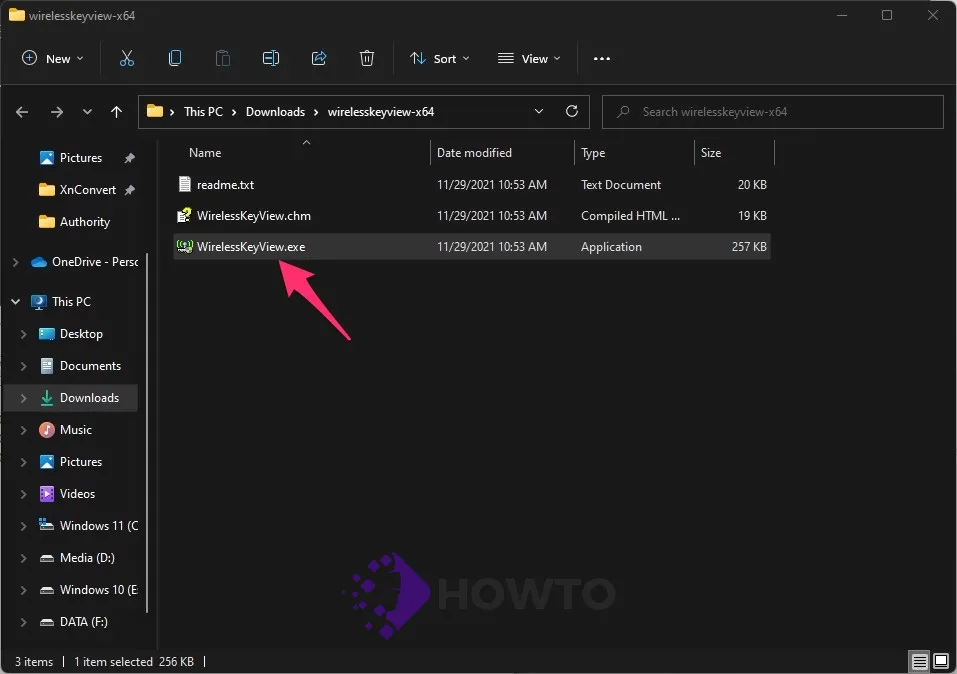
To access the program, download it from this page.
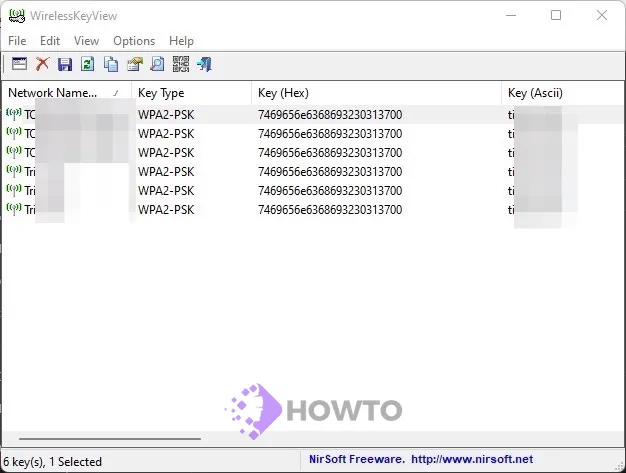
Extract the zip file and launch the program. Using the program, you can now see your WiFi password on a Windows 11 PC.
Conclusion
Thank you for reading this post on how to find WiFi passwords in Windows 11. If you have any more questions or would like help getting into your computer, please comment below!


