Changing the pointer on your computer is not difficult, but it does take a few steps. You can change the shape of the pointer to an arrow or a hand and change the color of the pointer.
If you’re sick of the Windows 10/11 default mouse pointer, you can download a beautiful set of mouse pointers for your PC. This article will show you how to change the mouse pointers quickly.
Installing your Mouse Cursors for Windows
These cursors may be used on all current versions of Windows, including Windows 11, Windows 10, Windows 8.1, and Windows 7.

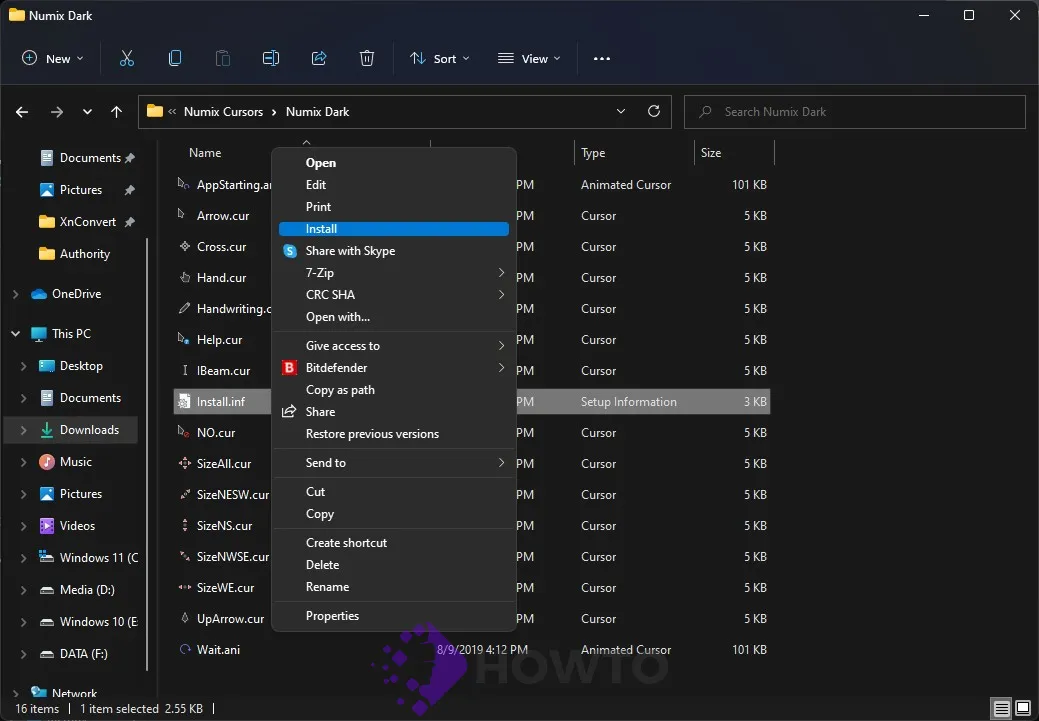
Unzip the package in a folder, right-click on the .inf file, and then select Install. It is applied to your Windows automatically.
Changing the Mouse Pointer in Windows 10/11
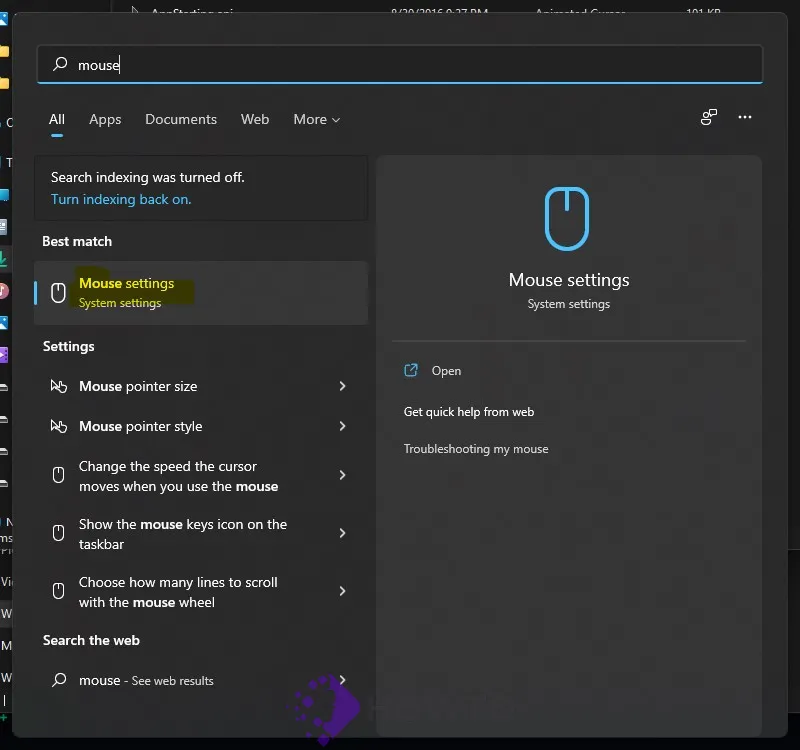
Step 1. Press the Windows button to access the Start Menu, then type “mouse” into the search bar in Windows 10. Just click the Search button from the Taskbar in Windows 11 and type “Mouse.”
Step 2. Open Mouse settings from the search result.

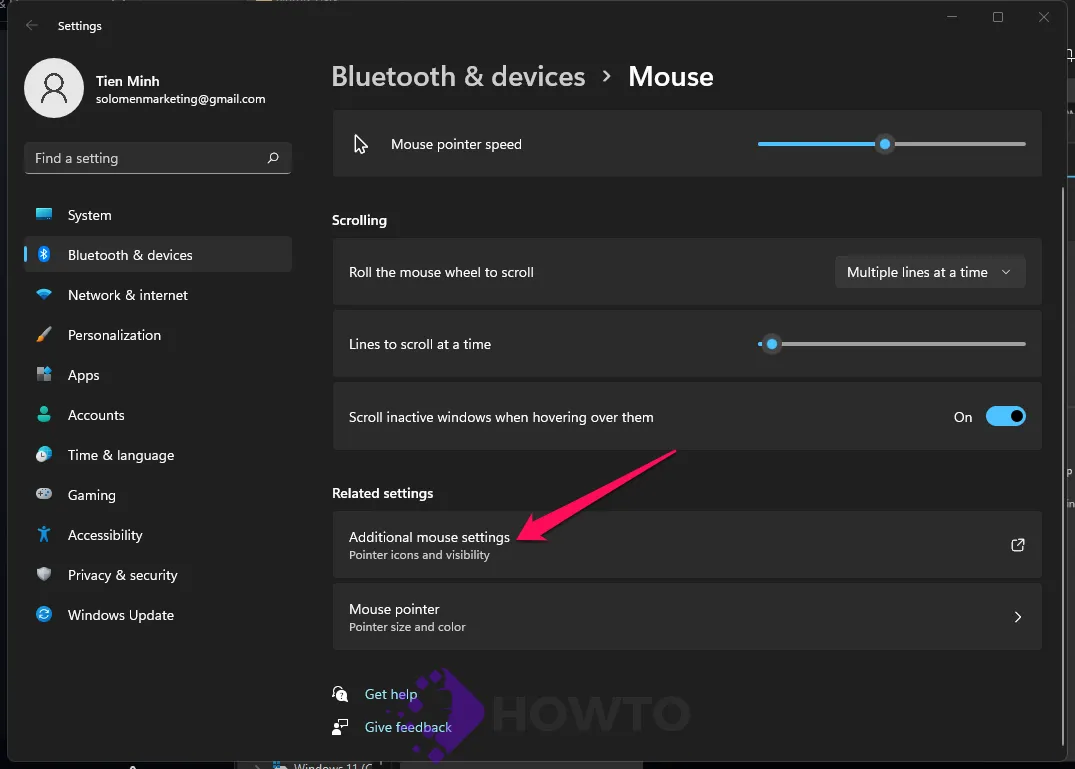
Step 3. Select the Additional mouse options to open the Mouse Properties—or Additional mouse settings in Windows 11.

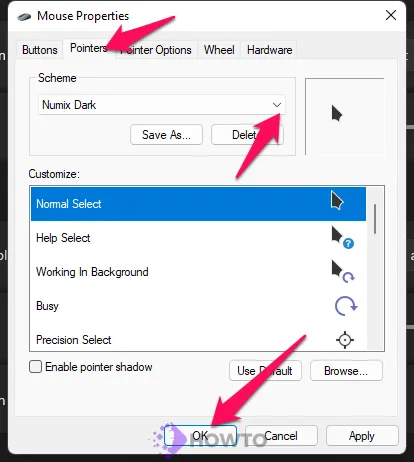
Step 4. Select the second option, Pointers. Then, select Scheme from the drop-down menu.

Step 5. Select the Mouse Pointer option that you want. The chosen mouse pointer set will be shown in the preview area. Finally, click the OK button.
That’s all there is to it. Your new mouse pointer design has now been established, and you can start using stylish mouse pointers.
Conclusion
If you want to change the default Windows pointer, this article will show you how. The pointers in Windows 10 and Windows 11 can be changed by following the steps above. This is an easy process that takes only a few minutes to complete!
How do you like the new pointer? We’re always happy to hear what you think about our content. With these tips, it’s more accessible for everyone who uses their computer day after day!


