Bootcamp is a program that comes installed on all Macs. It allows users to install and run Windows on their Macs. Bootcamp will create a separate partition on your Mac’s hard drive and install Windows onto that partition. When you start your Mac, you can start up in Windows or macOS.
Bootcamp is a great way to get the best of both worlds if you’re a Mac user who needs to use Windows 11 for work or school. This article will show you how to install and run Windows 11 on your Mac with an Intel chip using Bootcamp.
Bootcamp and Apple M-series chip
Make sure that your Mac is compatible with Windows 11 before you begin. As mentioned in the last post, Bootcamp does not work with Macs with the M1/M2 chip.
You can check this by visiting the Apple website and looking up your Mac’s model in the “Supported Models“ list. Fortunately, there is a way to run Windows 11 on an M1/M2 Mac, and we’ll cover this method in another article.
Windows 11 and TPM 2.0
Unlike installing Windows 10 on a Mac, you need a TPM (Trusted Platform Module) 2.0 to run Windows 11. TPM is a security feature that provides hardware-based security for your PC. Windows 11 requires TPM 2.0 to run, so if your device doesn’t have TPM 2.0, you cannot install or upgrade to Windows 11.
TPM provides several benefits, including more robust security for your PC and the ability to use features like BitLocker encryption. Most PCs released in the last five years have TPM 2.0. If your PC doesn’t have TPM 2.0, check with the manufacturer to see if your computer can be upgraded to have it.
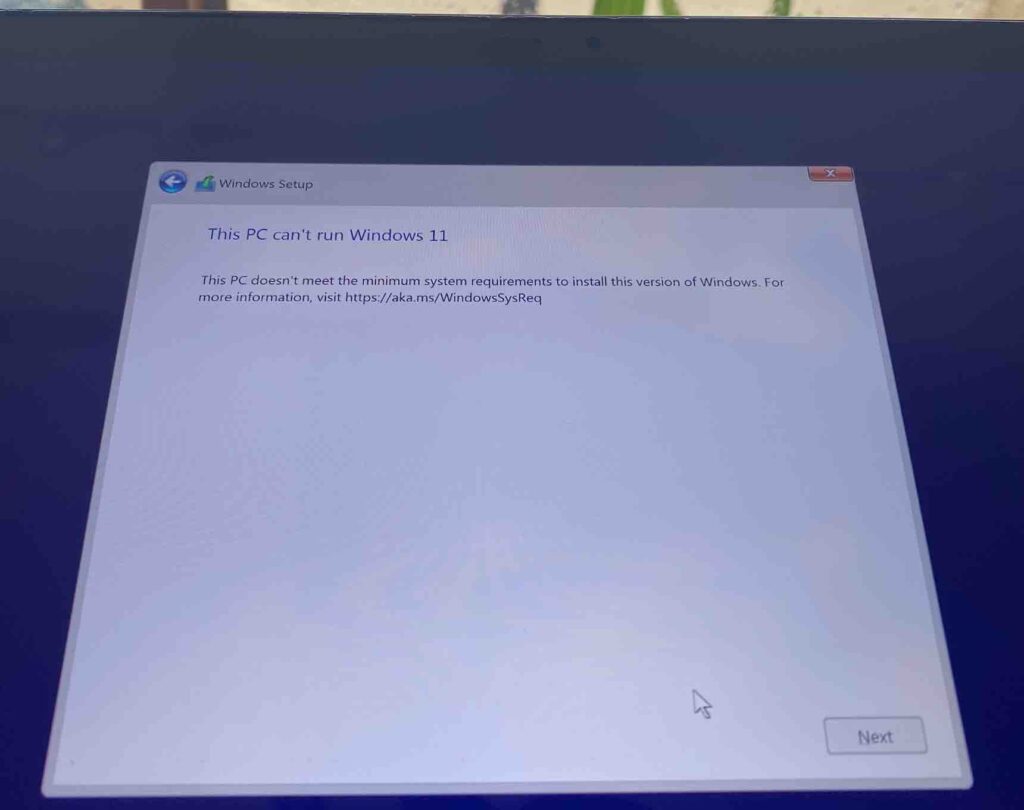
If your PC/Laptop does not have TPM 2.0, you will get an error message and won’t be able to continue the installation.
I Have Found The Best Way
Two standard methods can solve this problem with TPM when you search for it on the internet: using Regedit or replacing the install.wim from the Windows 10 ISO.
When trying to install Windows 11 on my MacBook Pro (13-inch, 2017) with Bootcamp, I got the following error message:
Using Regedit
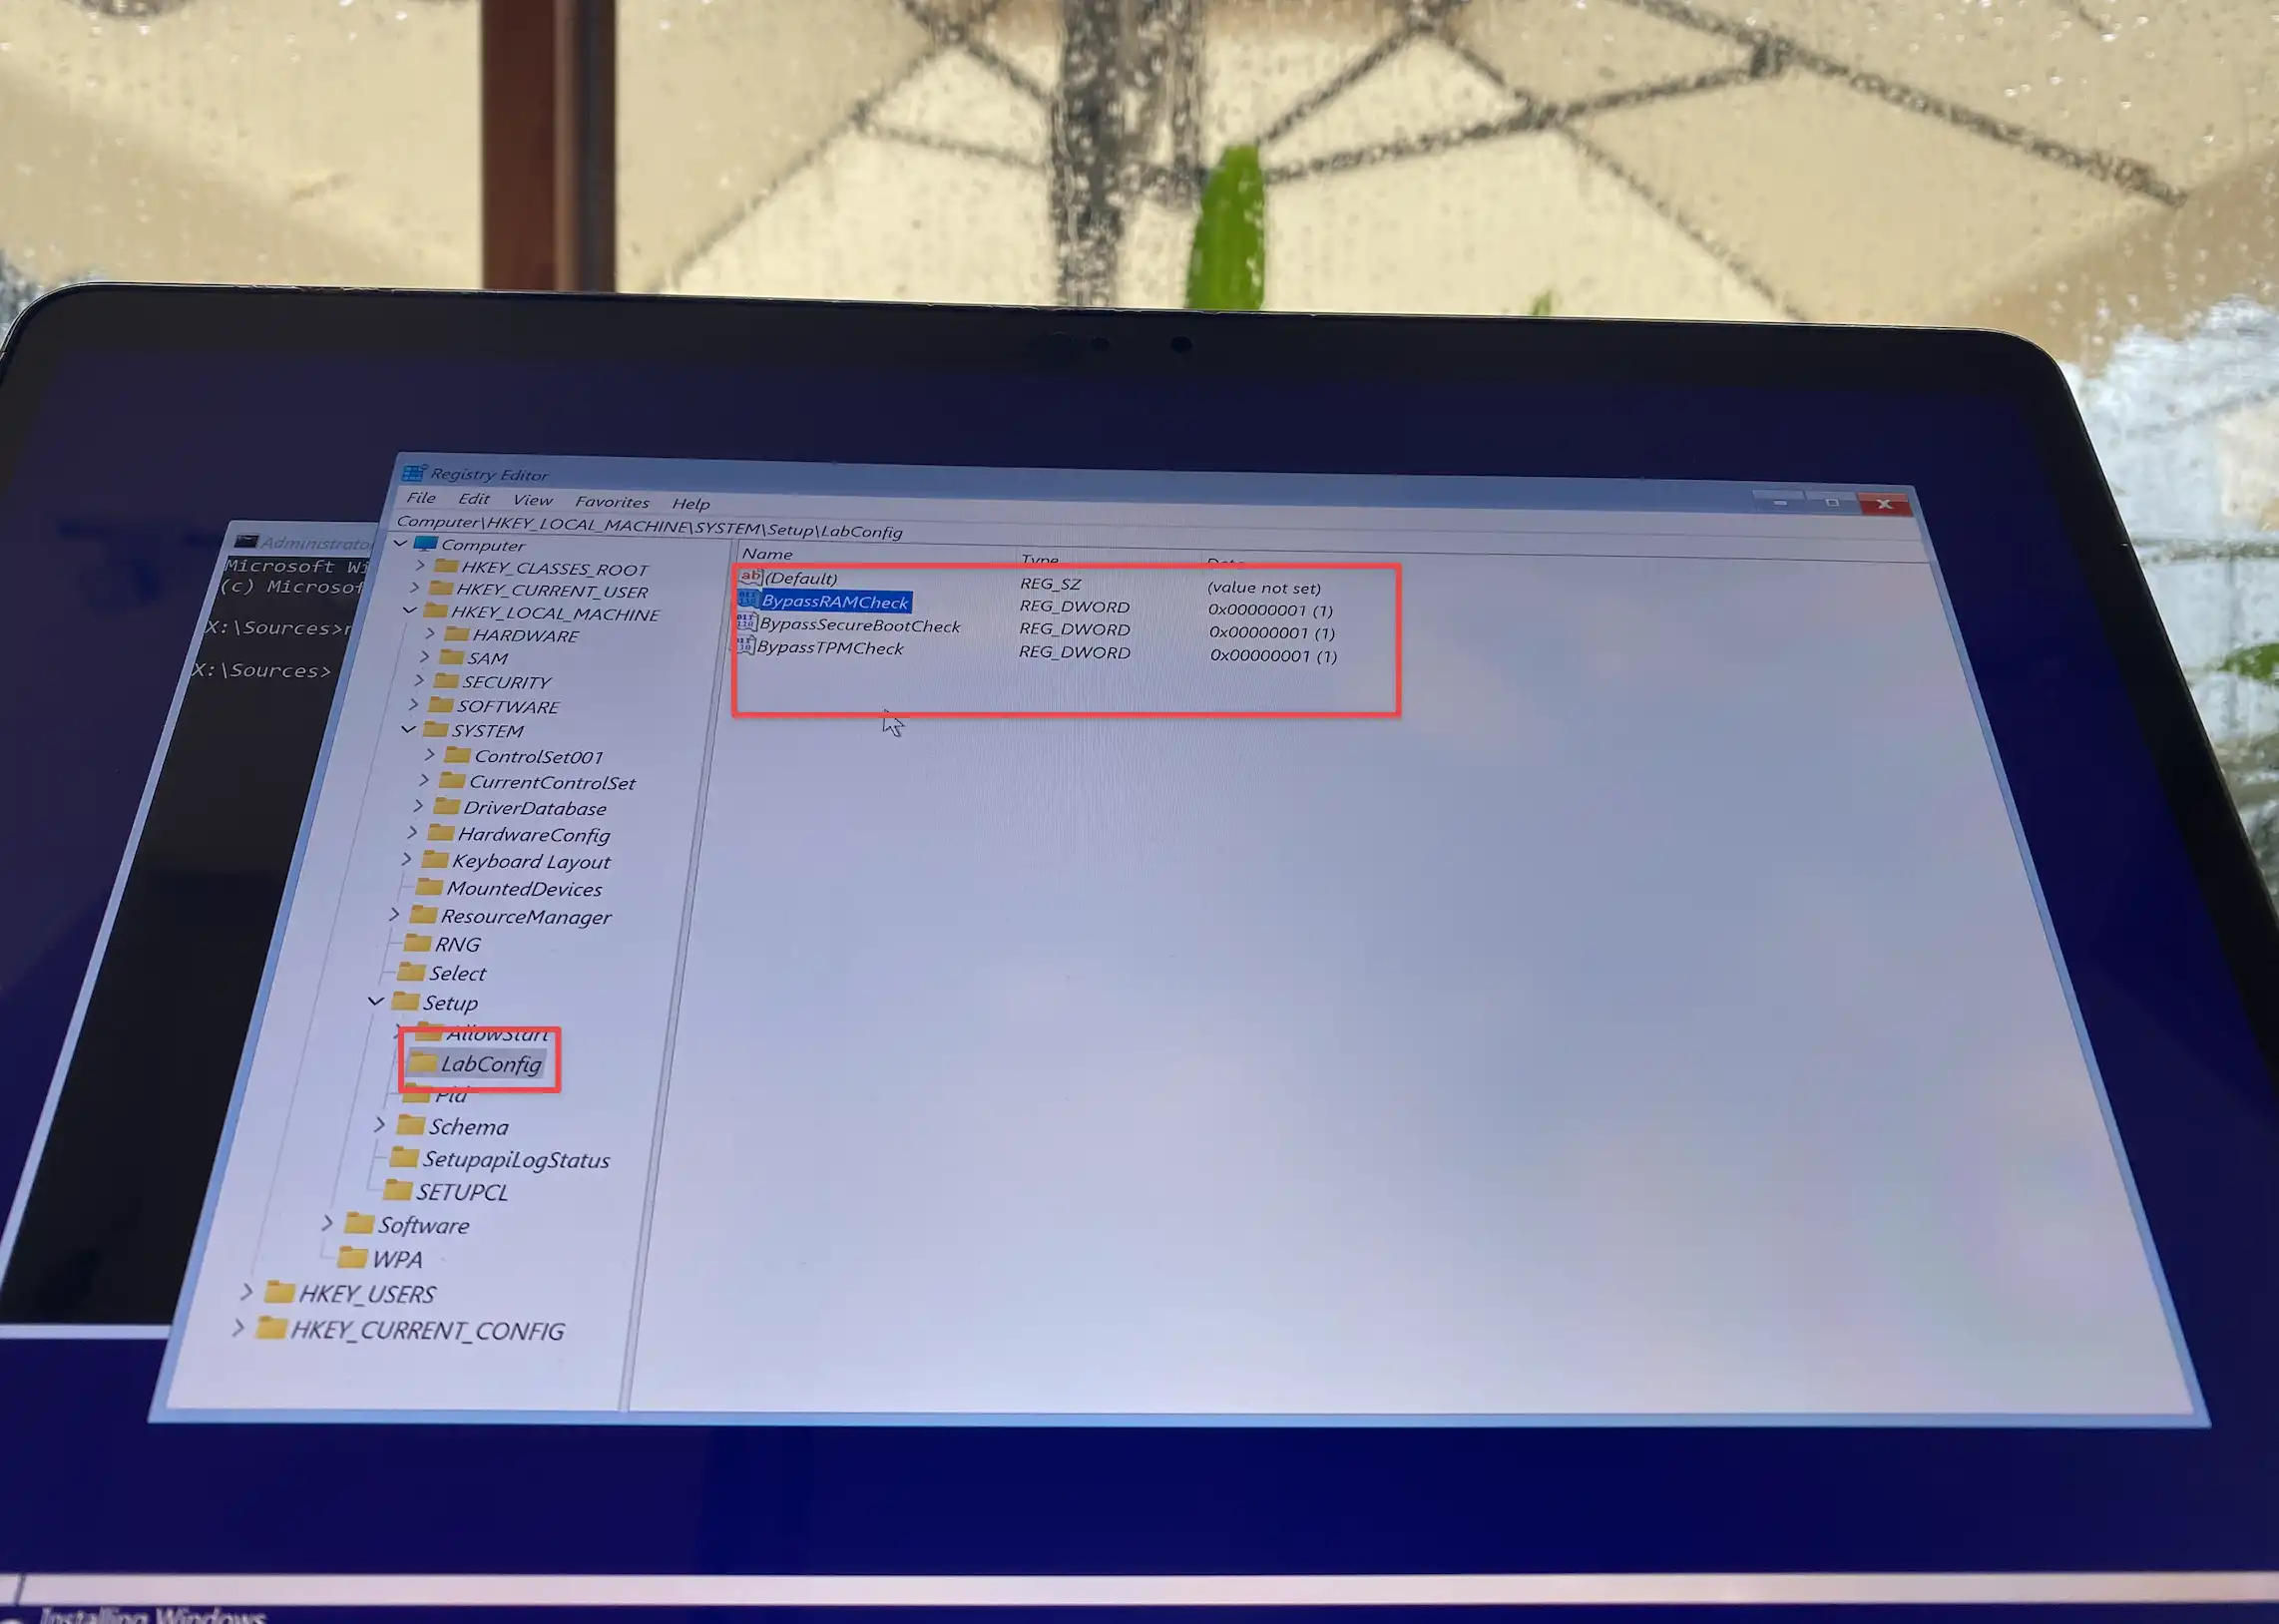
By adding three new keys (BypassTPMCheck, BypassSecureBootCheck, and ByPassRAMCheck) to
HKEY_LOCAL_MACHINE\SYSTEM\Setup\LabConfig
Replacing The “install.wim”
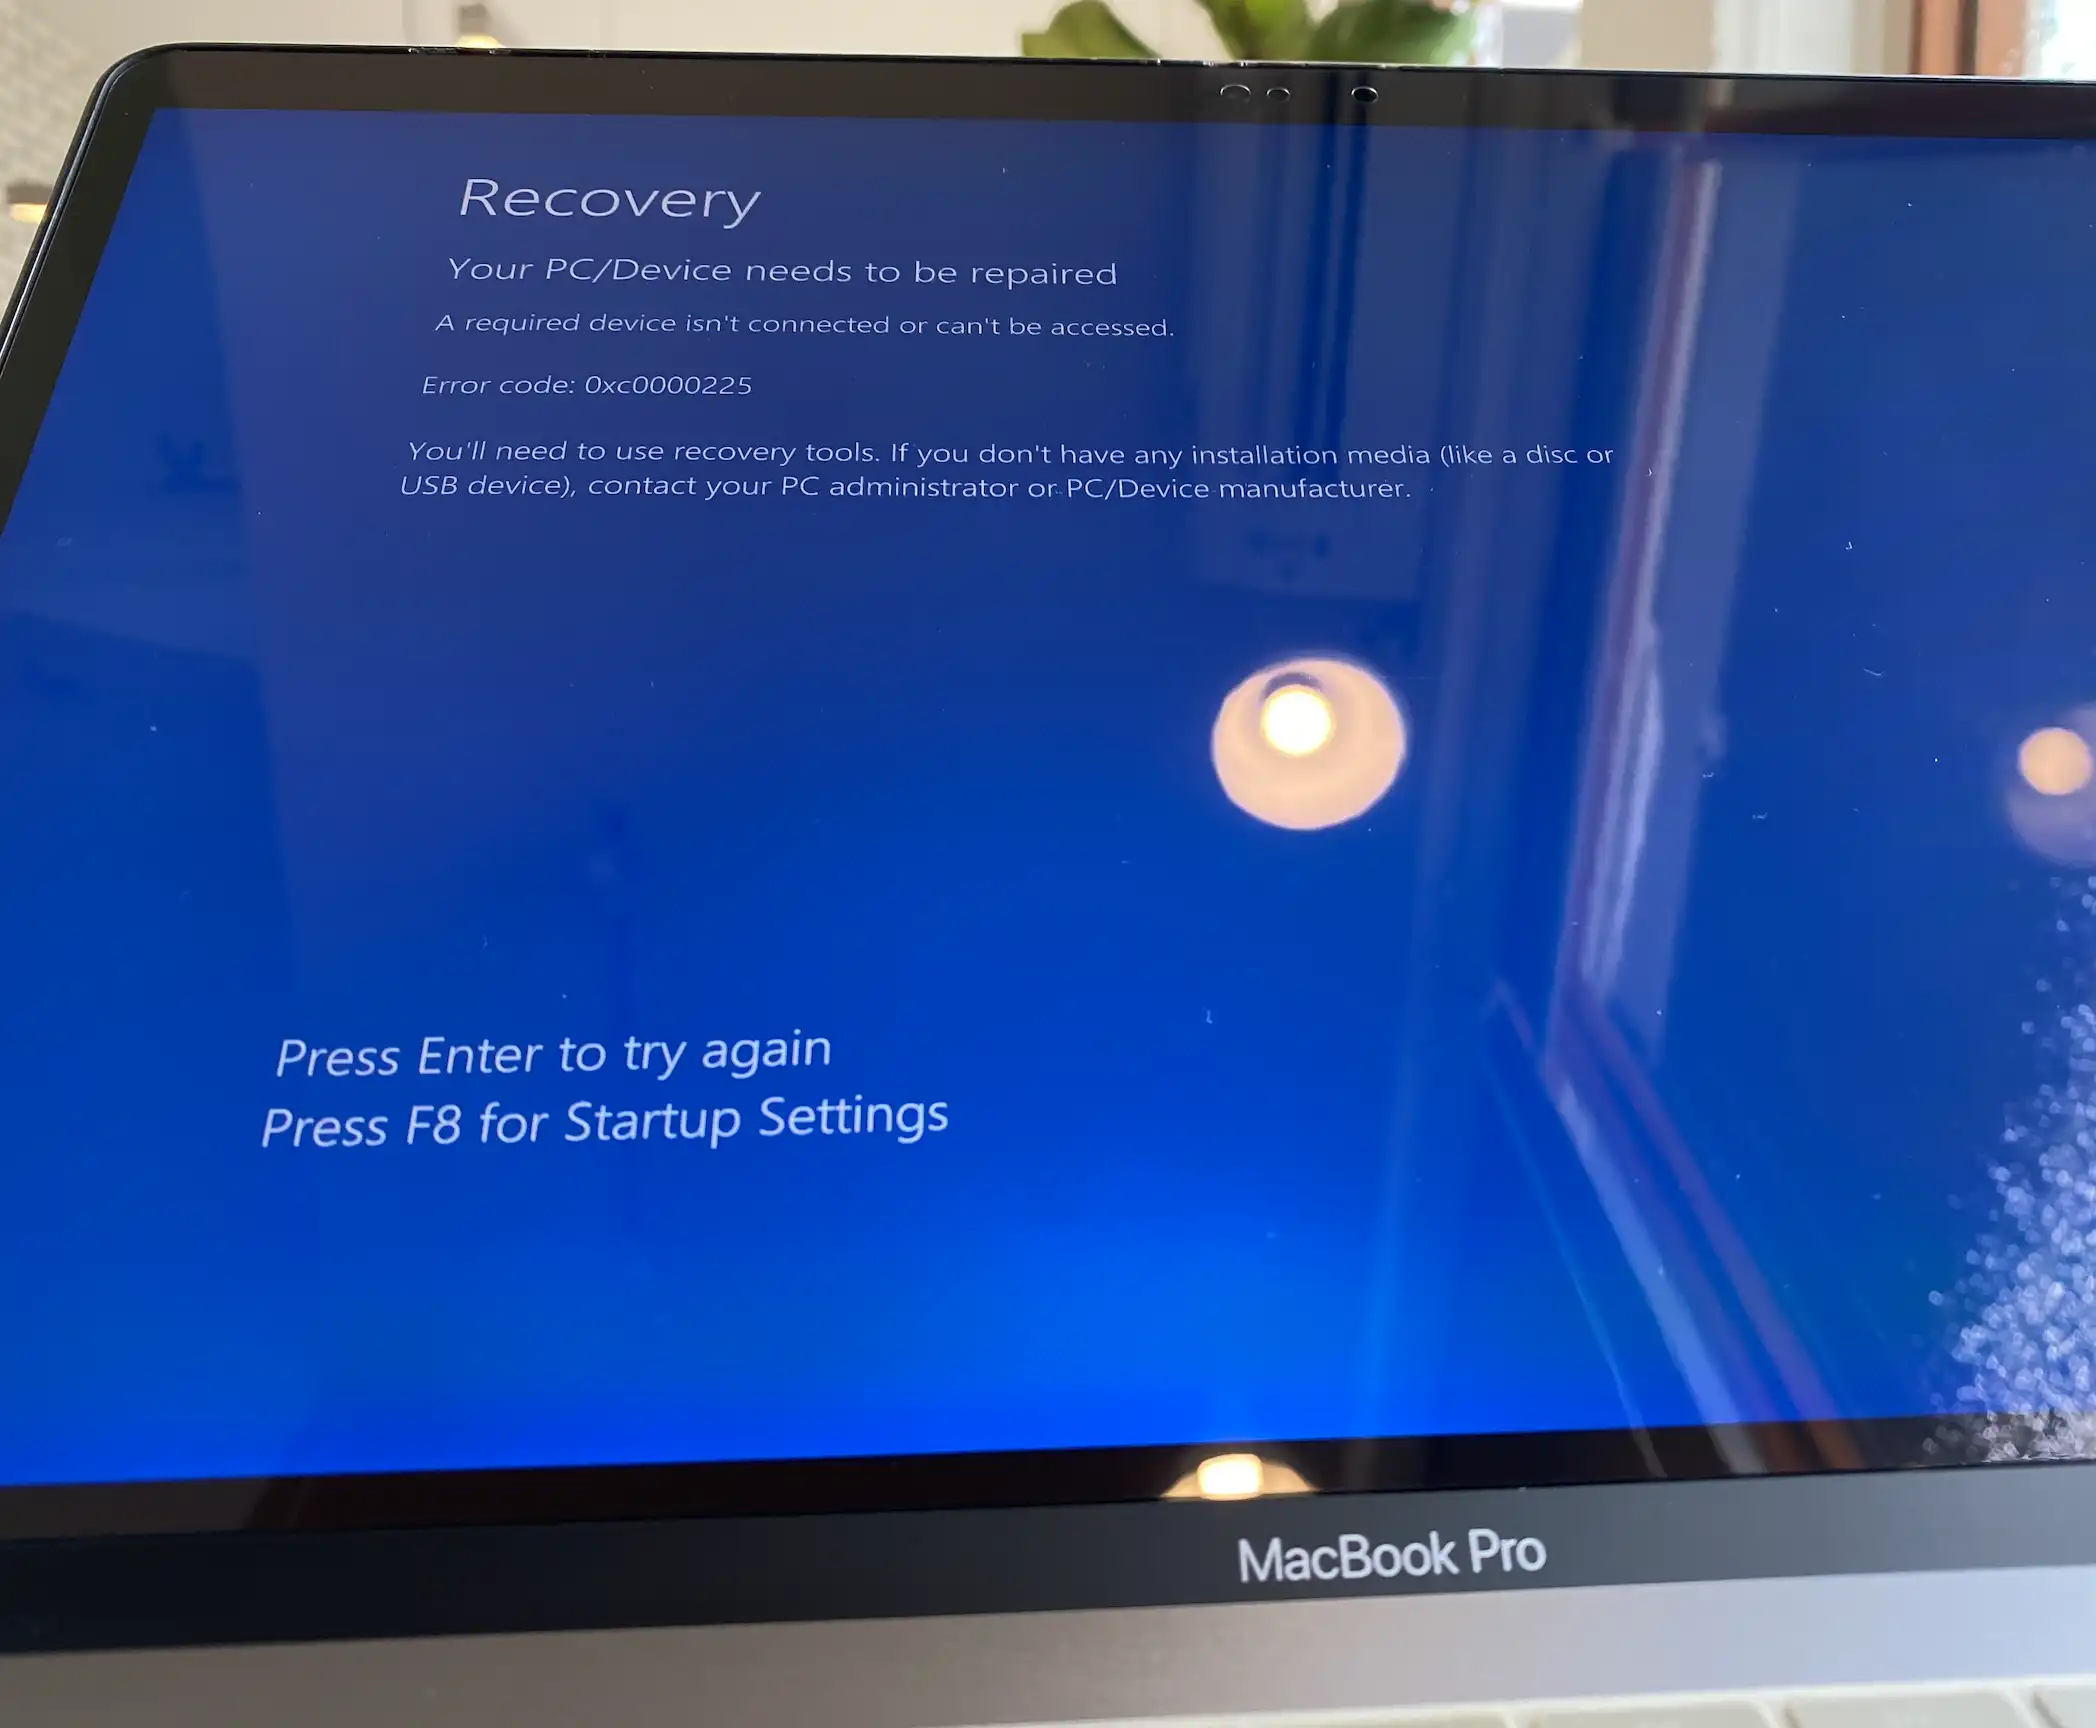
This way, it copies all files from the Windows 10 ISO to a new folder and then replaces the install.wim file with the install.wim file (Windows 11) in the Sources folder. Then, use a tool to convert a folder to an ISO file.
According to some other guide, you should rename the install.wim file to the ESD file (install.esd) before creating an ISO.
None of them worked for me. Luckily, I have found a way to run Windows 11 on my Macbook, and below is the detailed guide.
What You Need!
To install Windows 11 on your Mac, you’ll need the following:
- A copy of Windows 11 ISO
- An Intel-based Mac
- Plug the power adapter or ensure a Mac has a reasonable battery charge.
- Mac with one partition and enough free storage space of at least 40GB to create a Bootcamp partition. Click here to learn how to delete a partition on Mac.
Necessary:
Please make sure to backup your data before deleting any partition. You can use an external hard drive, Time Machine, or cloud storage.
How To Install Windows 11 On A Mac With An Intel Chip
Make sure you have only one partition on your Mac. Then, continue with the steps below.
Download Both Windows 10 and Windows 11 ISO
1. Go to Microsoft’s Download Windows 11 page here.
2. From Download Windows 11 Disk Image (ISO), select Windows 11 (multi-edition ISO) and then click on the Download button.
3. Select your preferred language(s) and click the Confirm button on the next page.
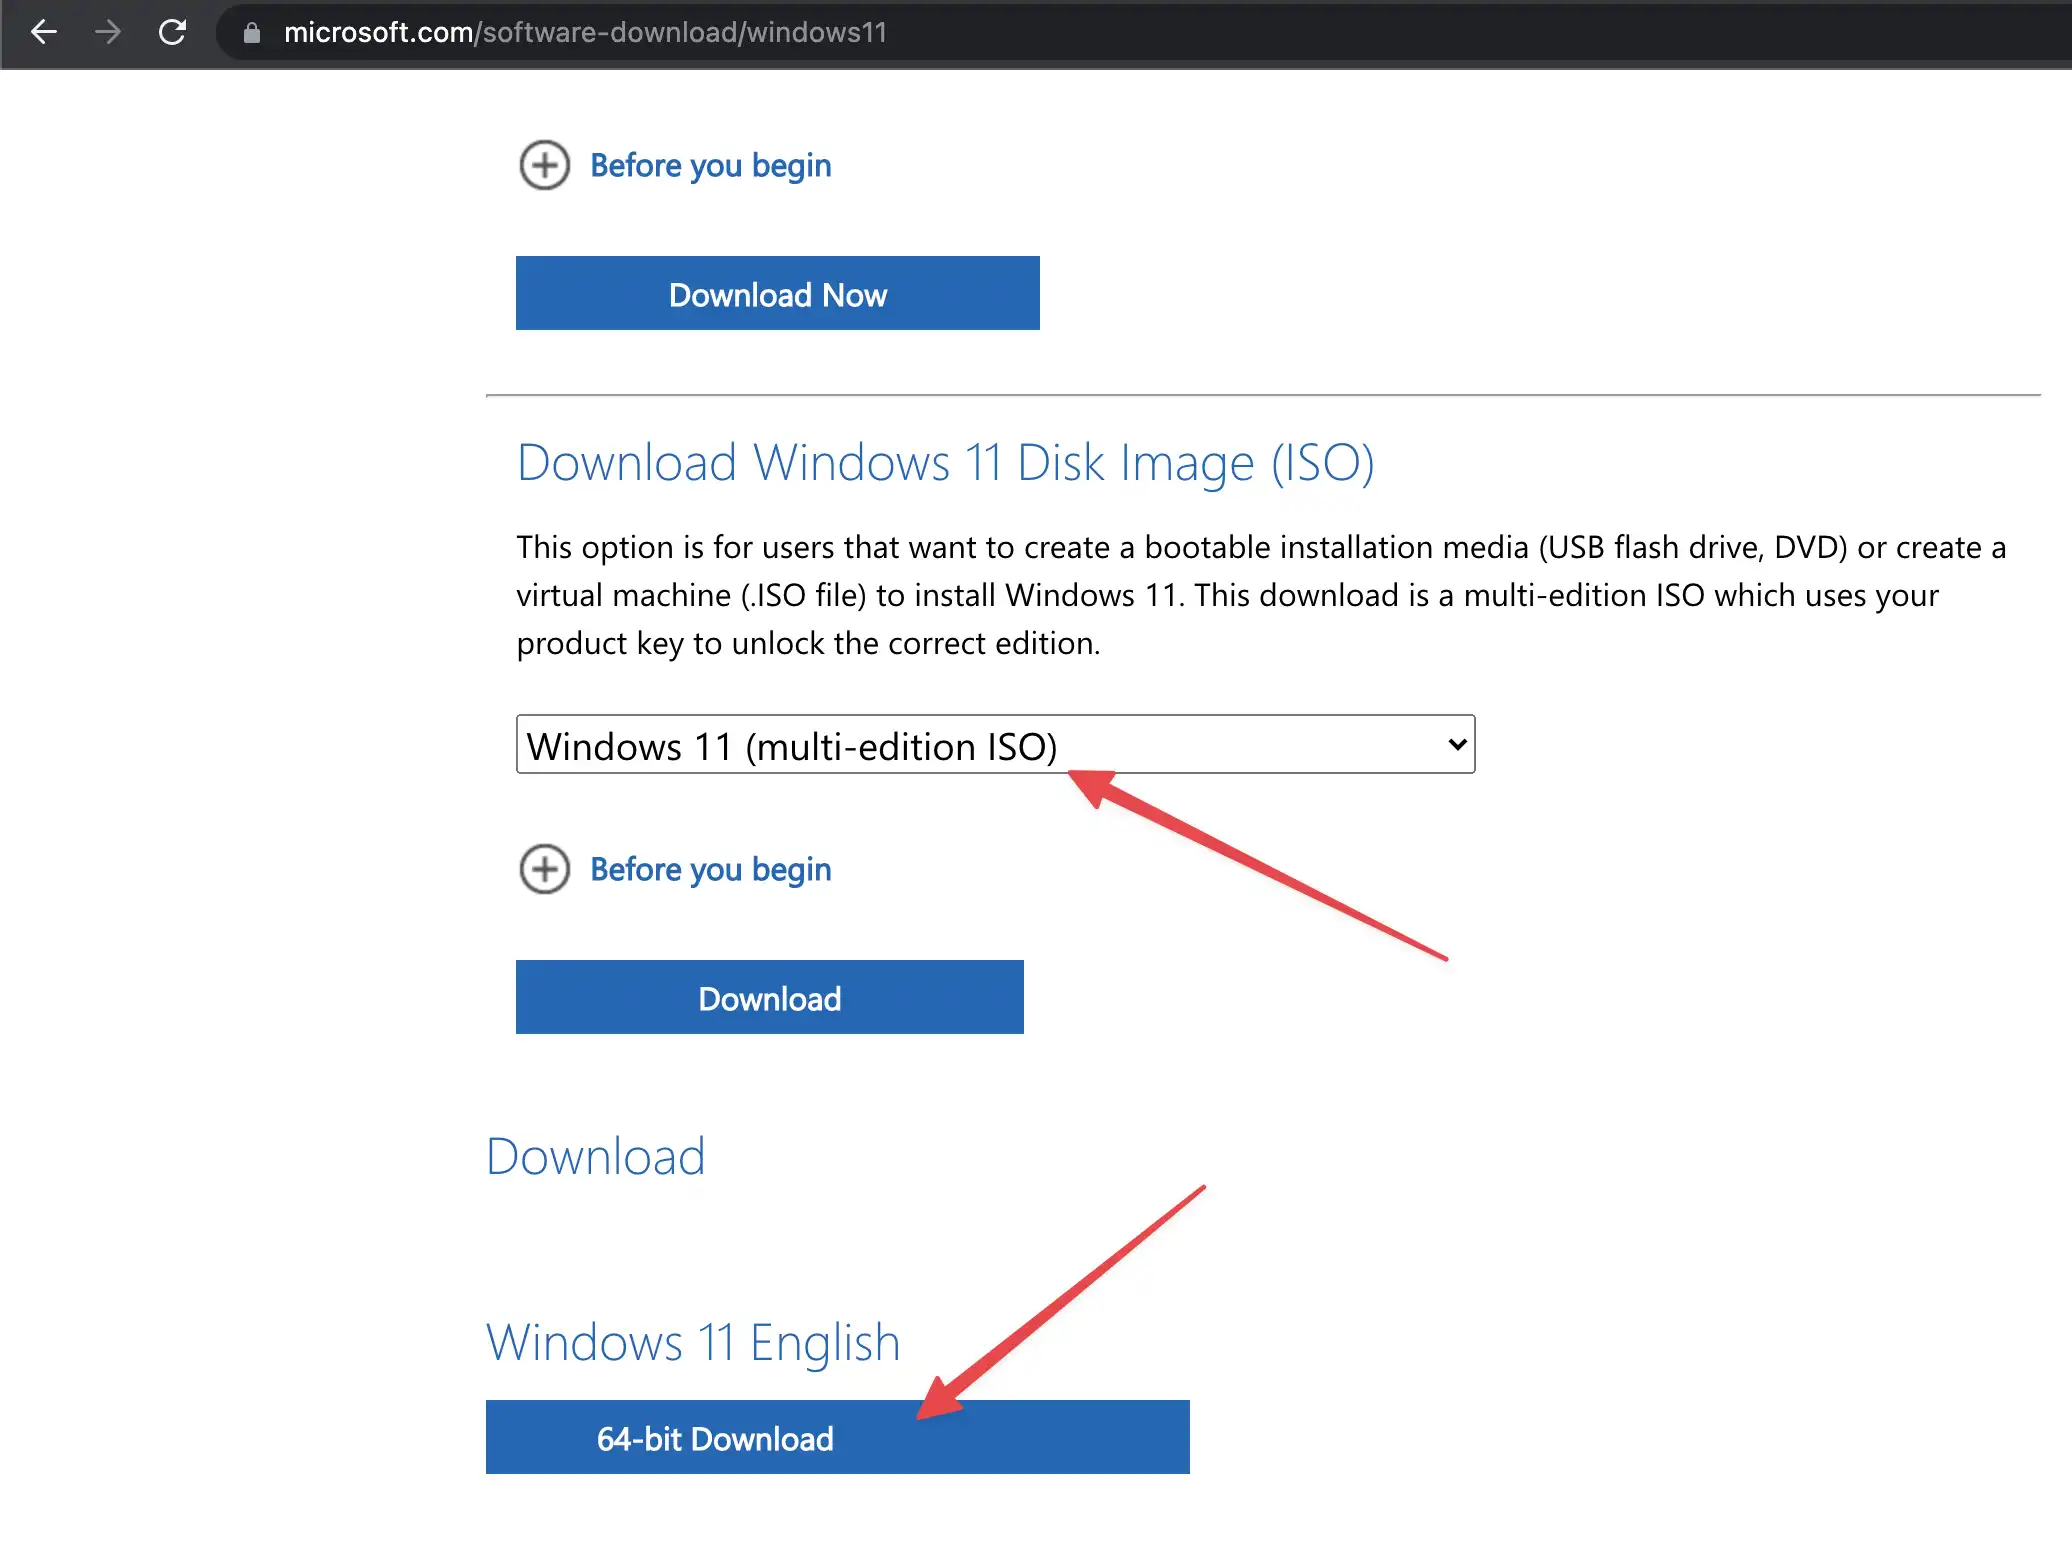
4. Now, select Windows 11 (64-bit) to download the 64-bit version of Windows 11.
5. Once the download is completed, open Finder and go to your Downloads folder. You should see the ISO file you downloaded (e.g., Win11_English_x64v1.iso).
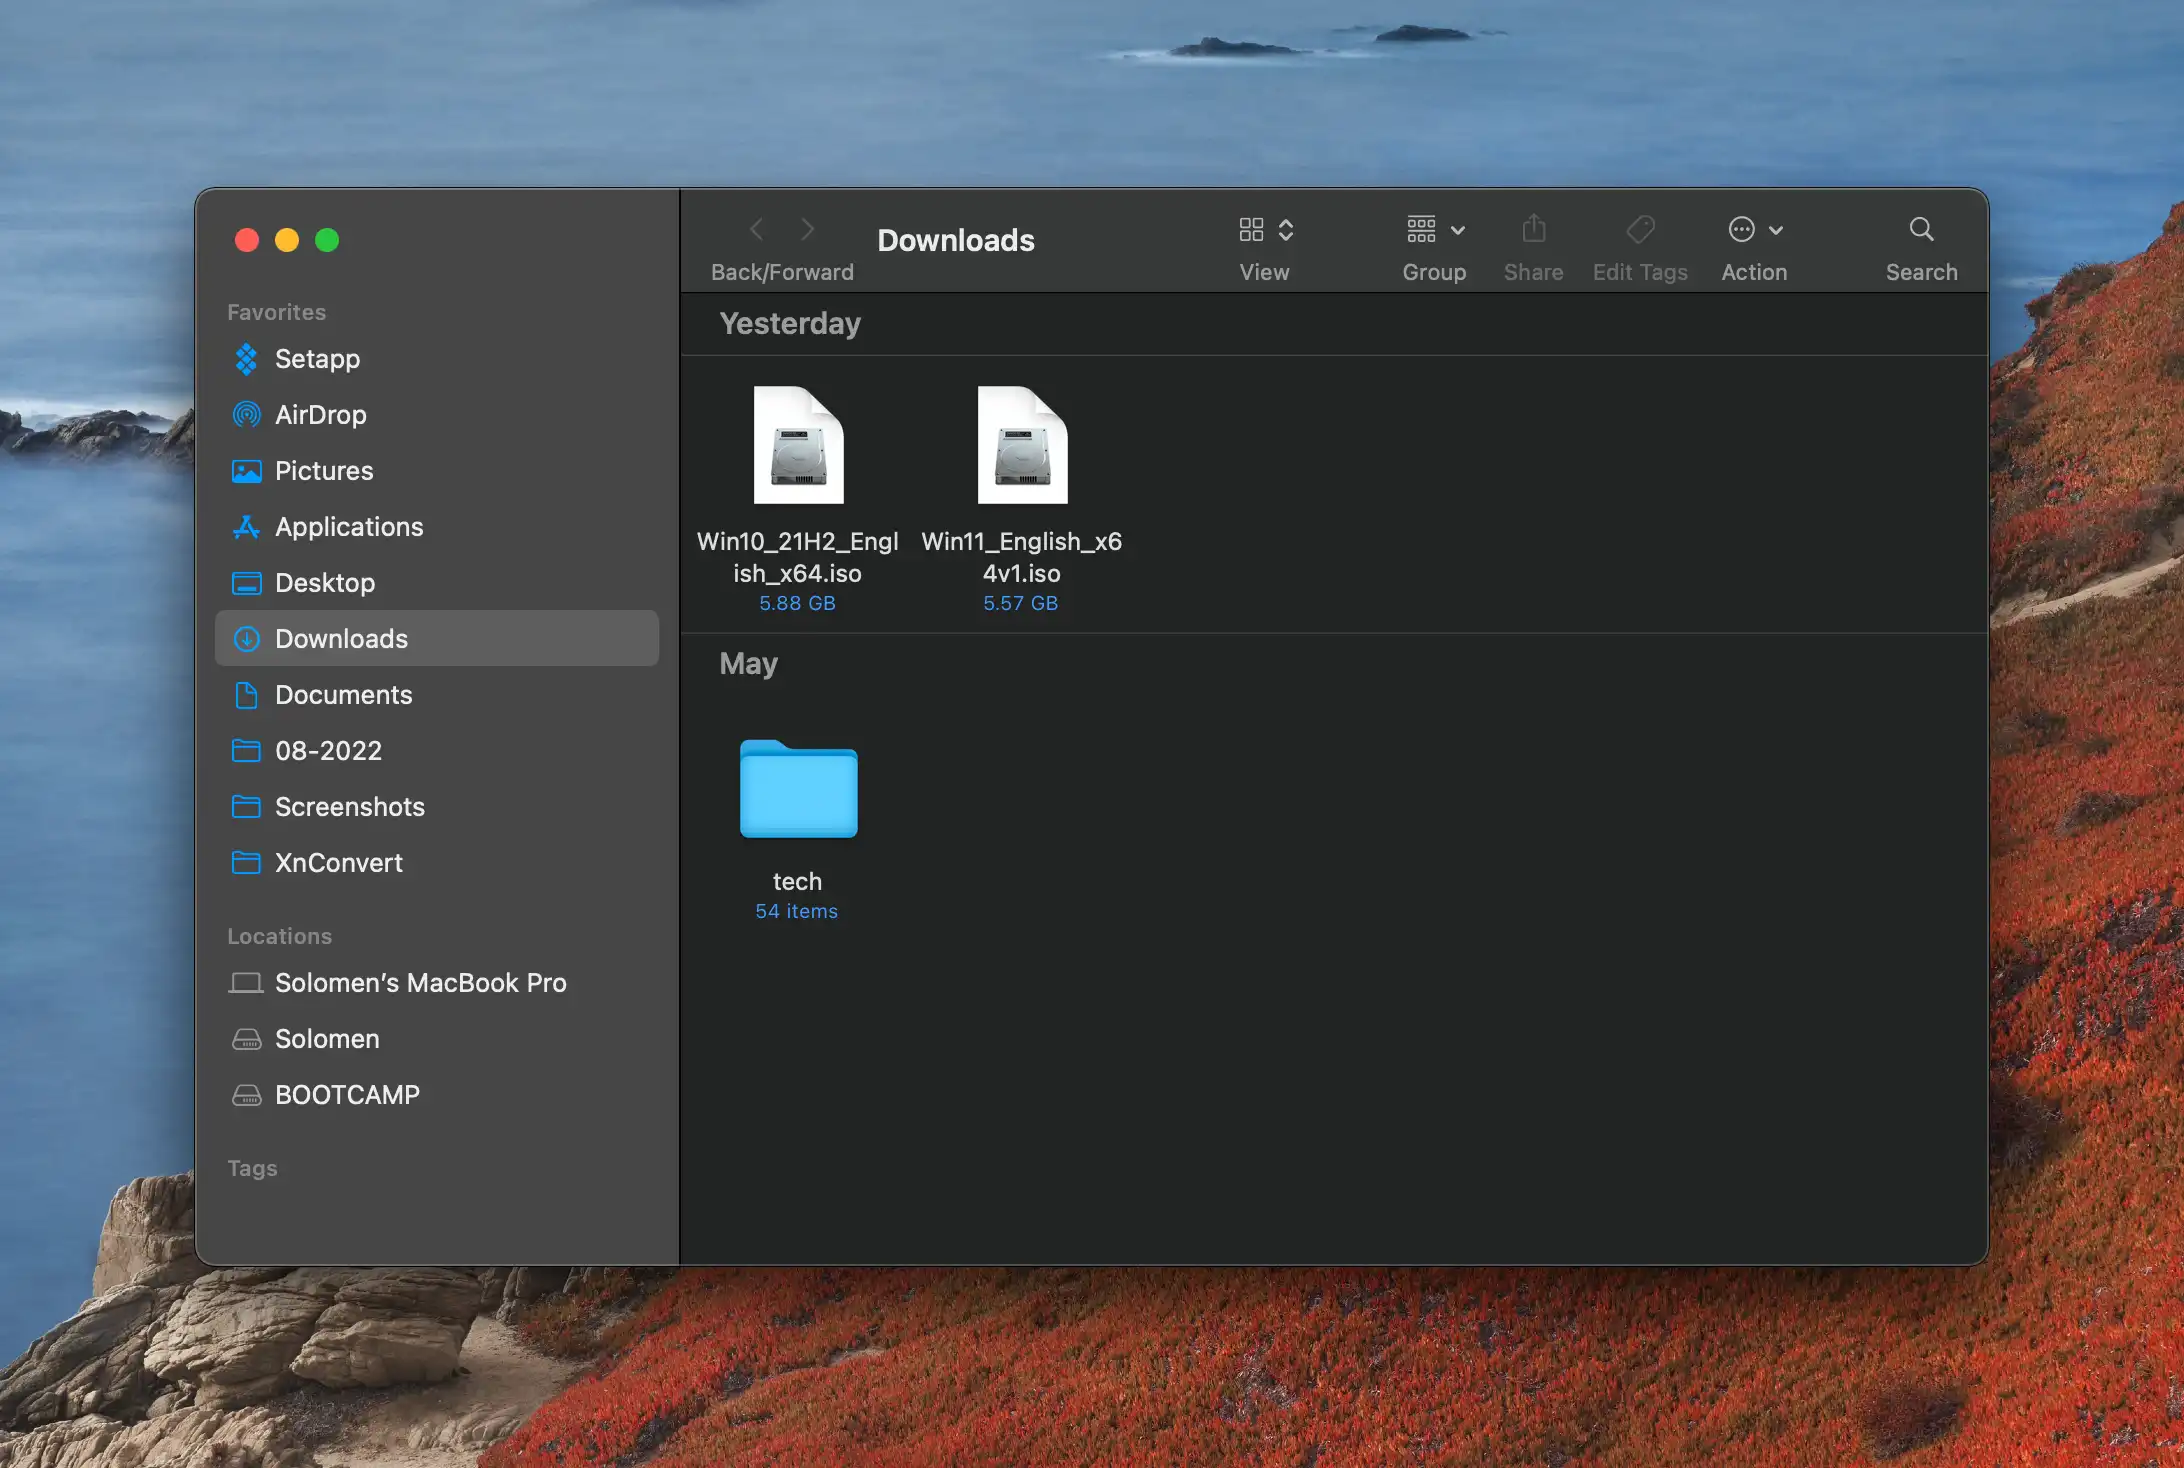
Do the same thing for Windows 10 ISO, and you will get two ISO files: Win10_21H2_English_x64 and Win11_English_x64v1.iso.
Copy All Windows 10 Files to a New Folder And Delete “install.wim”
1. On your Mac, open Finder and then go to your Downloads folder. Right-click on the Win10_21H2_English_x64.iso file and select Open from the contextual menu.
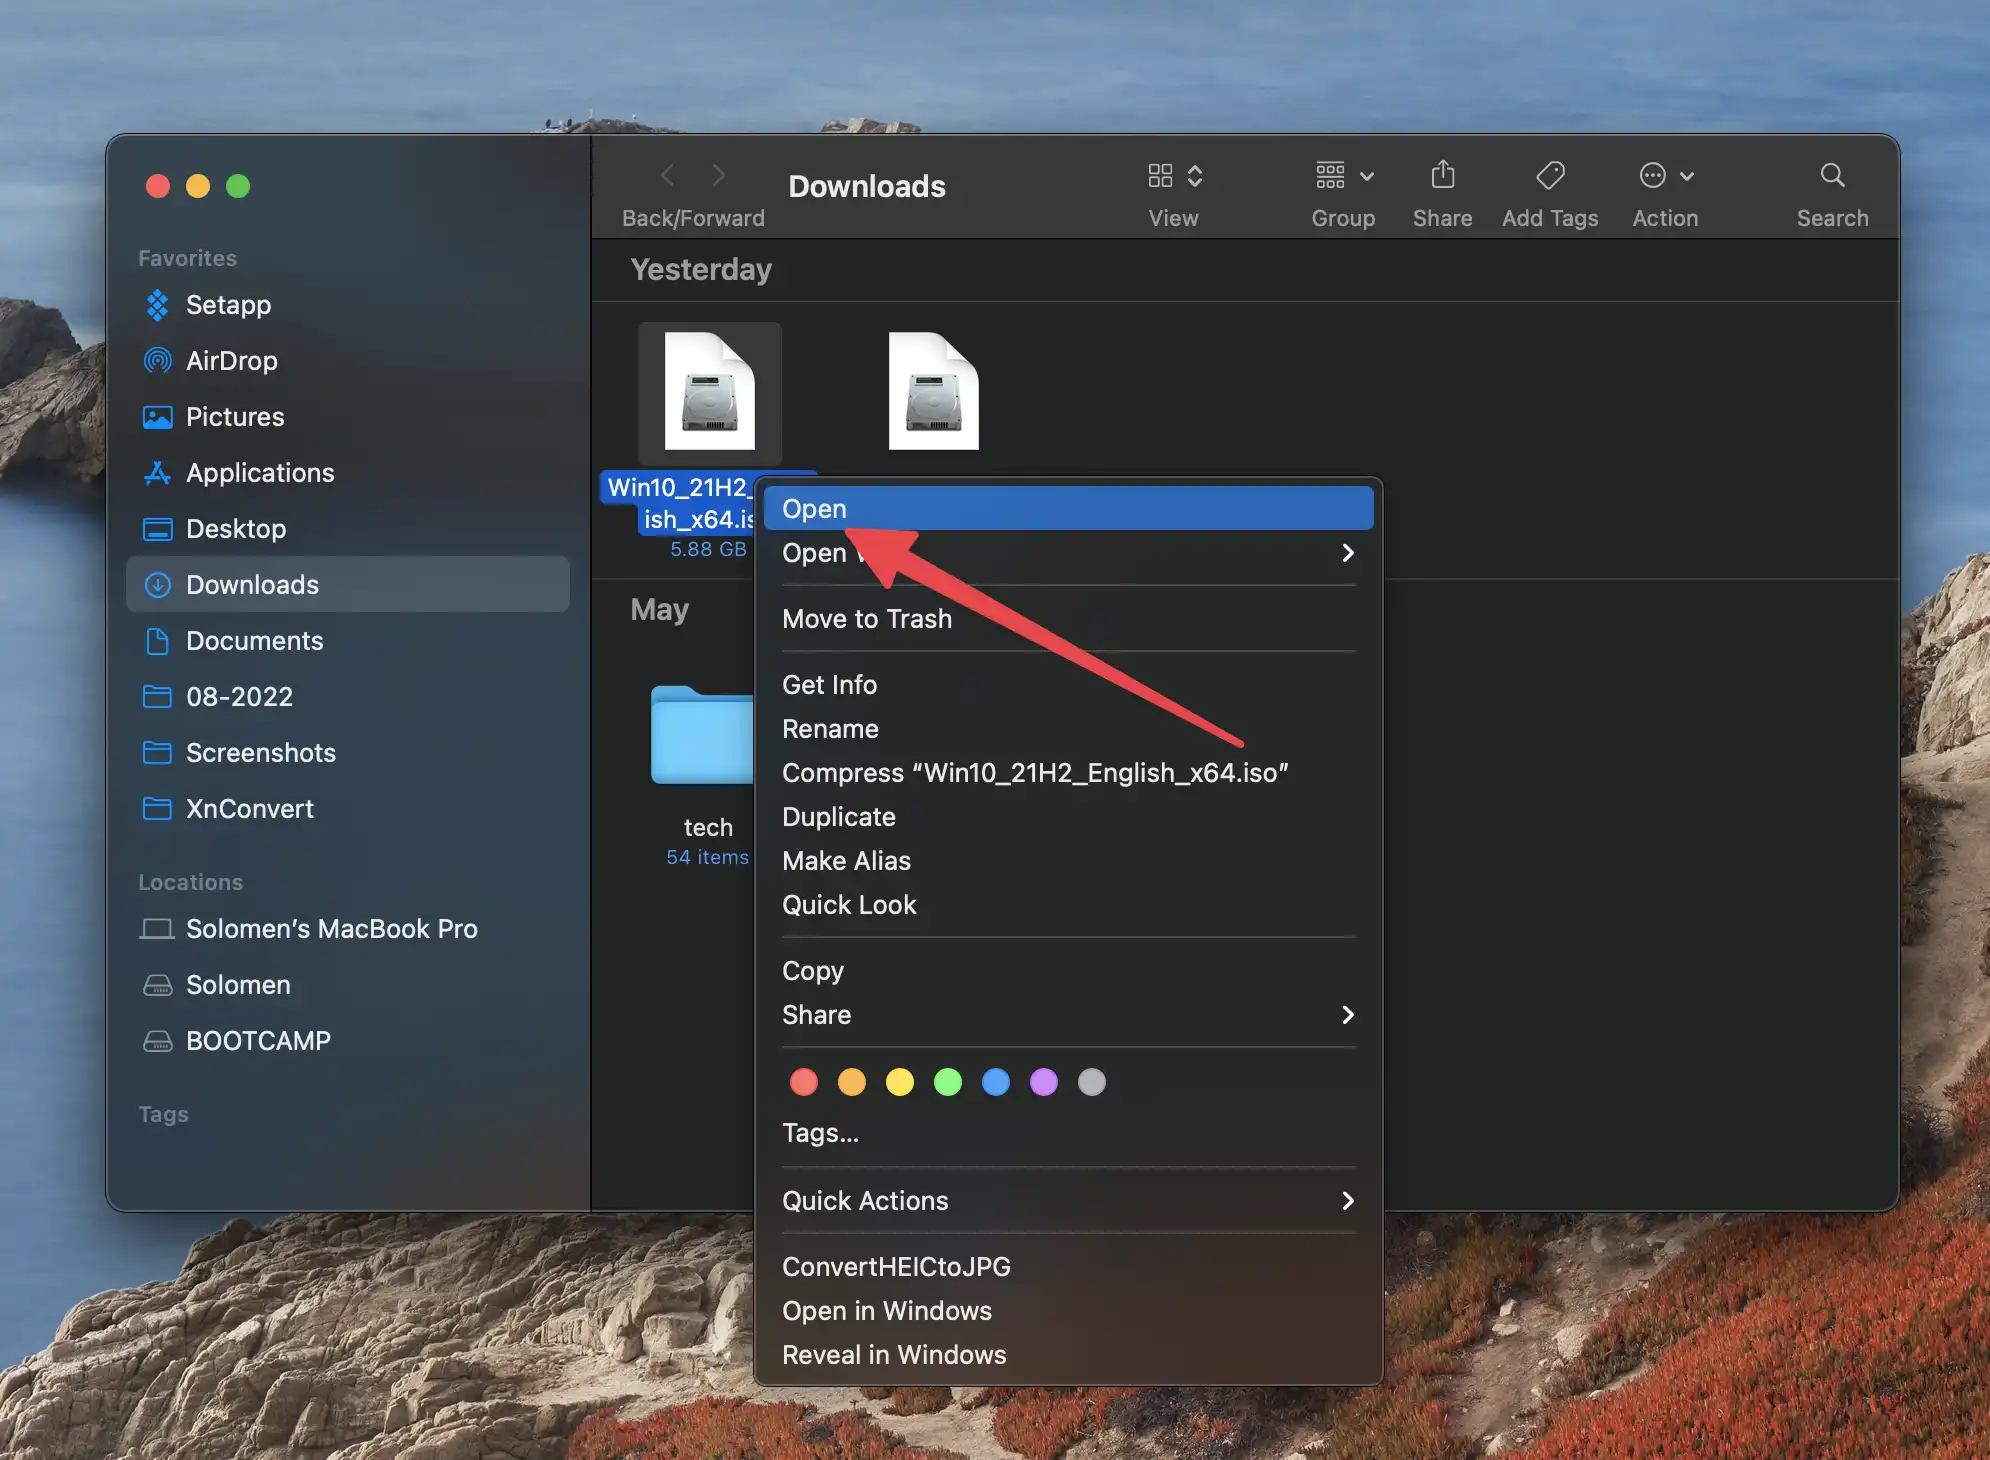
2. A new window will open with the contents of the ISO file. Select all items and copy them by pressing Command + C on your keyboard.
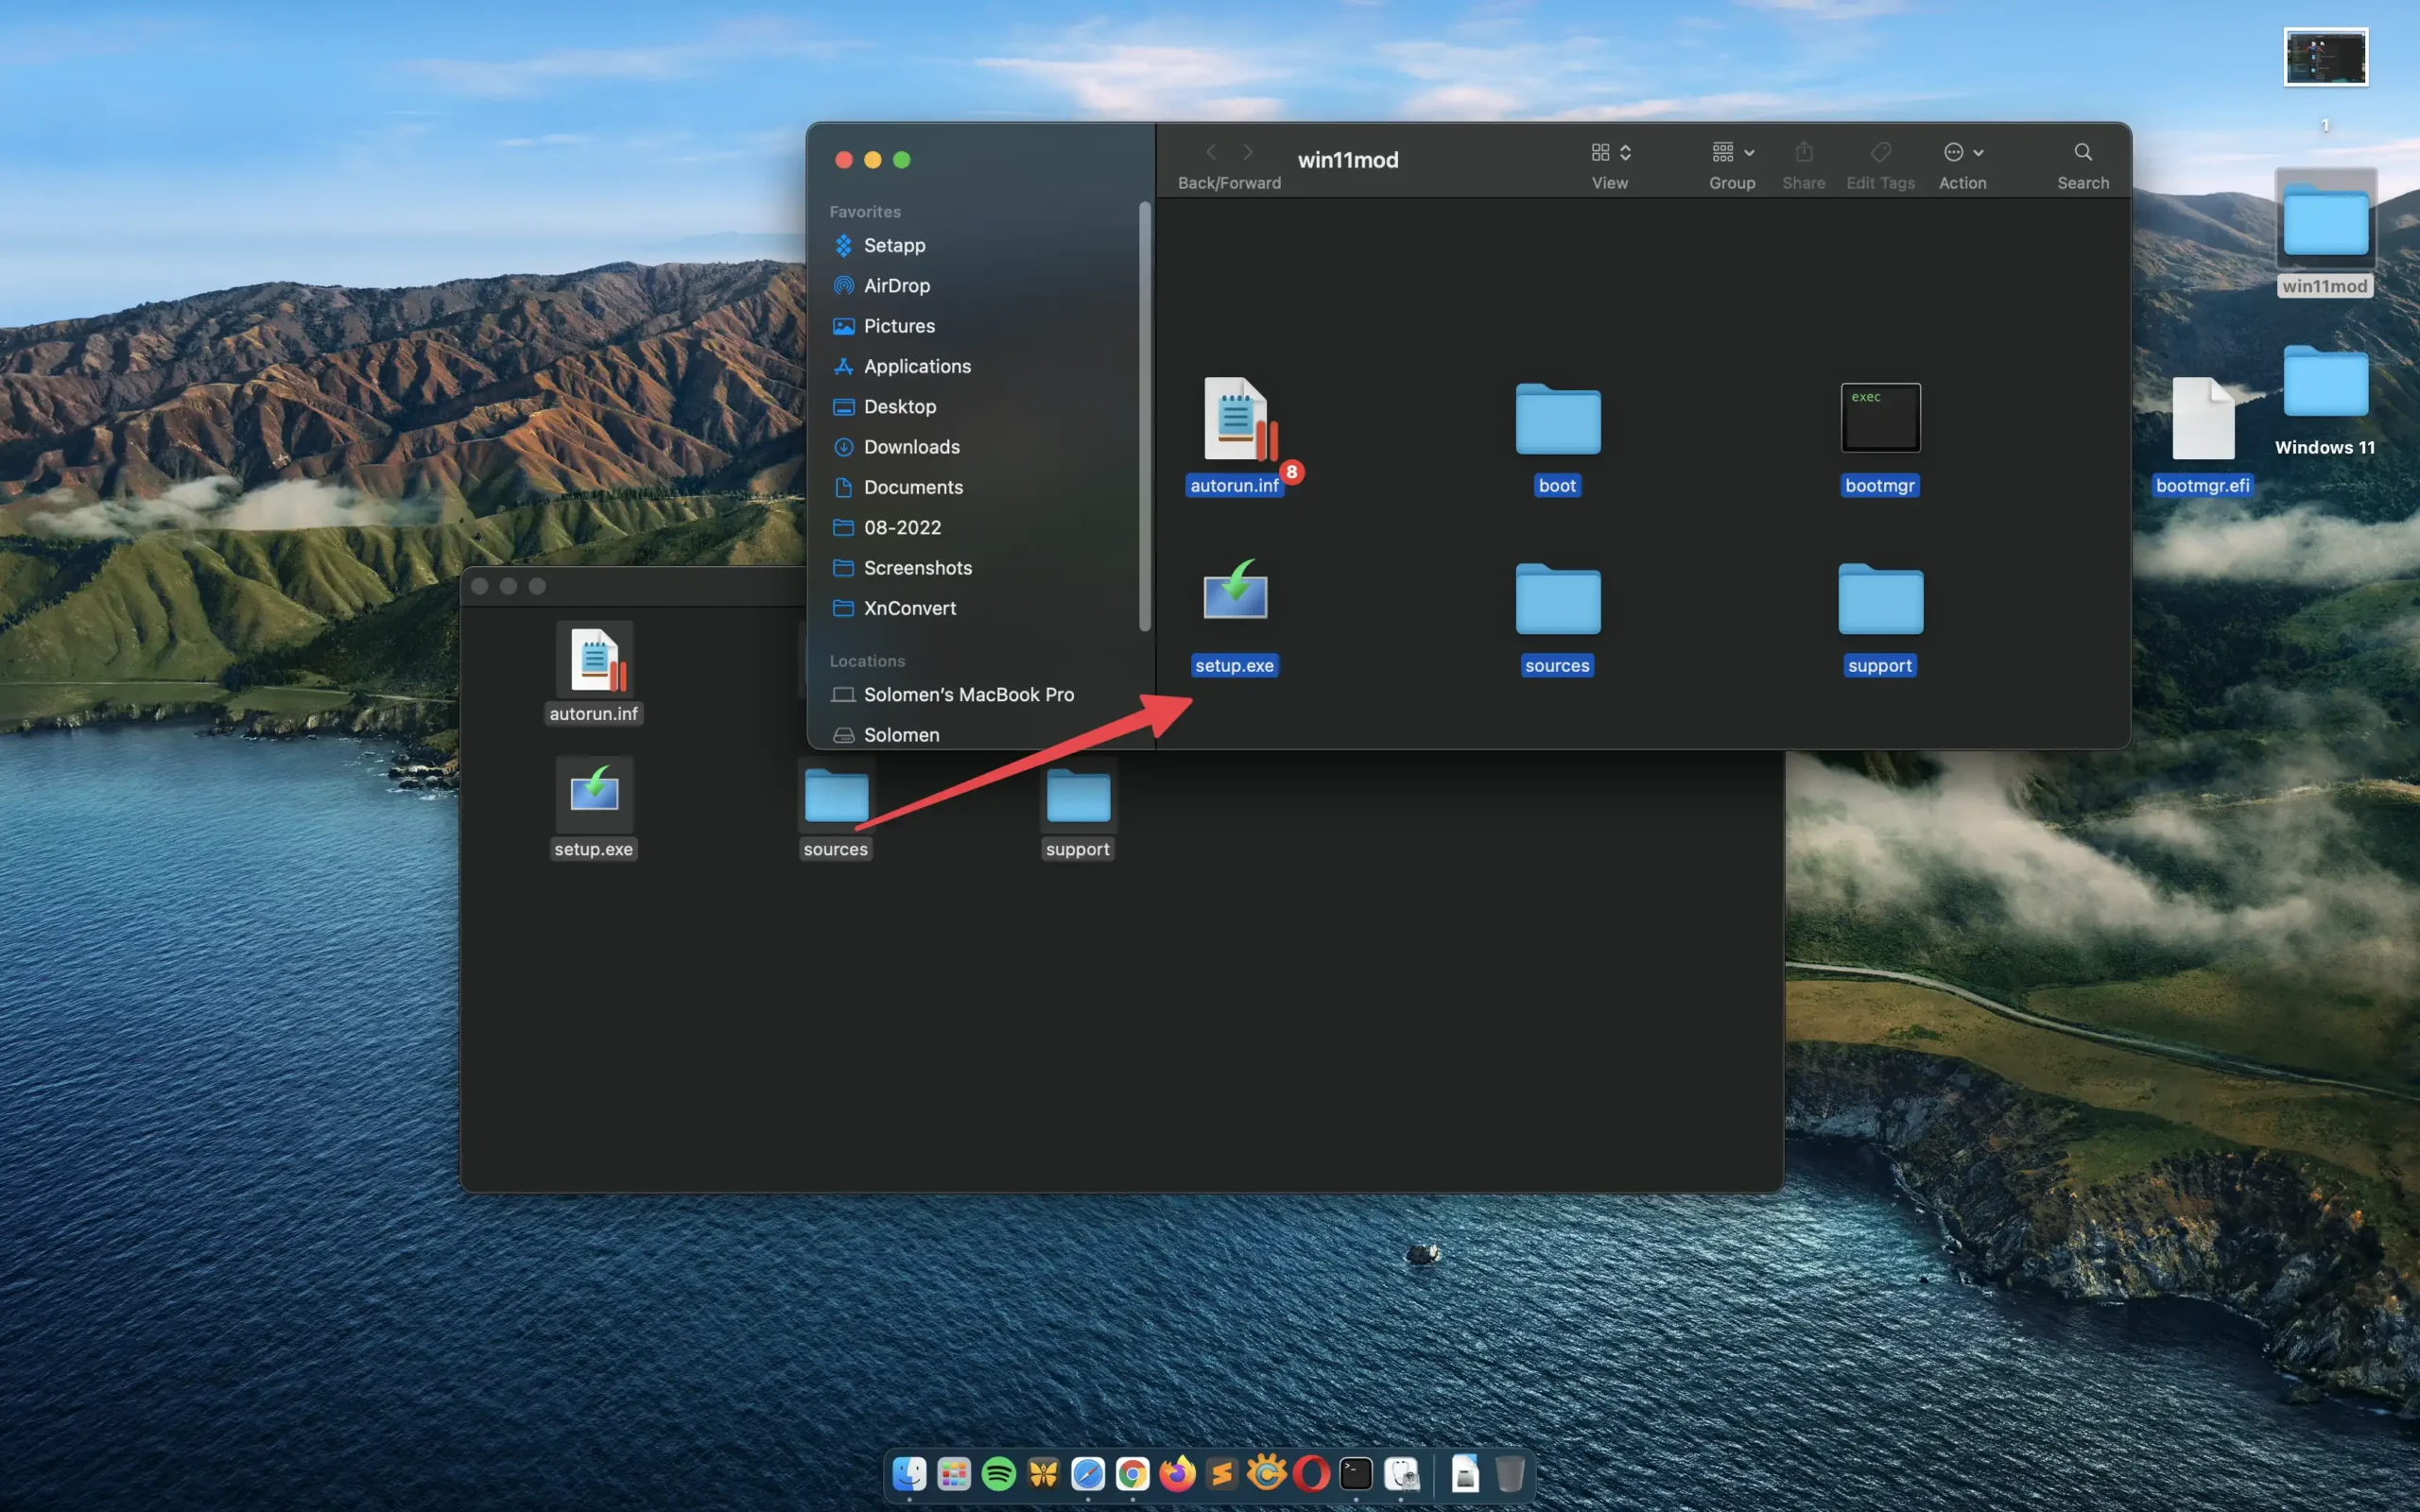
3. Now, create a new folder on your Desktop and name it “win11mod”. Paste all items you’ve copied in the previous step by pressing Command + V on your keyboard.
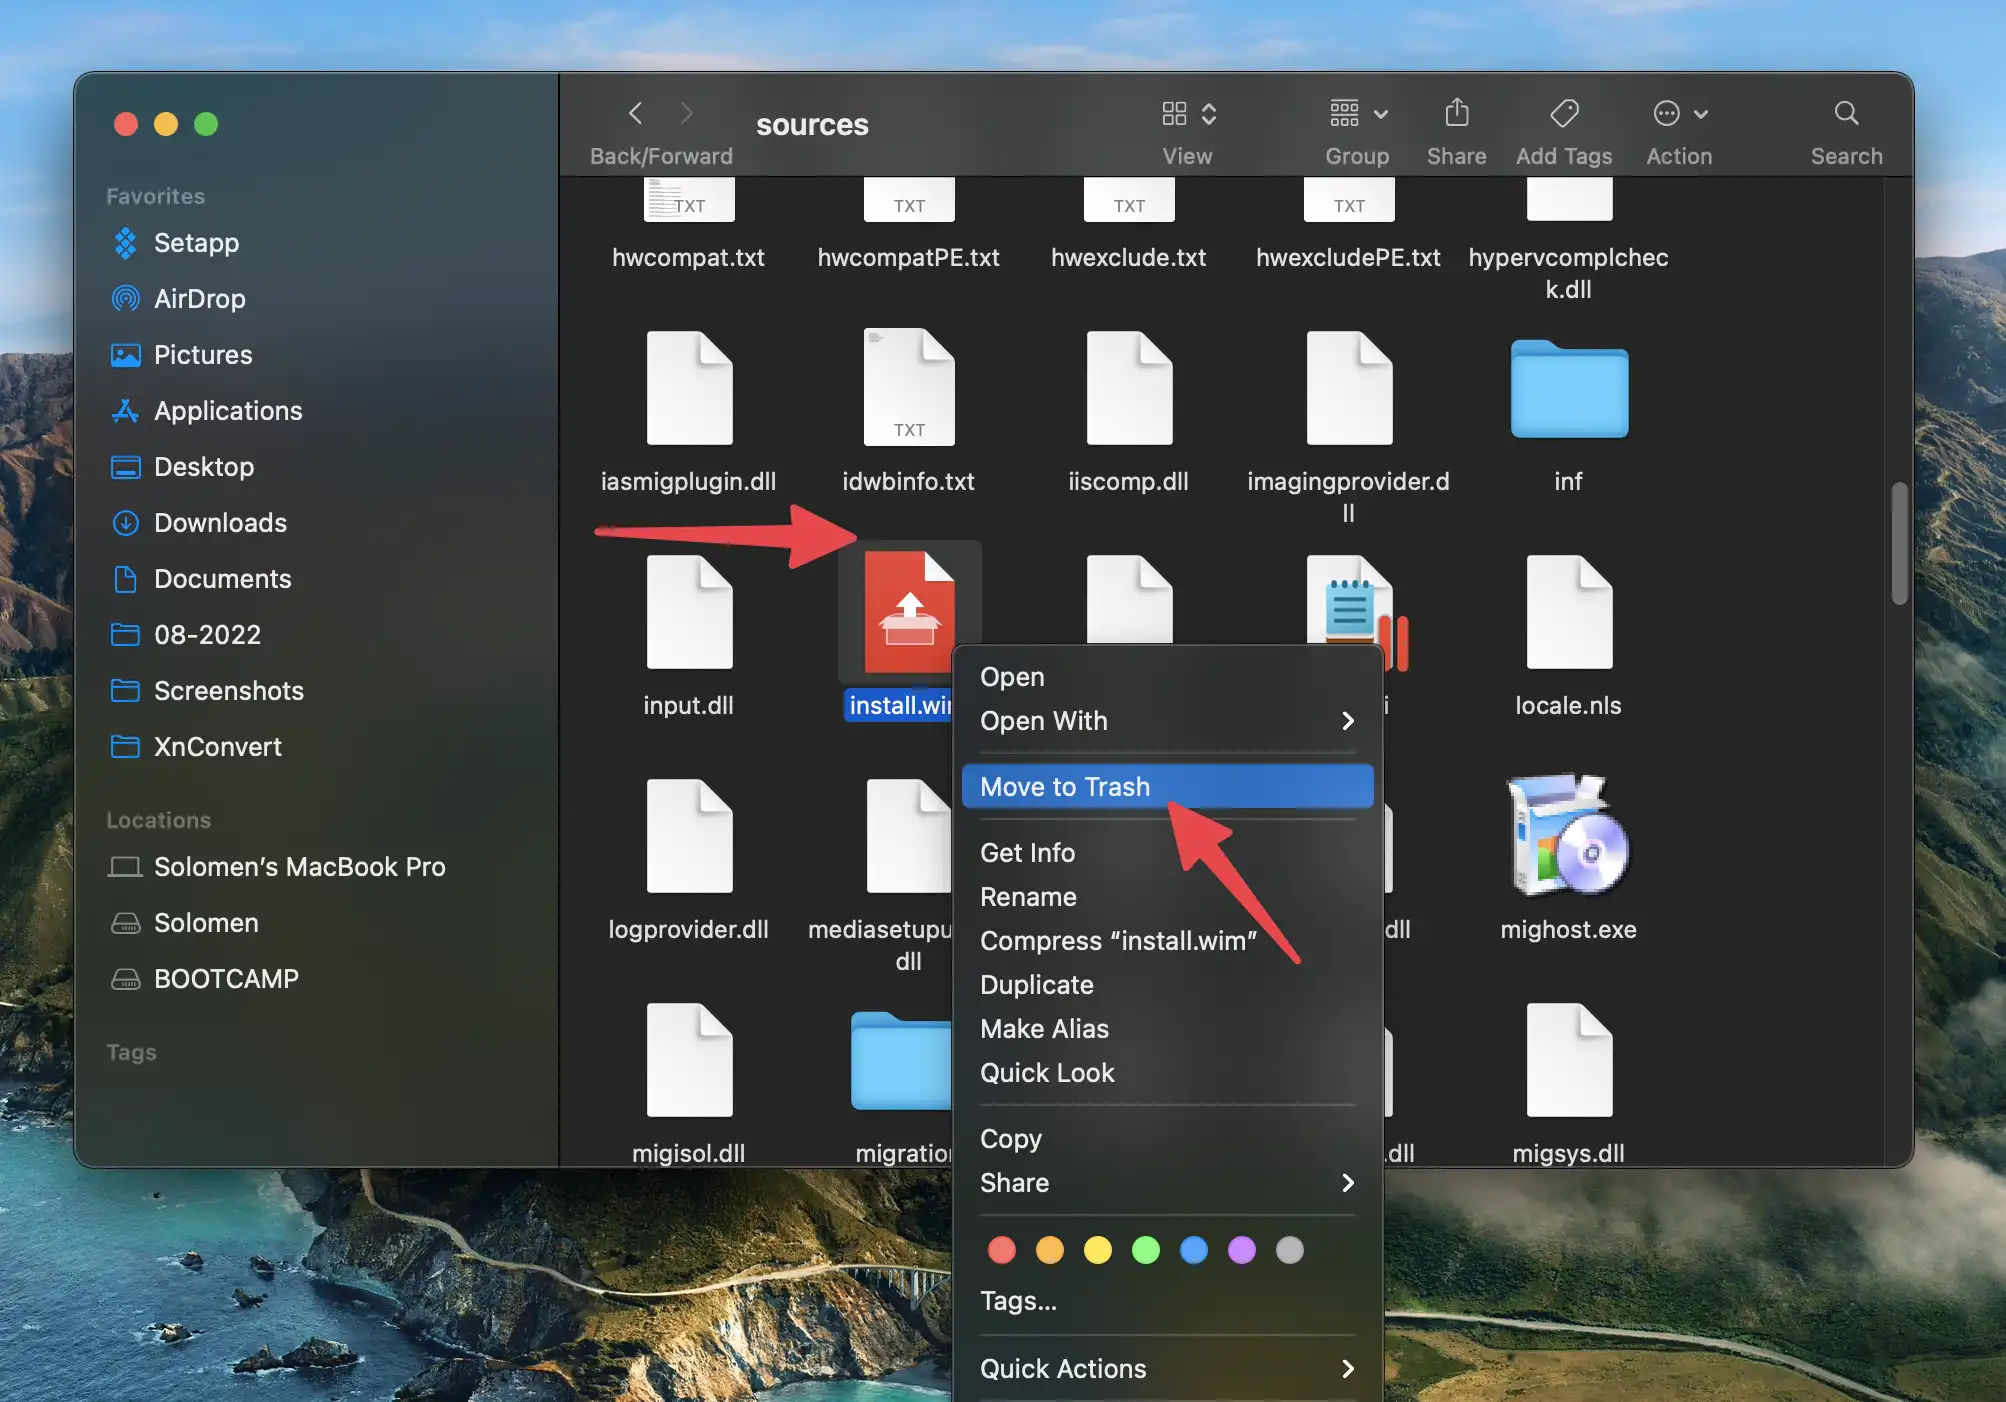
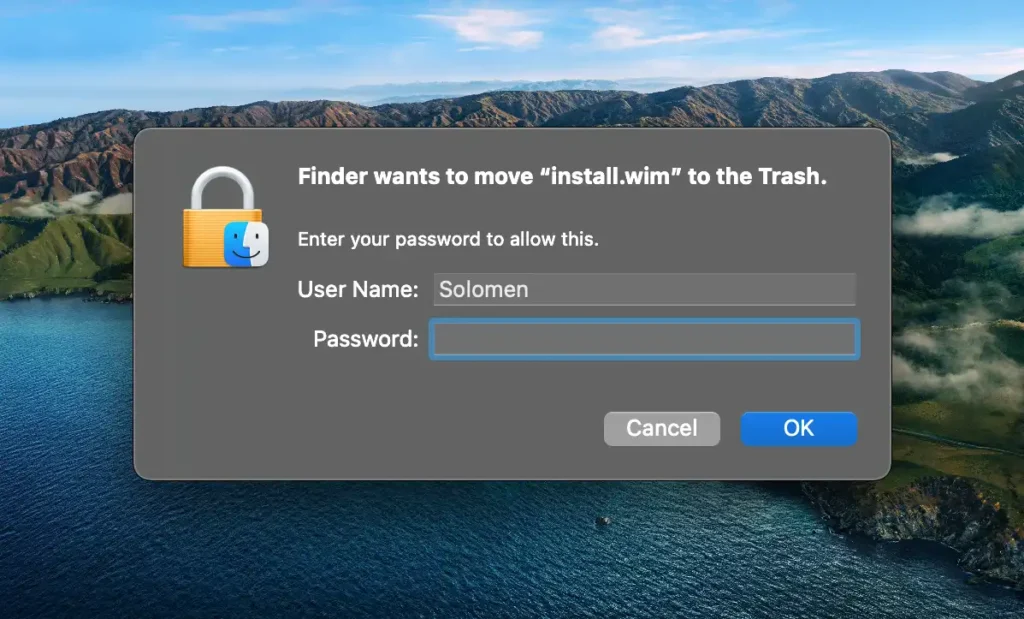
4. After that, open the “win11mod” folder, open the “source” folder, and then delete the install.wim file by right-clicking on it and selecting Move to Trash from the contextual menu.
Copy “install.wim” From Windows 11.iso to Desktop
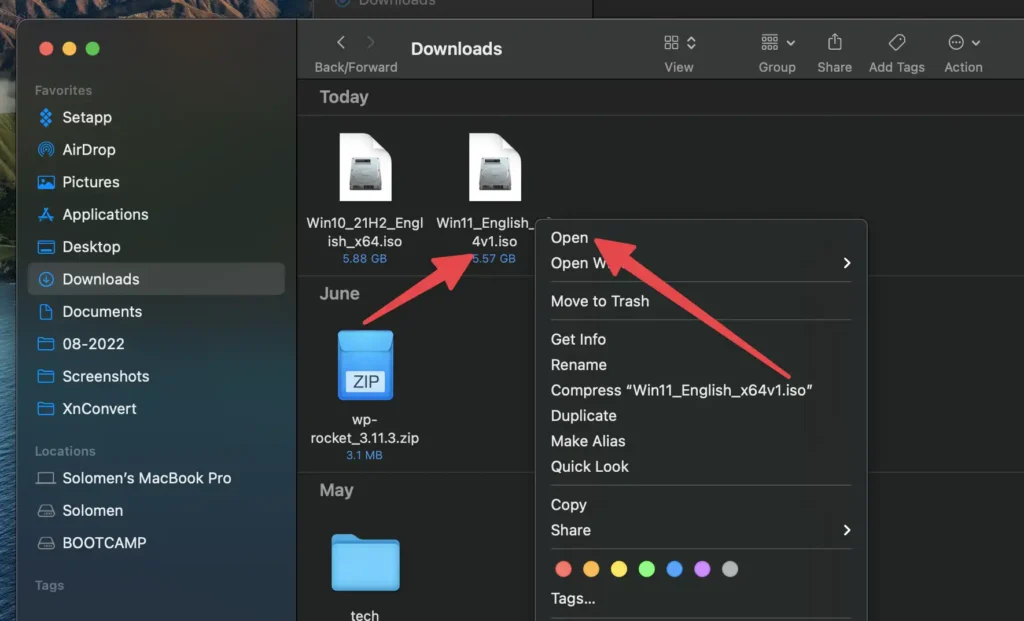
Now, open the Windows 11 ISO file you downloaded in the step above by double-clicking on it.
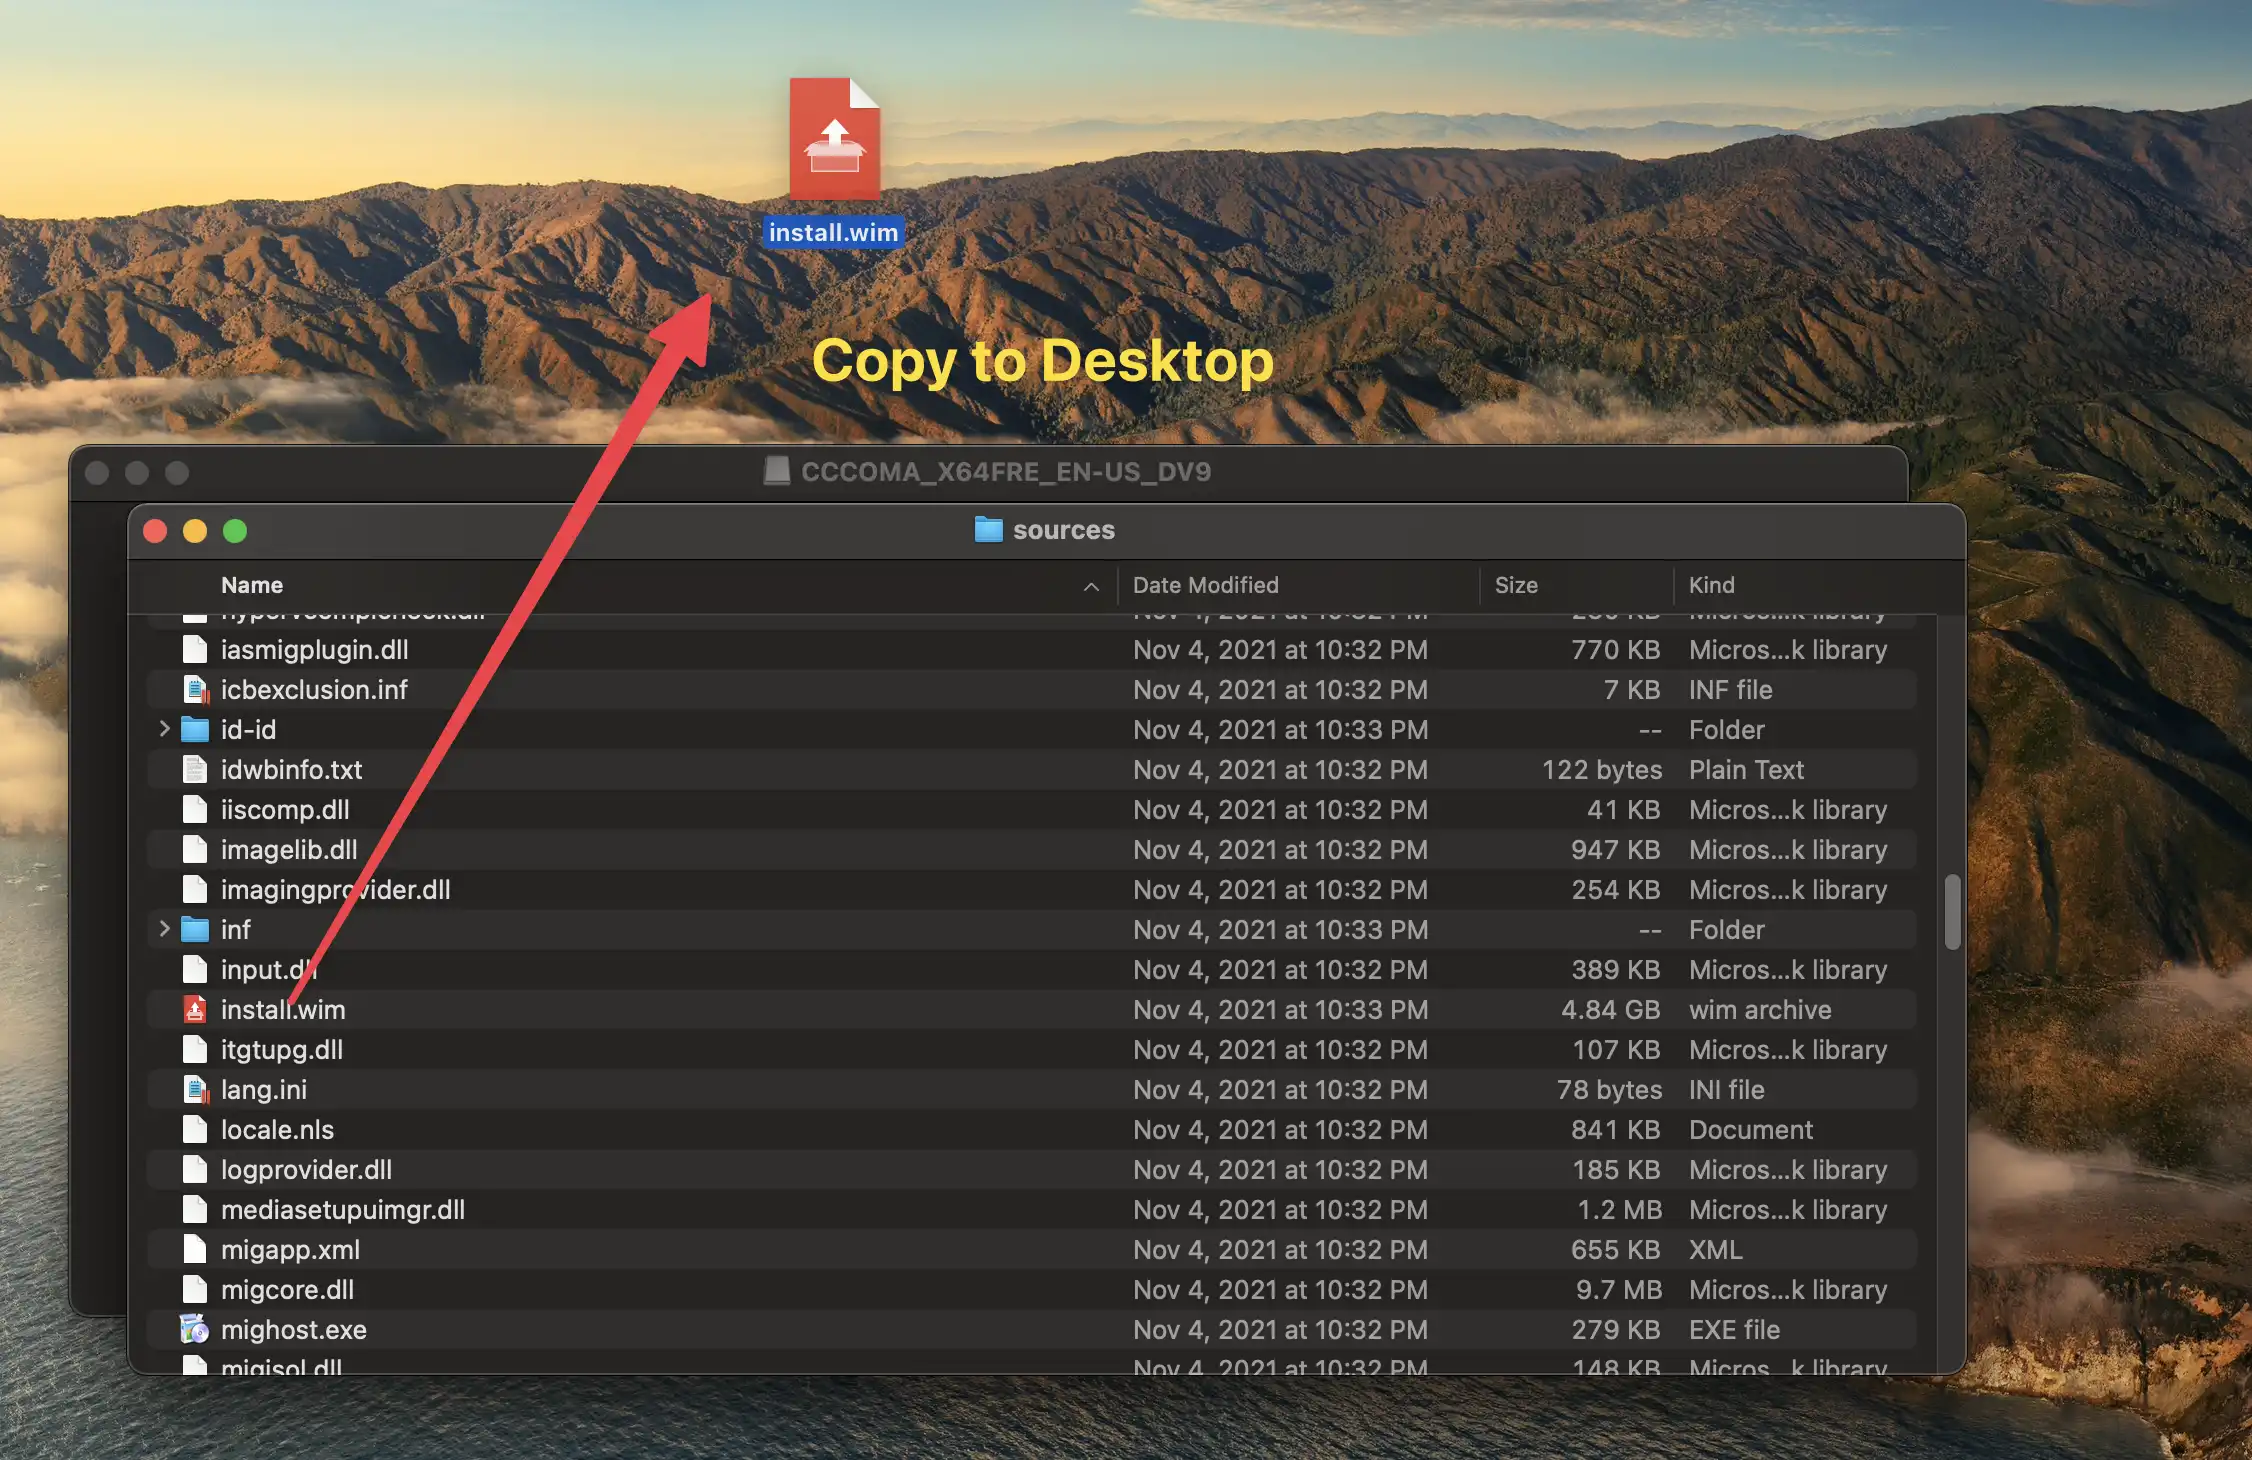
A new window will open with the contents of the ISO file. Open the “sources” folder and then copy the install.wim file by dragging it to your Desktop. Now, eject the Windows 11 ISO.
Make Windows 11 ISO Can Run on Mac
Terminal and Homebrew
What is Homebrew? Brew is a package management system for macOS that allows you to install software on your computer using the Terminal. With Brew, you can easily install software unavailable in the App Store.
1. Install Homebrew
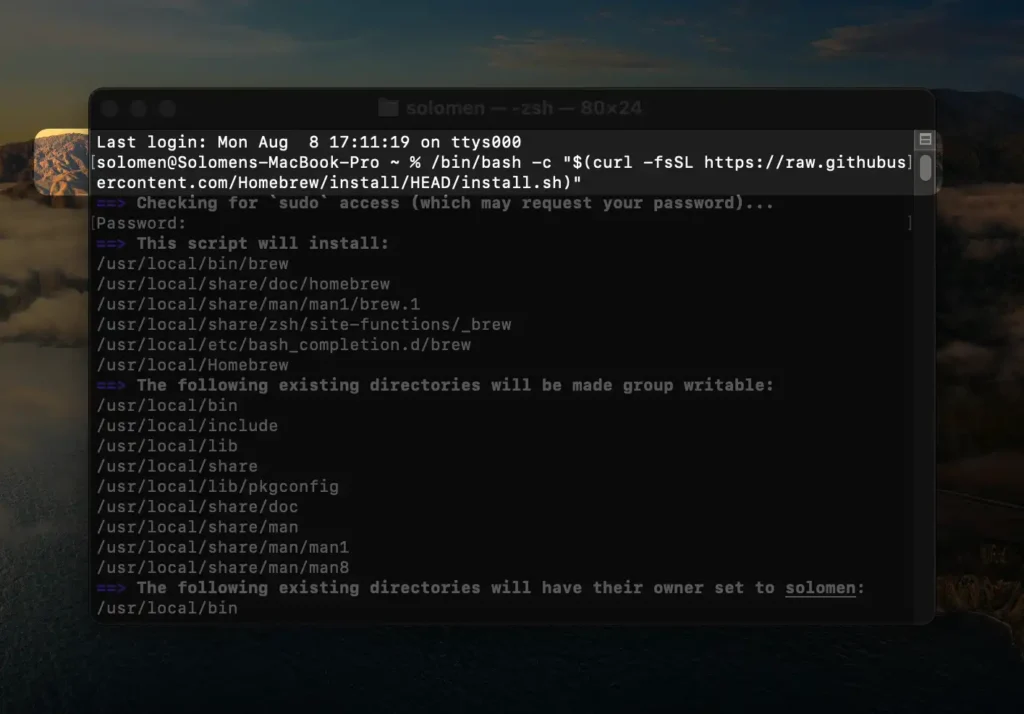
To install Homebrew, open the Terminal and then run the following Command:
/bin/bash -c "$(curl -fsSL https://raw.githubusercontent.com/Homebrew/install/HEAD/install.sh)"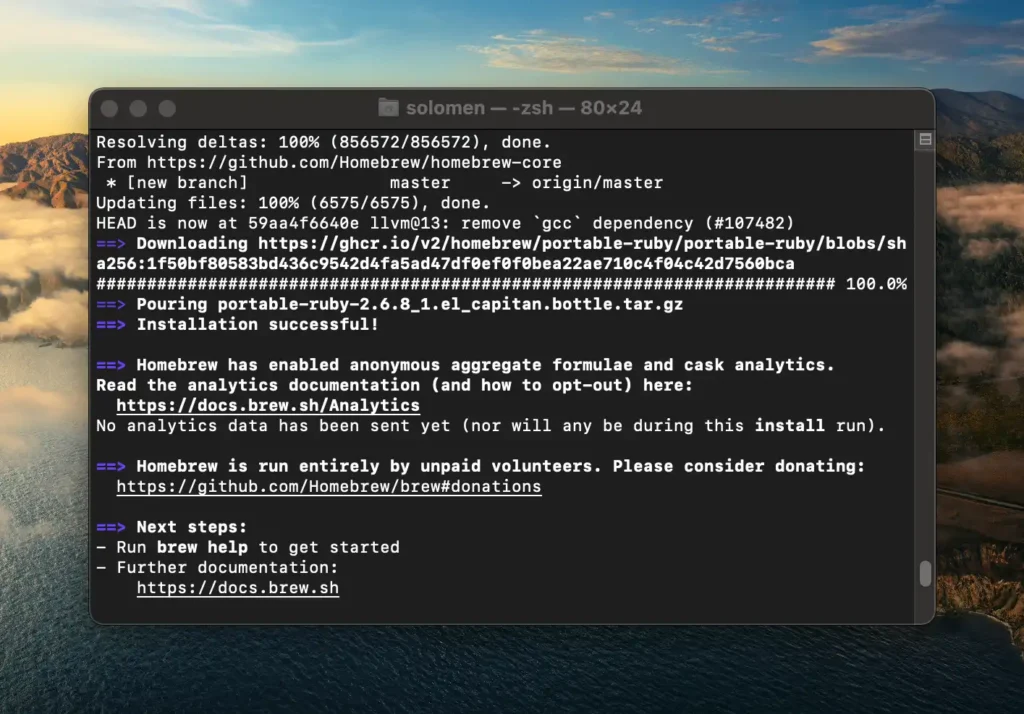
2. Install wimlib
To install wimlib, run the following Command in the Terminal:
brew install wimlib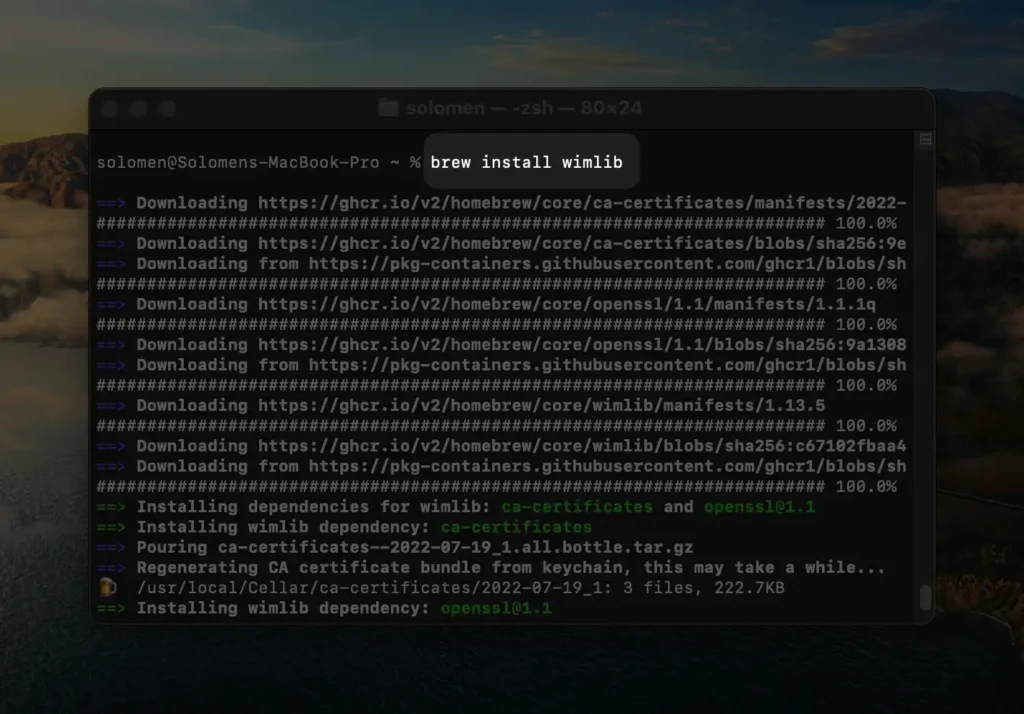
When you see this message, you are ready to continue. It takes around 7 minutes to install both Homebrew and wimlib.
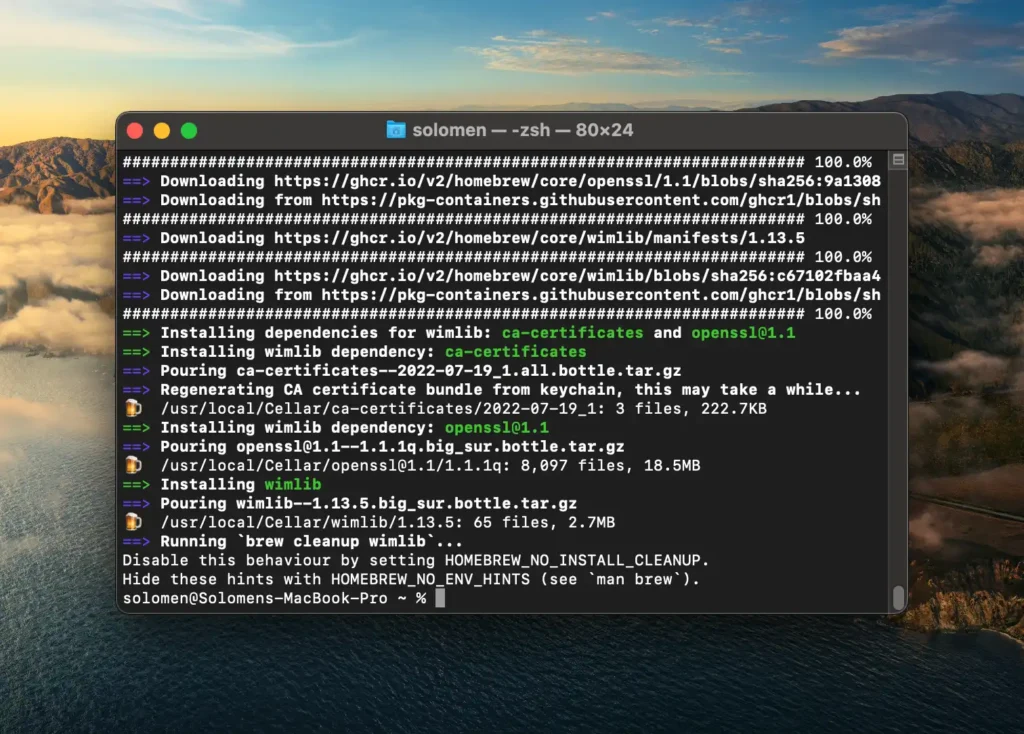
3. Splitting the “install.wim” file on the Desktop
In the step above, you’ve copied the “install.wim” file from Windows 11 ISO to your Desktop. Please copy the following Command and paste it into Terminal, then hit Enter.
cd ~/Desktop
wimlib-imagex split install.wim install.swm 3500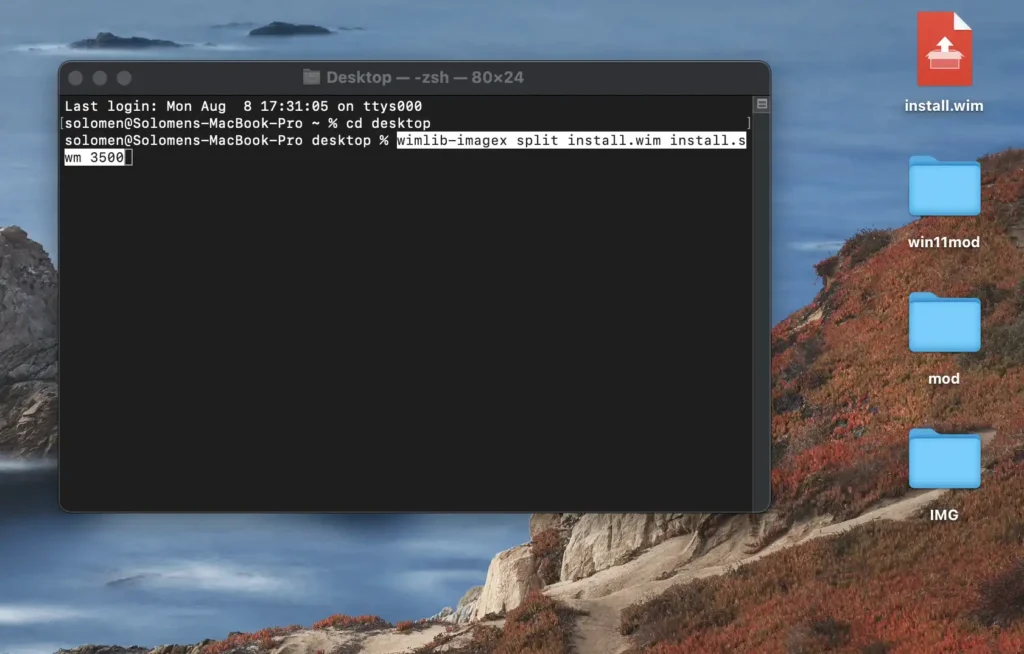
Important:
- This Command works only when the “install.wim” file is on your Desktop.
- Hit Enter for each line of the Command above.
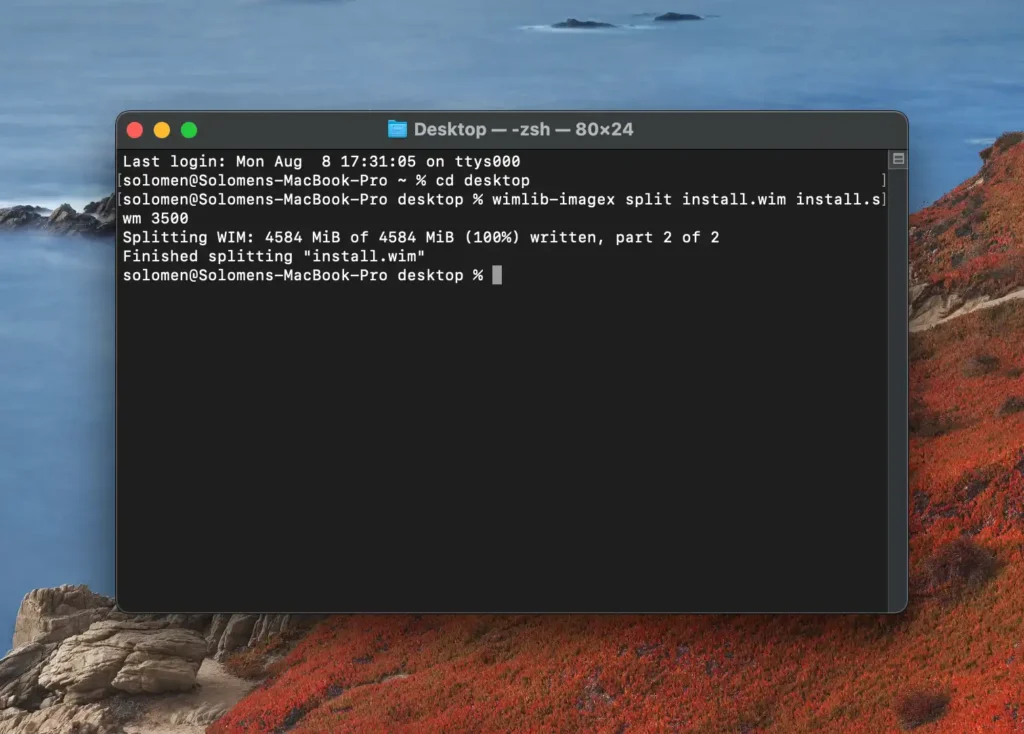
4. Creating a new folder and copying the split files
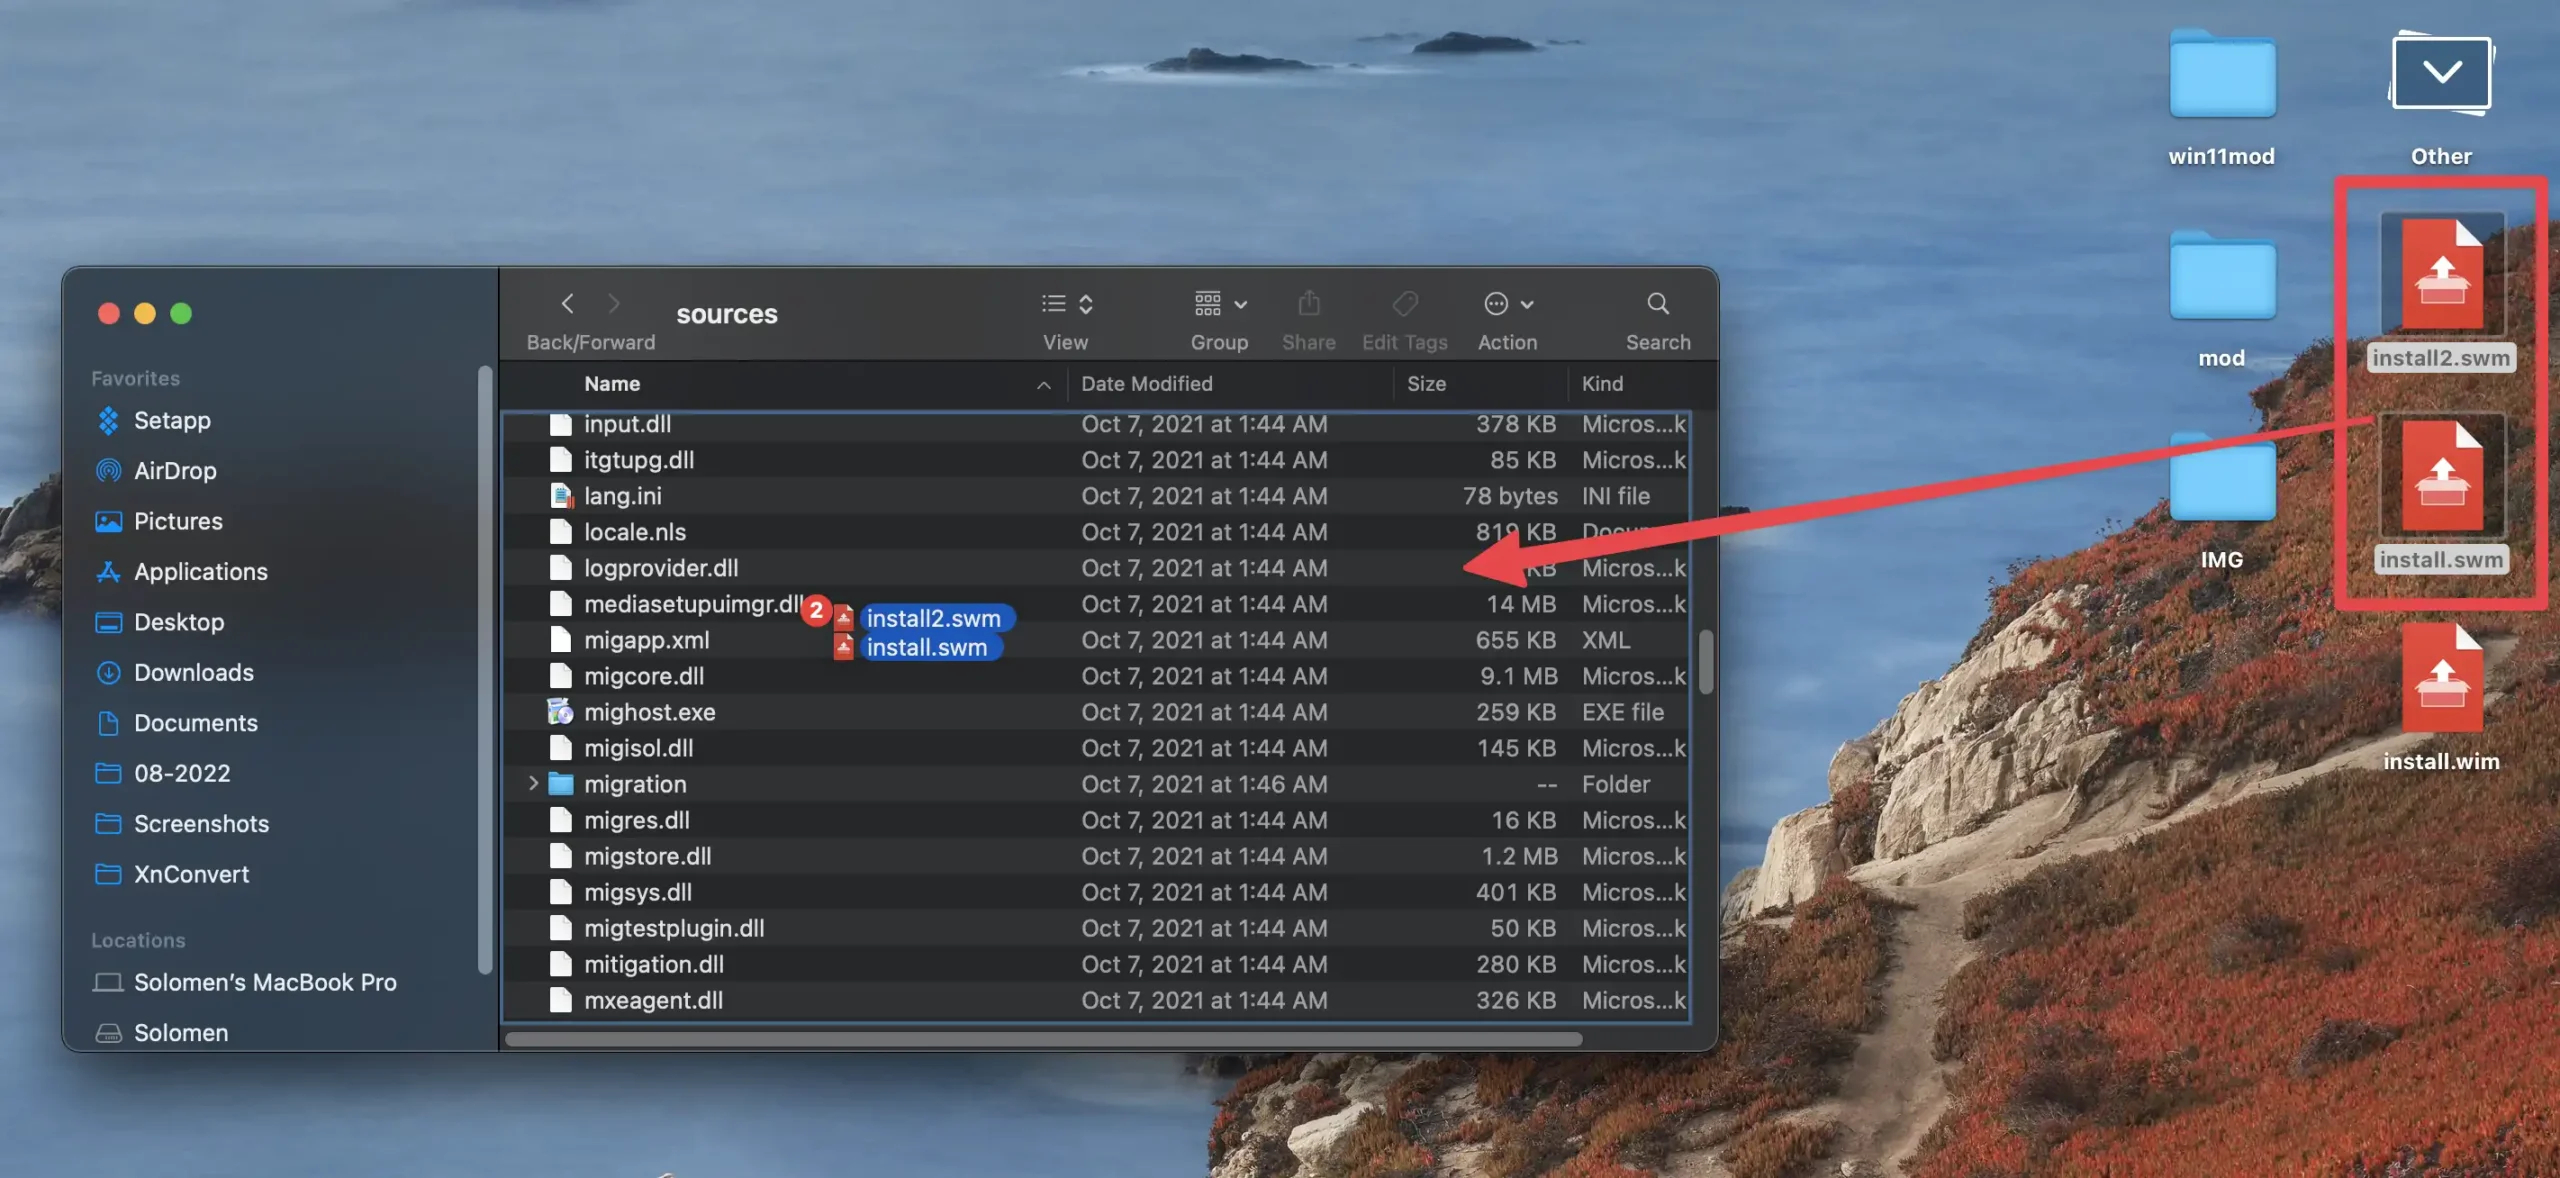
After splitting the “install.wim” file, you must copy both install.swm and install2.swm files into “win11mod” > “source” folder.
Enter your Mac password when prompted and then hit Enter or OK.
Now, we are ready to convert the “win11mod” folder to the win11mod.iso file. We can run Windows 11 on a Mac and Intel processor with a new ISO without issues.
Converting the “win11mod” folder to a CDR file
In macOS, we can quickly create an ISO file from a folder without third-party software. Follow the steps below to create an ISO file from the “win11mod” folder.
1. Open Disk Utility. Press Command + Space on your keyboard to open Spotlight Search. Type “disk utility” in the search field and select Disk Utility.app from the search results. Or open it from LaunchPad.
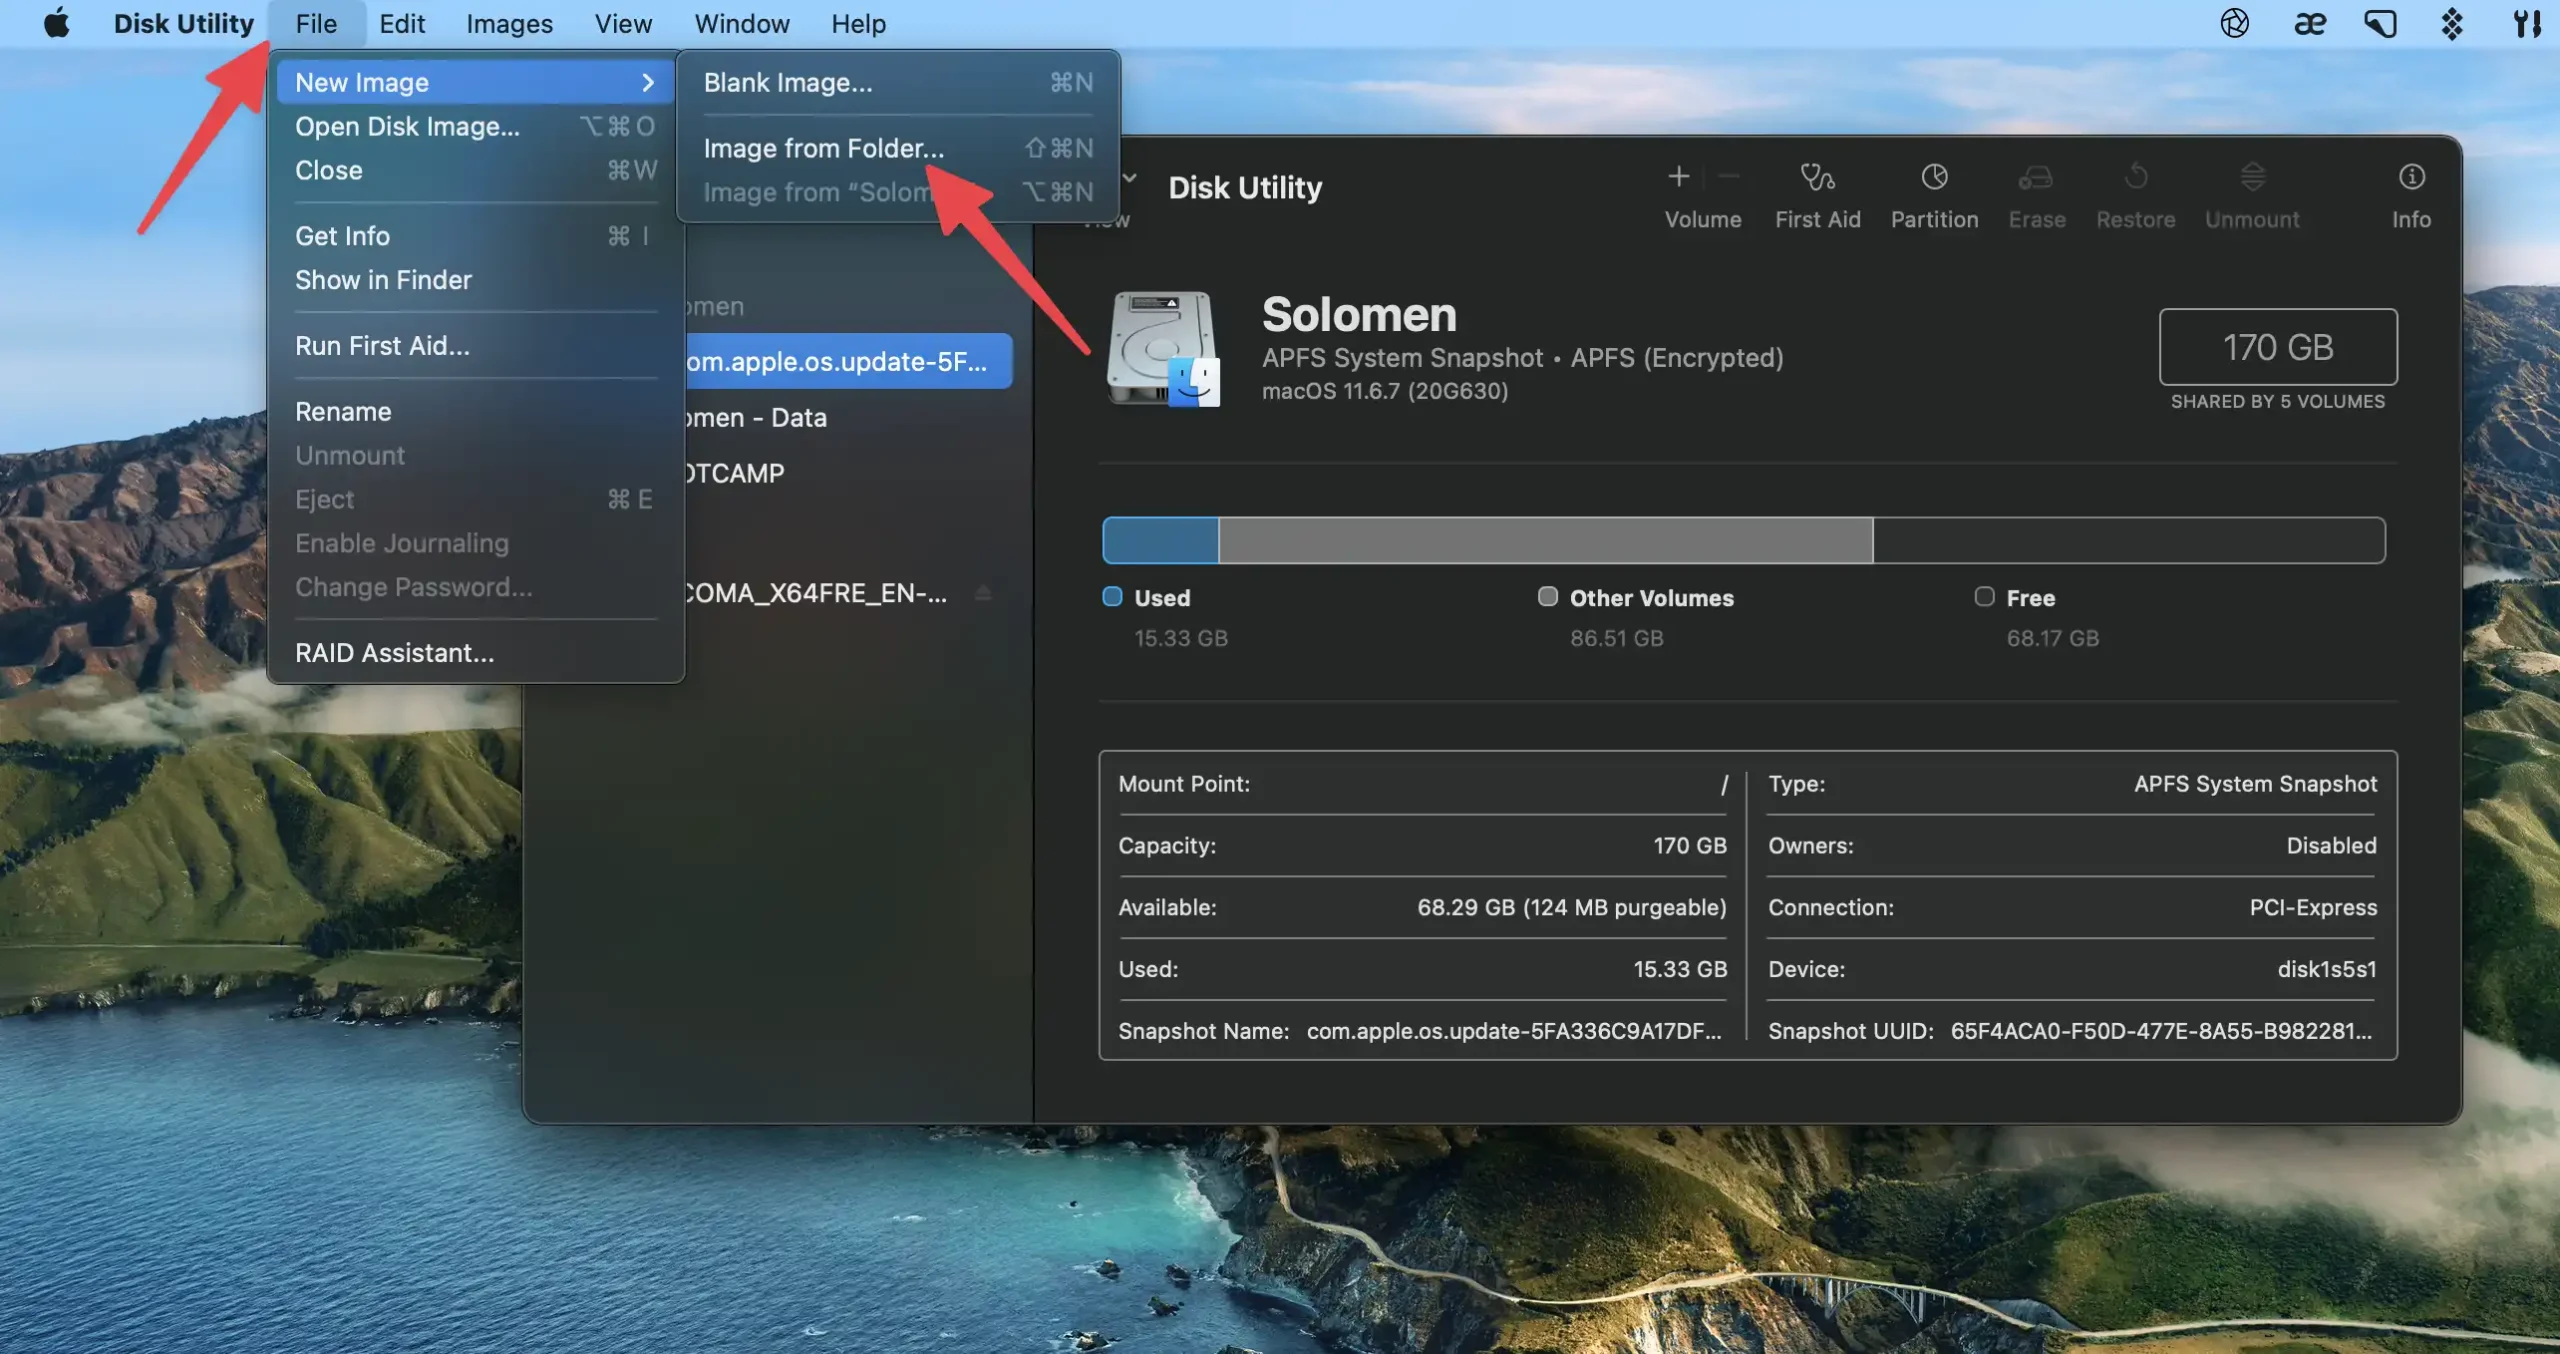
2. Select File from the menu bar and click New Image > Image From Folder…
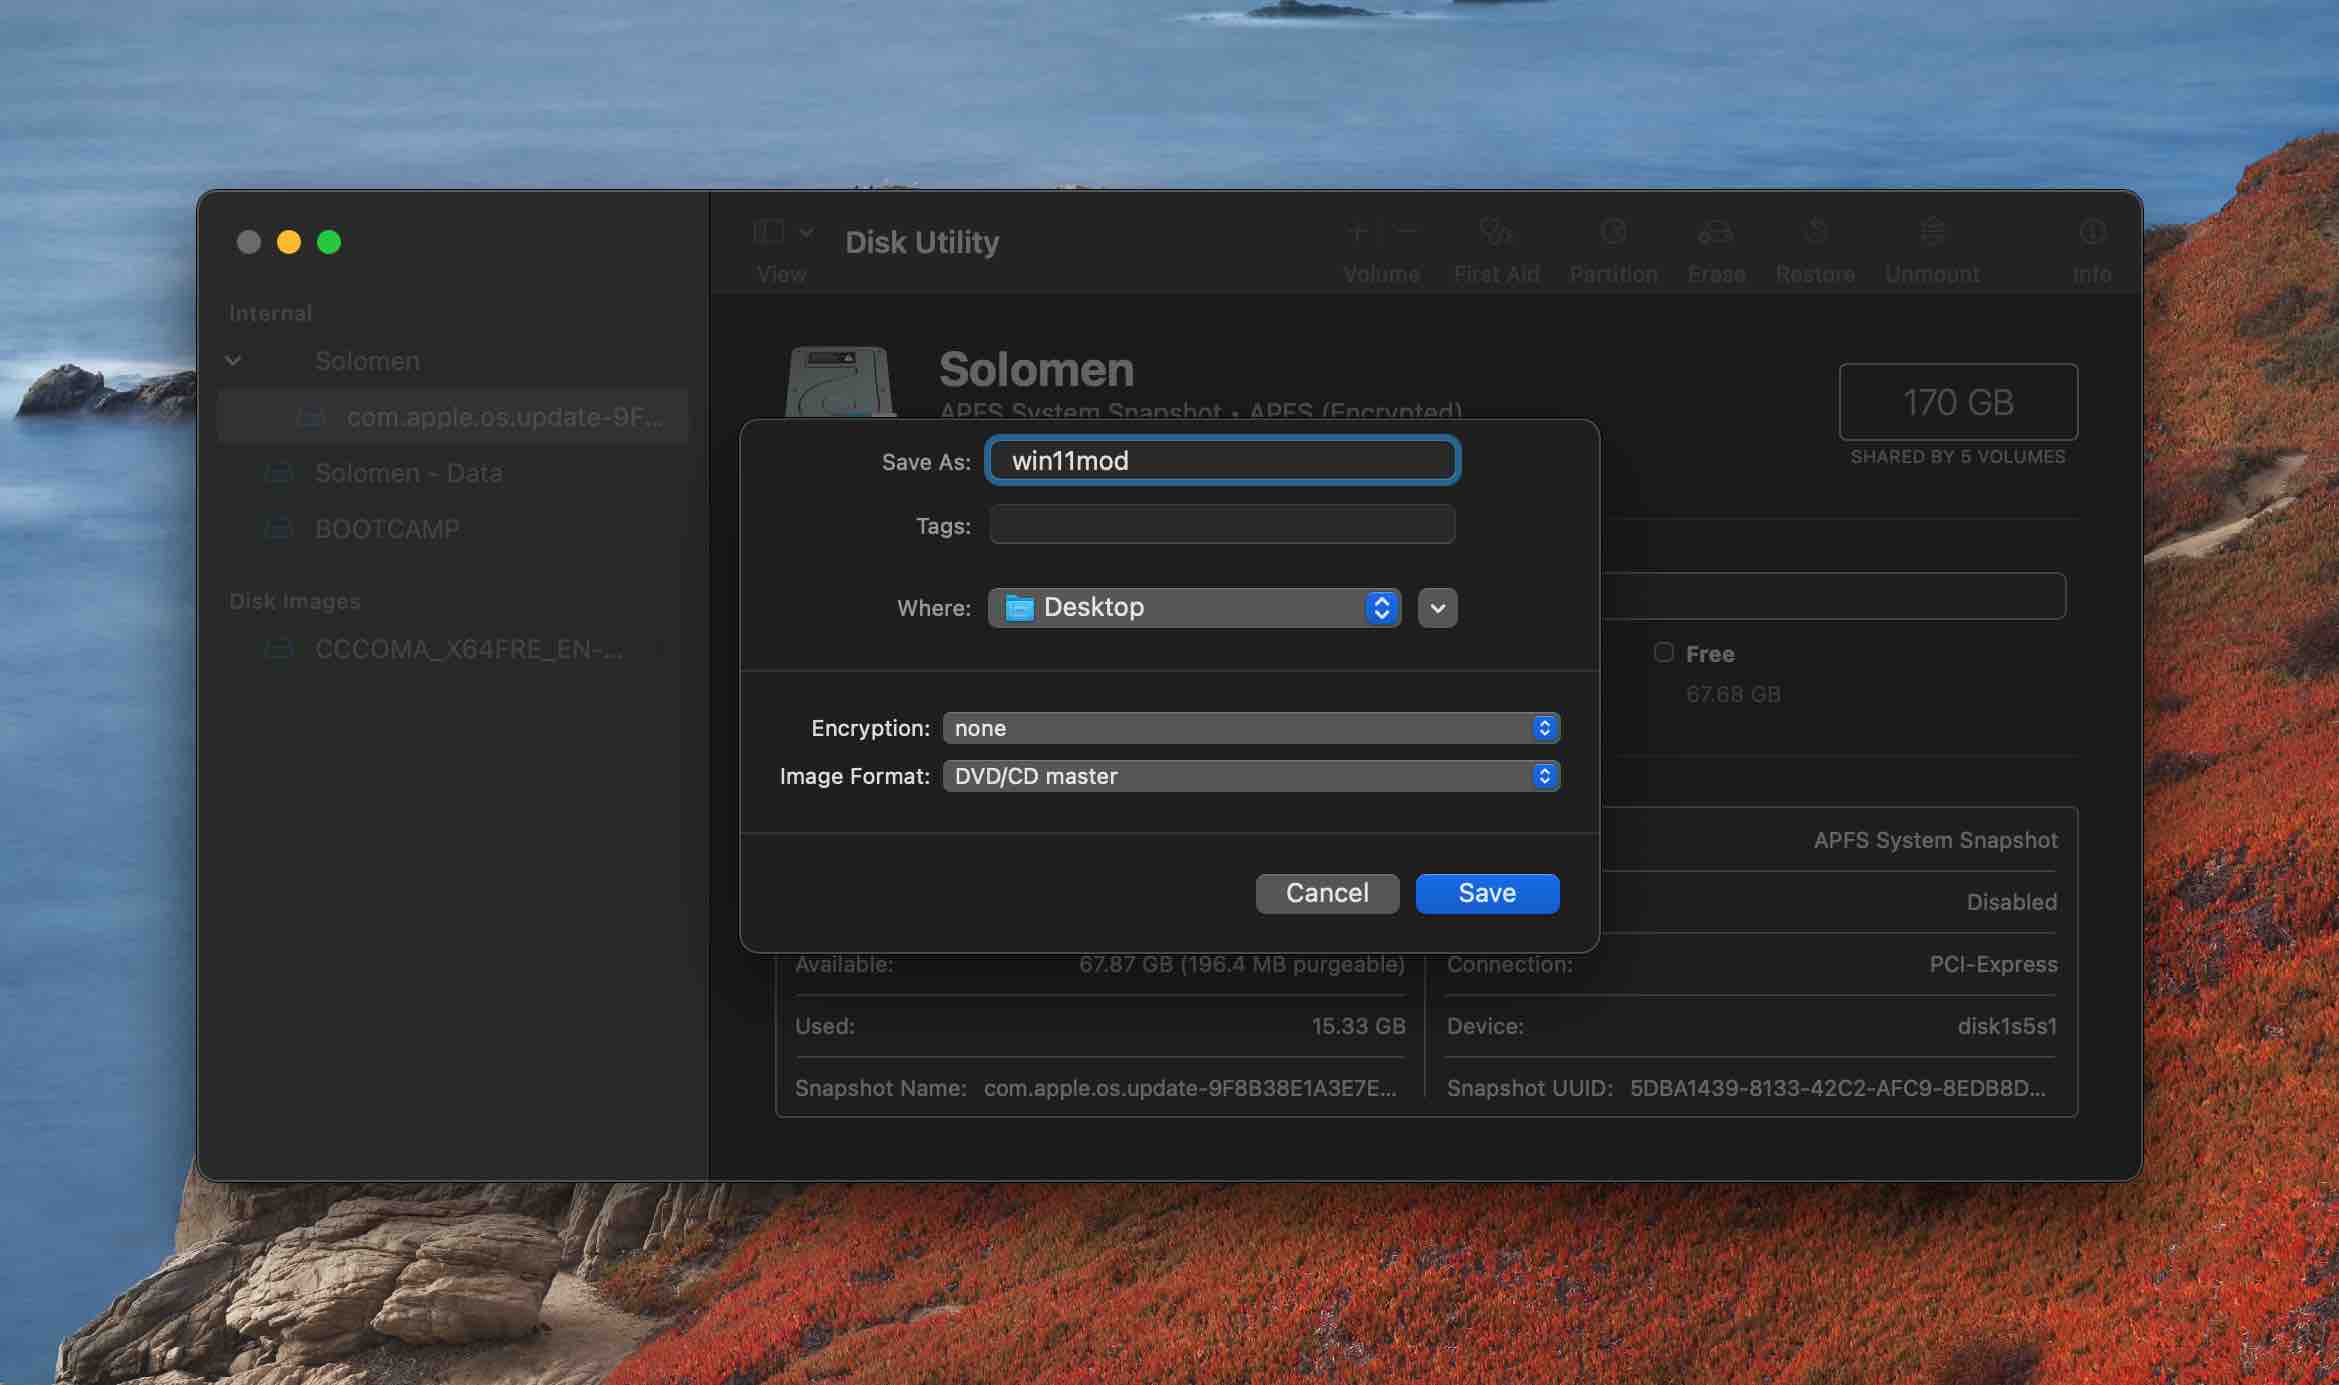
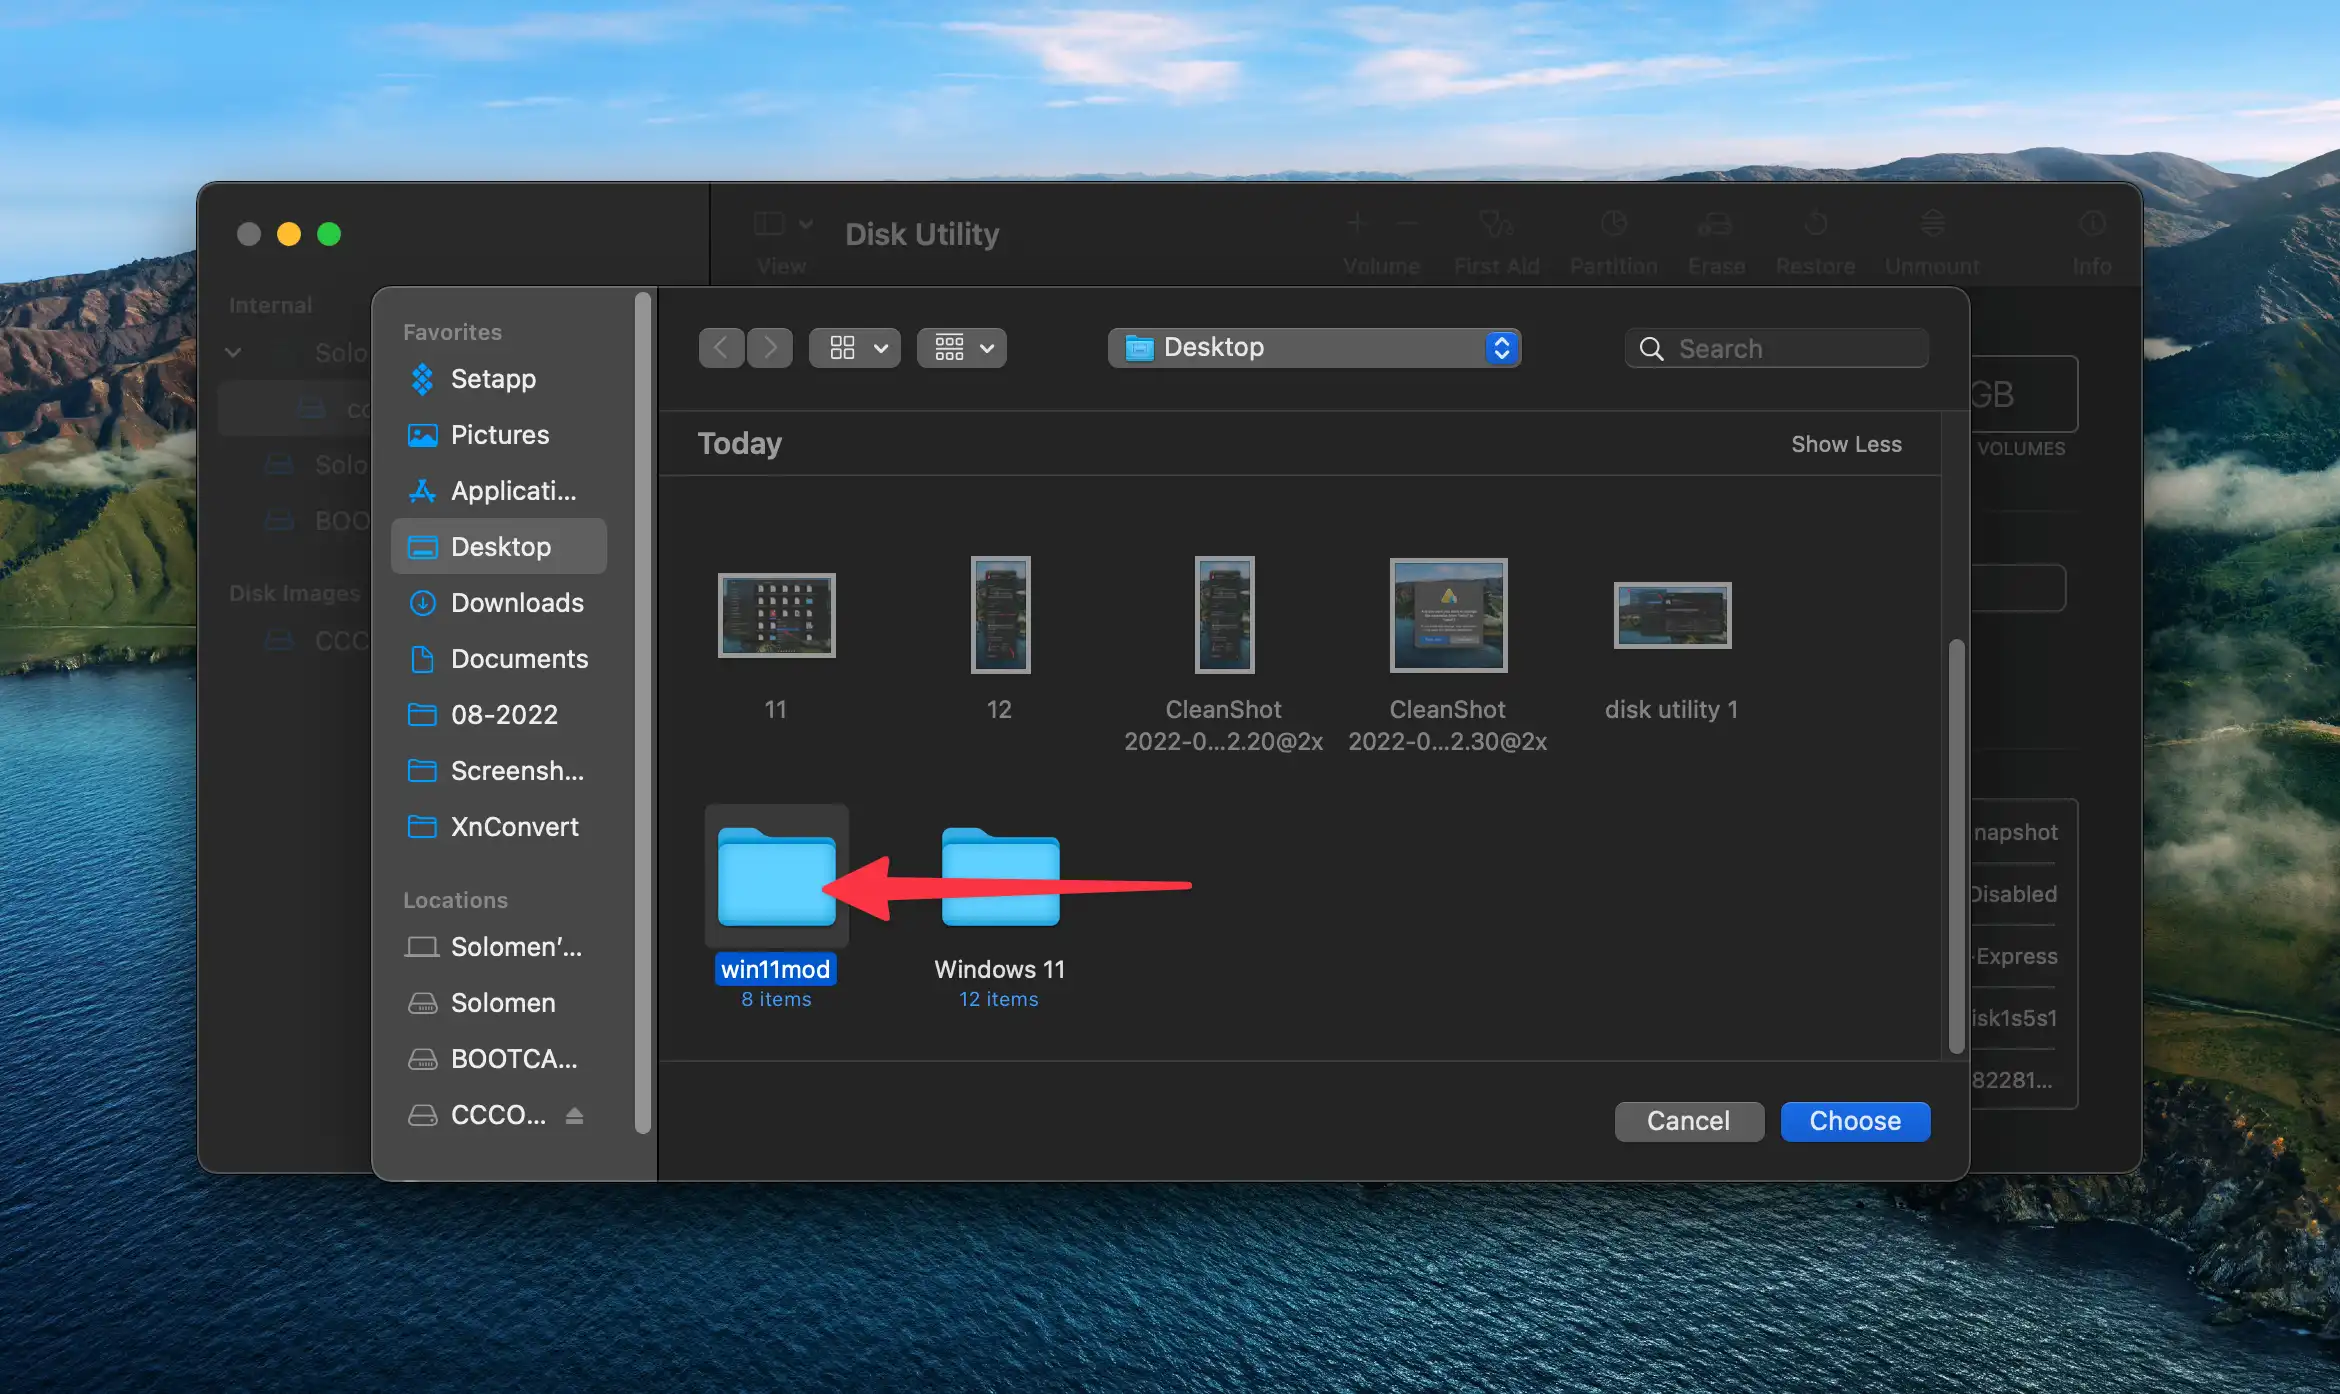
3. In the new window, select the “win11mod” folder we’ve created above and click Open.
4. In the next window, make sure that CD/DVD Master is selected in the Image Format drop-down menu and then click Save.
This will create a new file on your Desktop with the win11mod.cdr. Now, just one more step, we are ready to run Windows 11 on a Mac.
Converting the CDR file to an ISO file
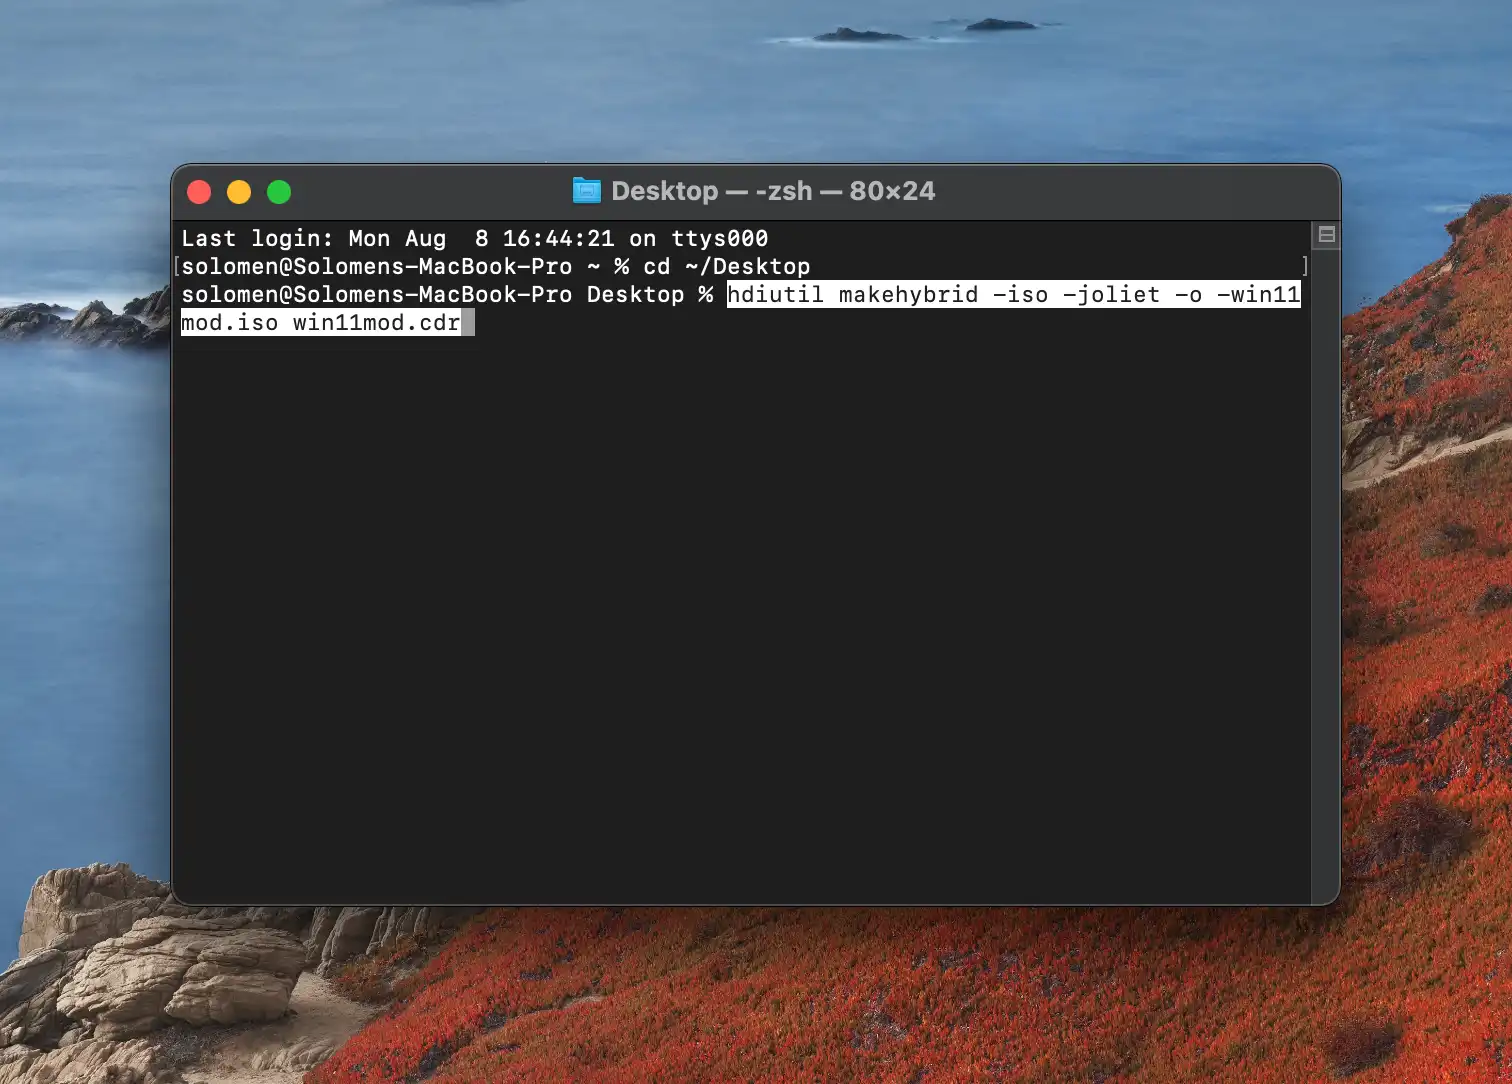
To convert the CDR file to an ISO file, open the Terminal and then run the following Command:
hdiutil makehybrid -iso -joliet -o ~/Desktop/win11mod.iso ~/Desktop/win11mod.cdror
cd ~/Desktop
hdiutil makehybrid -iso -joliet -o -win11mod.iso win11mod.cdr
This will create a new ISO file on your Desktop with win11mod.iso. Now, we are ready to run Windows 11 on our Mac!
Running Windows 11 On A Mac
We can install Windows 11 on a Mac now that we have the ISO file.
1. Open Boot Camp Assistant.
2. In the next window, click on the Continue button. Then select the ISO Image option and click on the Browse…button.
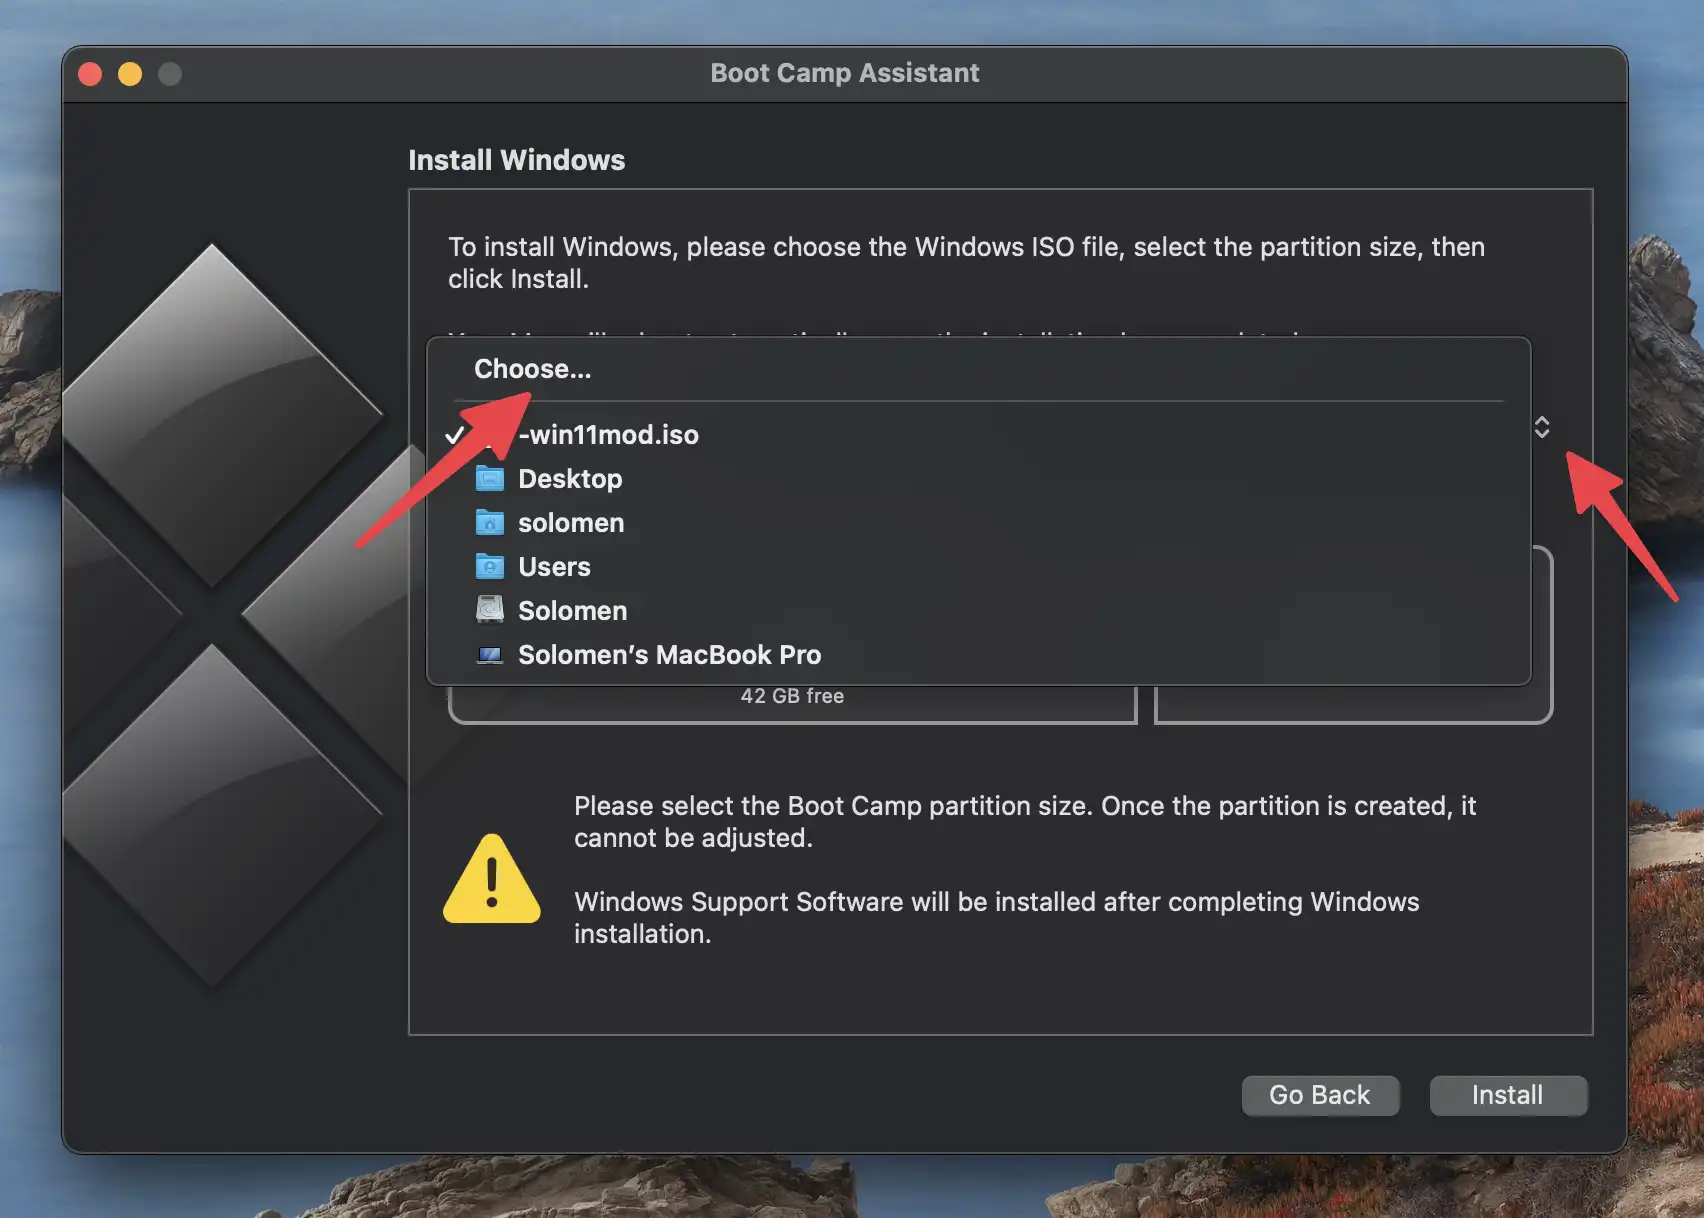
3. In the new window, select the win11mod.iso file we’ve created above and click Open. Choose the Boot Camp Partition size…
Then click on the Install button to proceed.
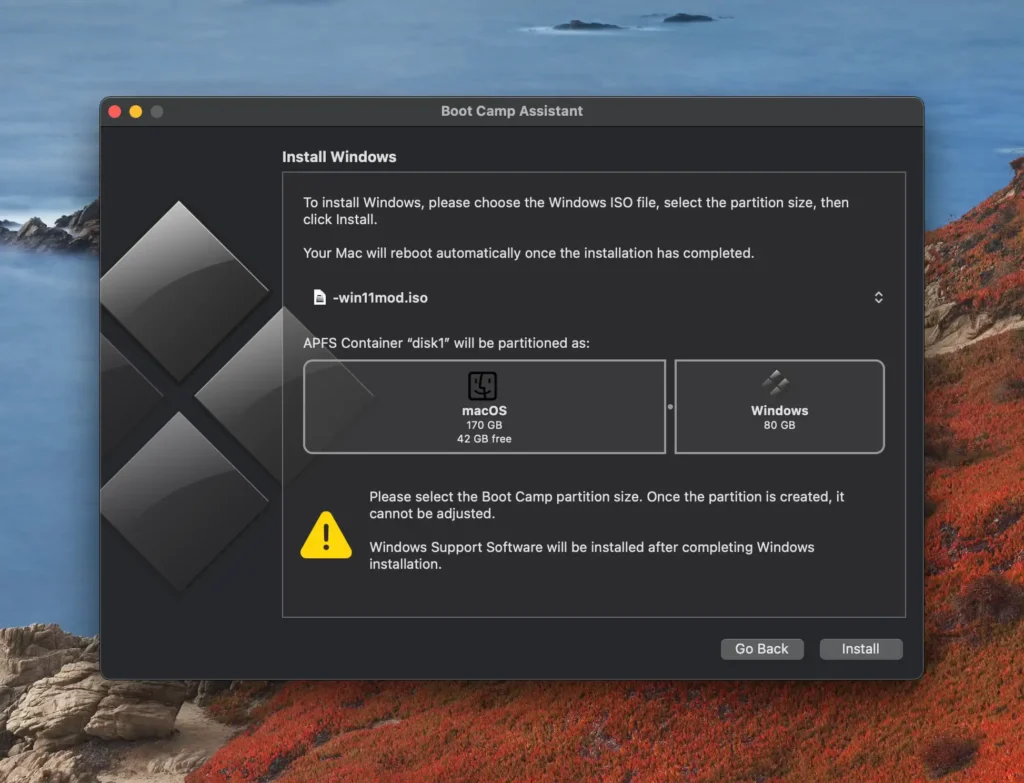
Please wait for the process to complete, and do not interrupt it. Your Mac will automatically restart and boot into the Windows 11 installation process.
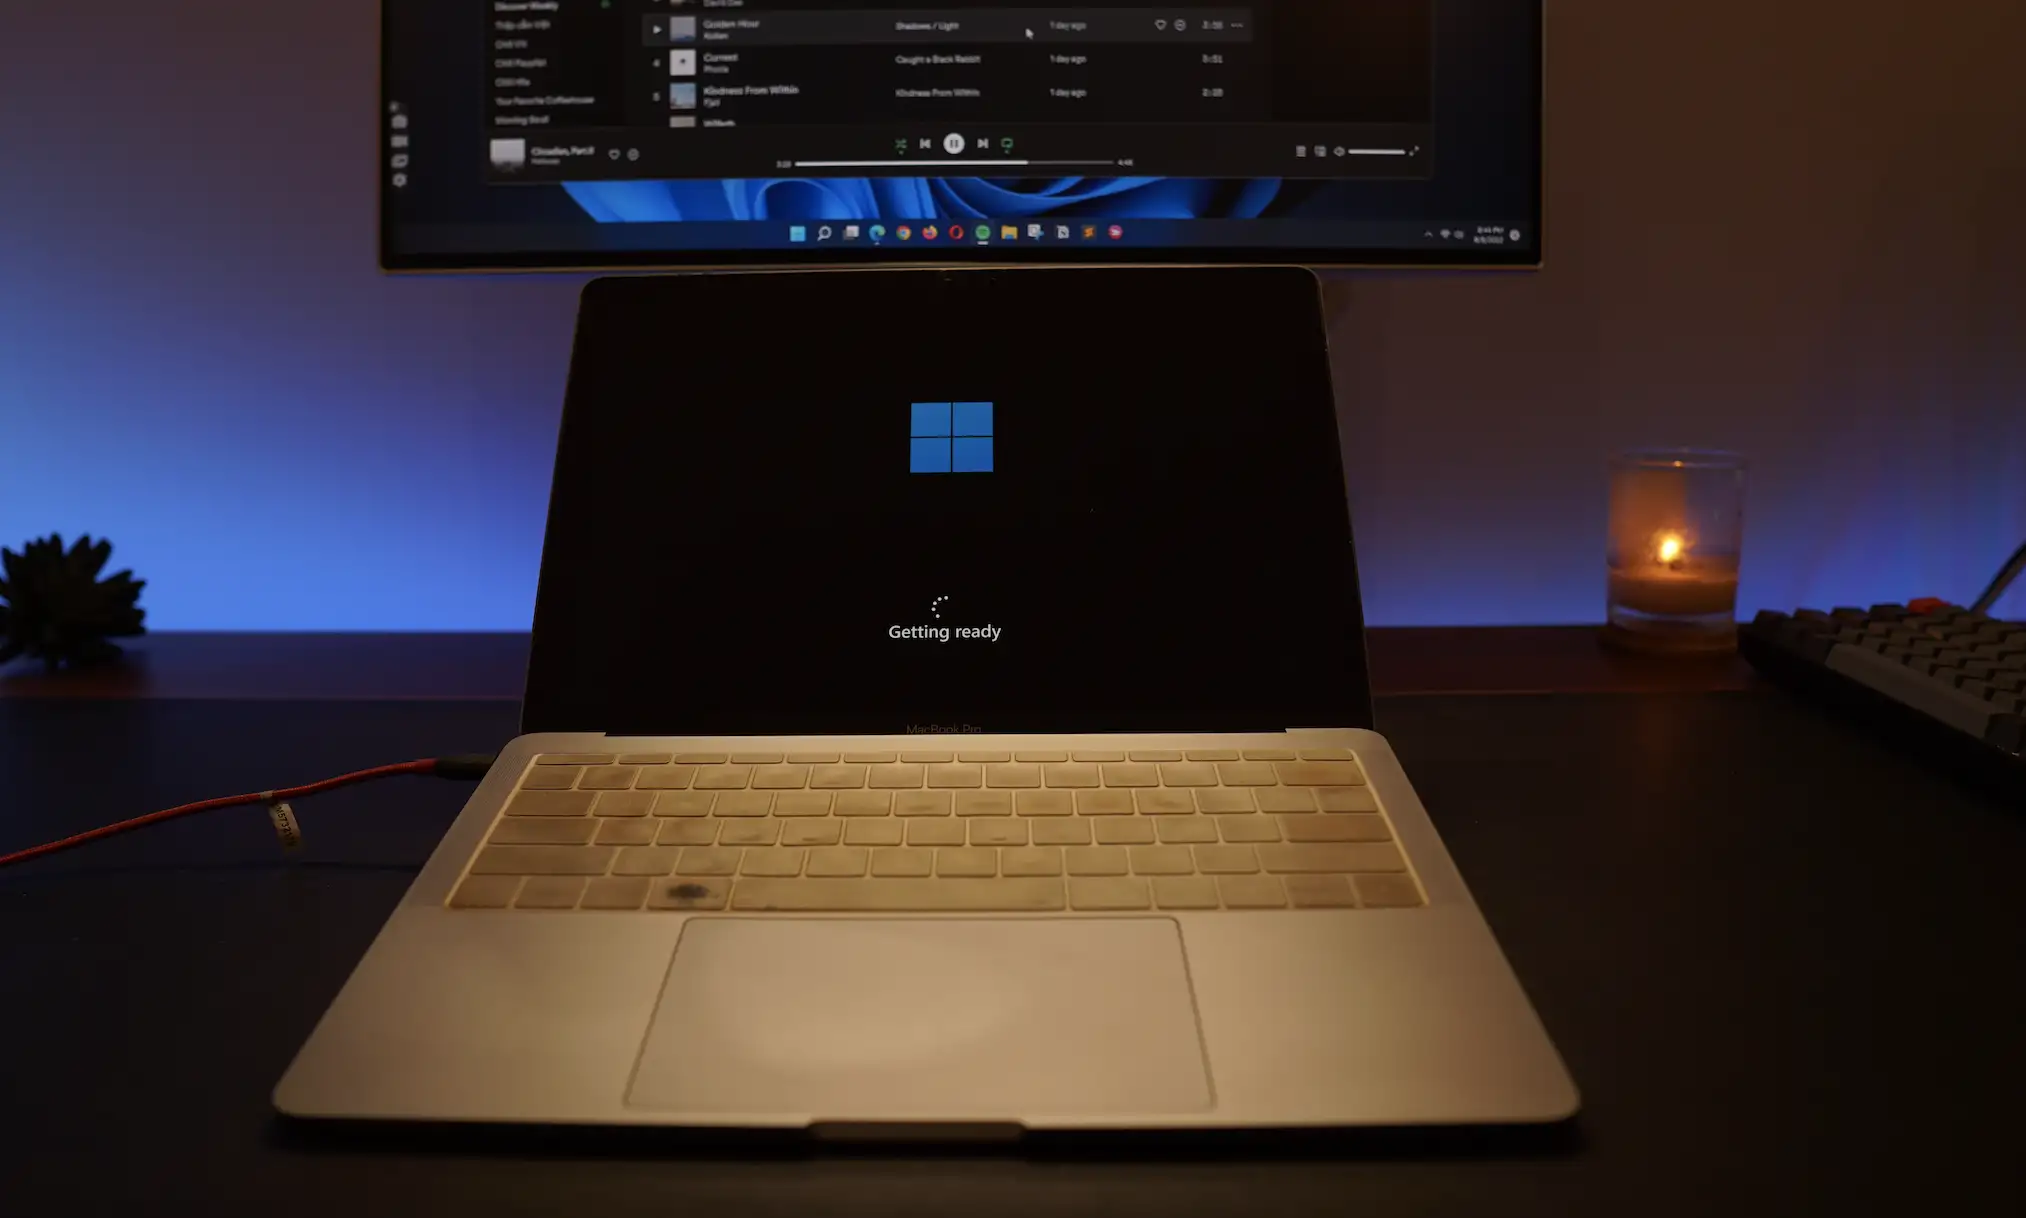
Everything is the same as installing Windows on a PC. Just follow the on-screen instructions to complete the installation process. You can see all the images of the installation process below.
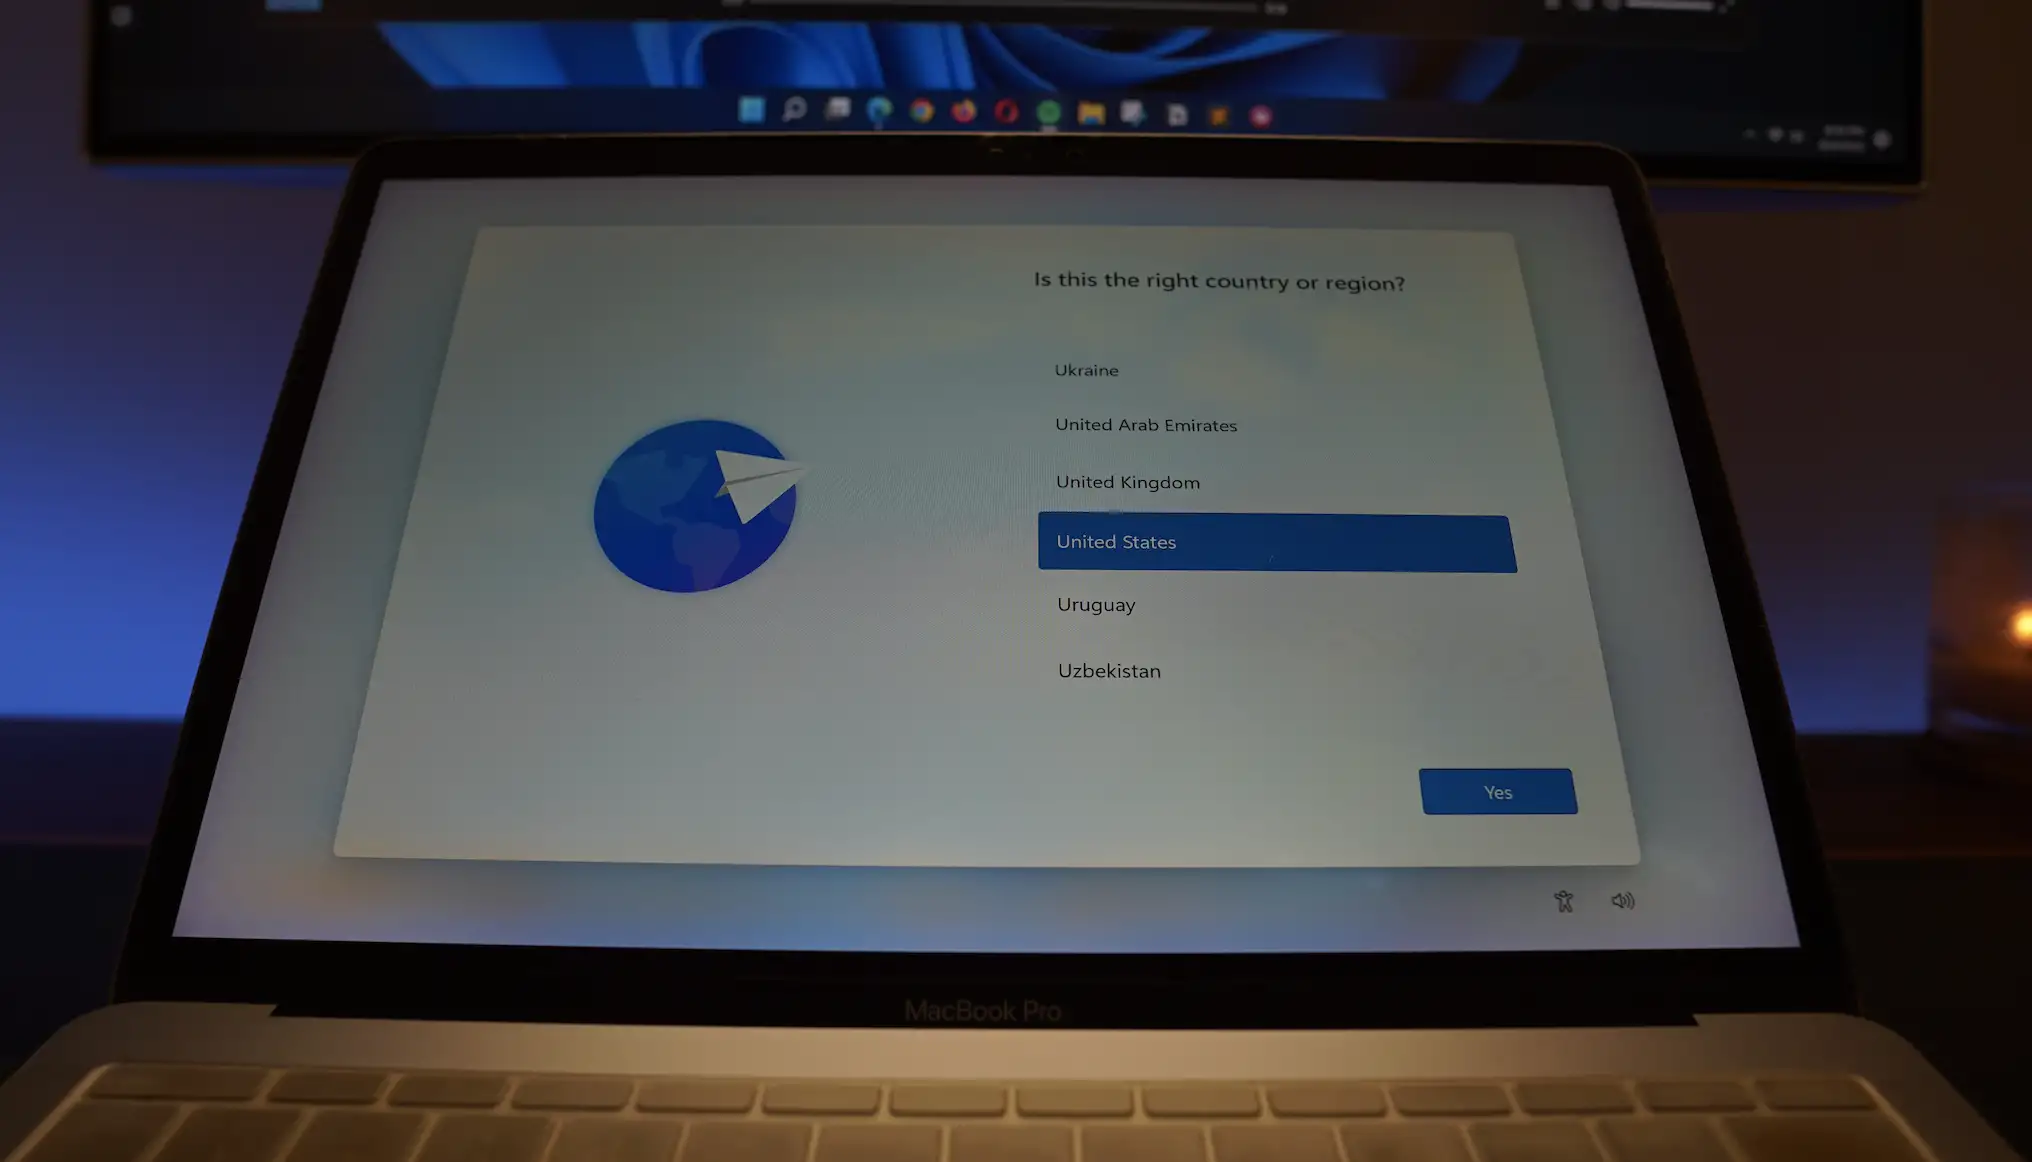
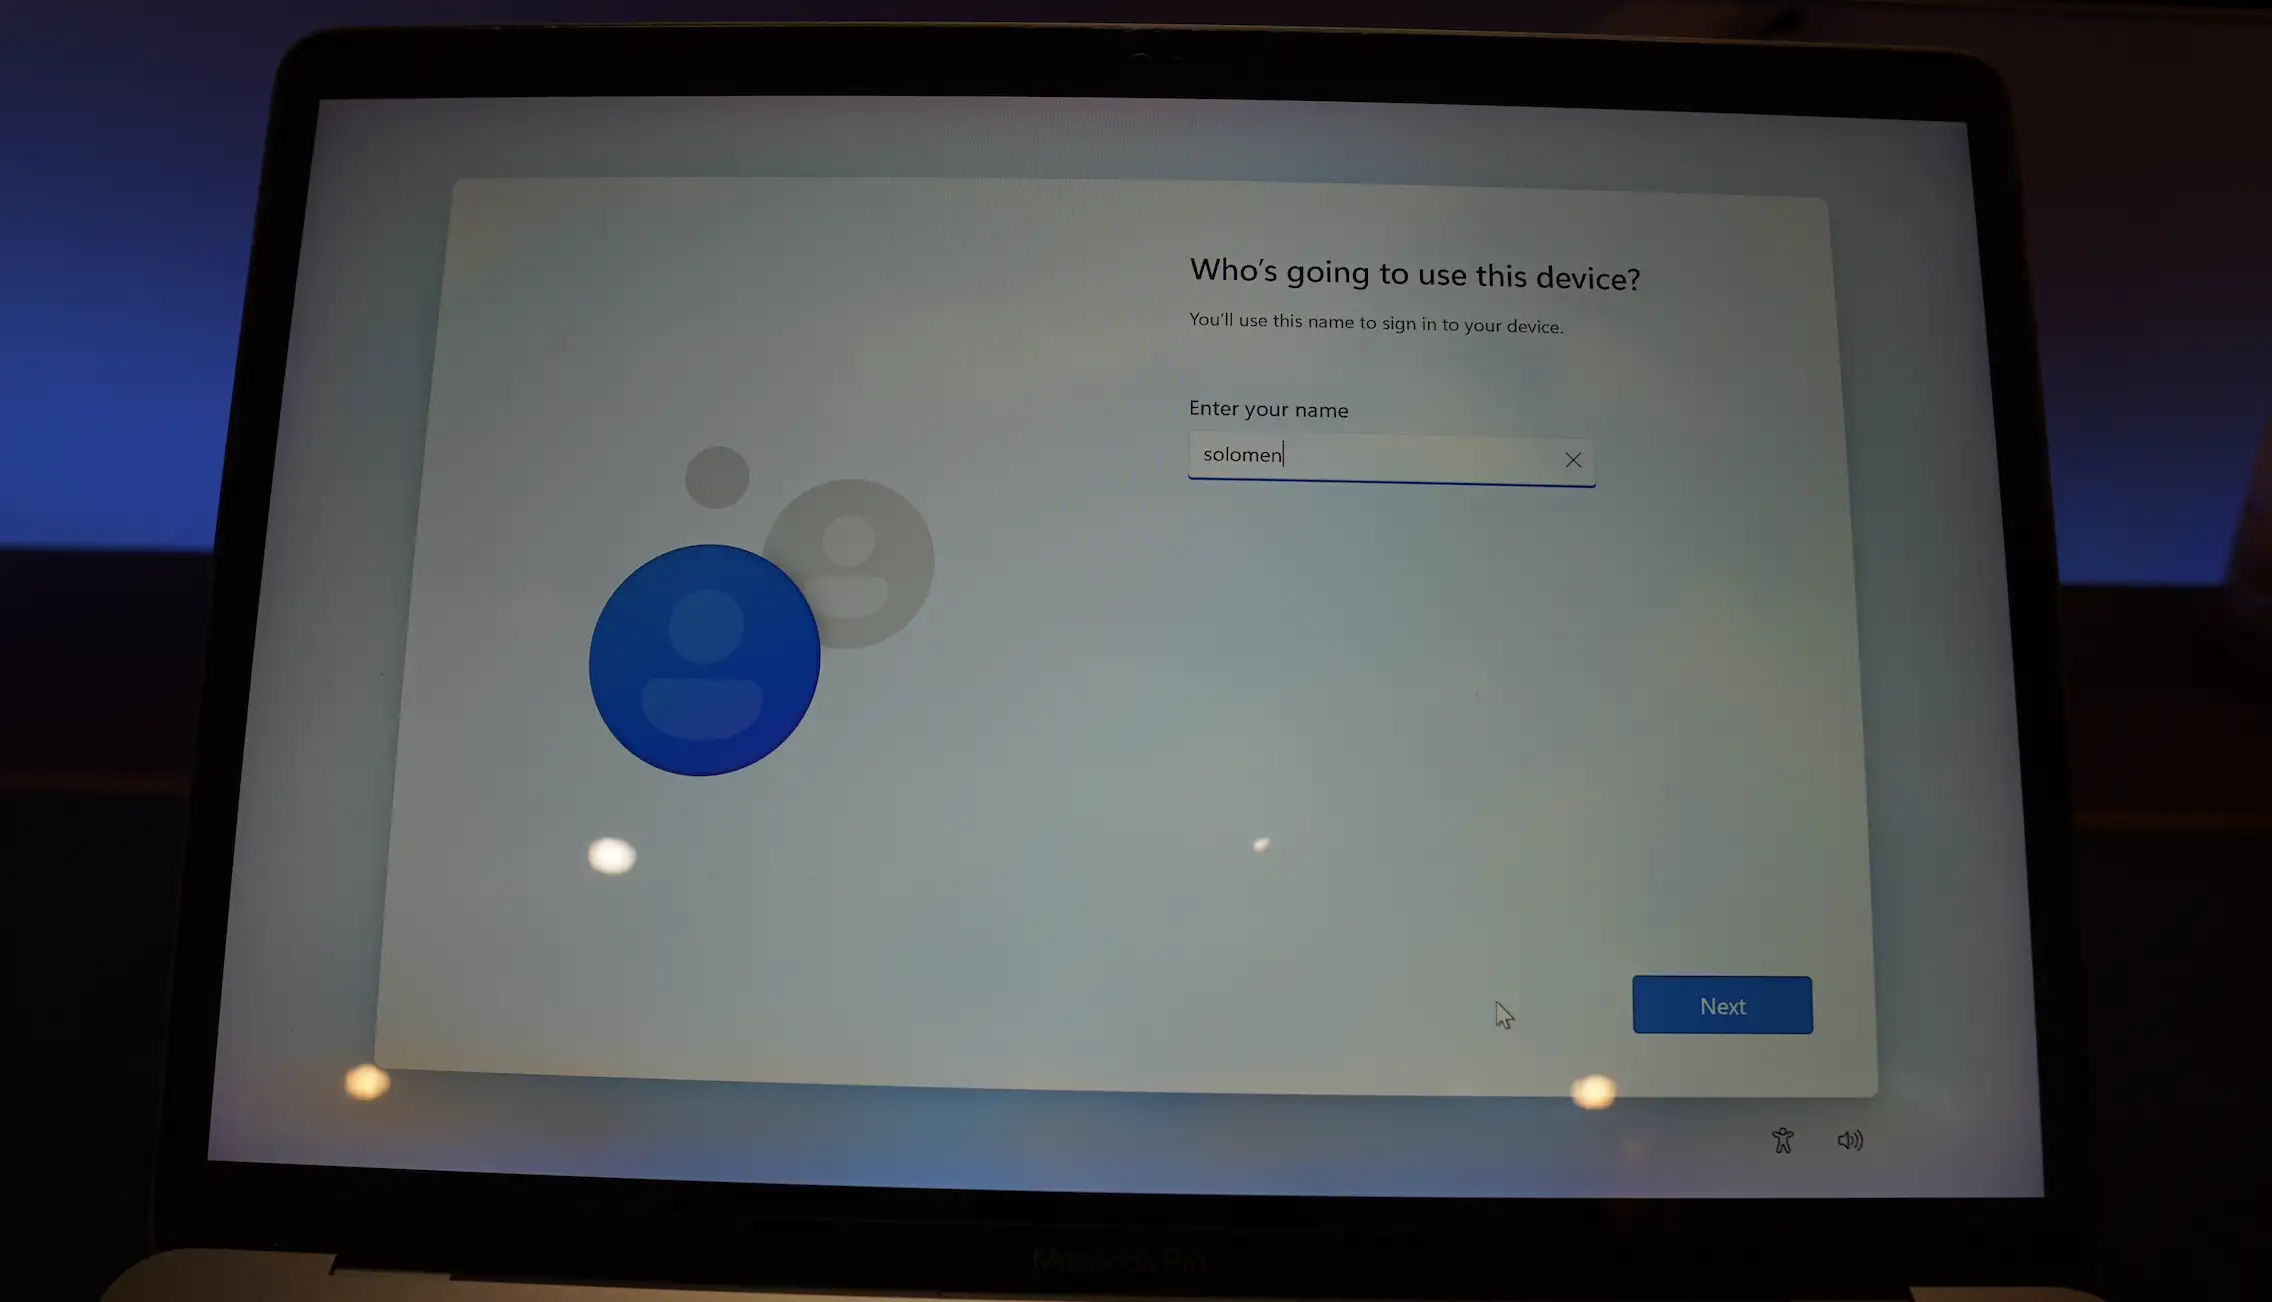
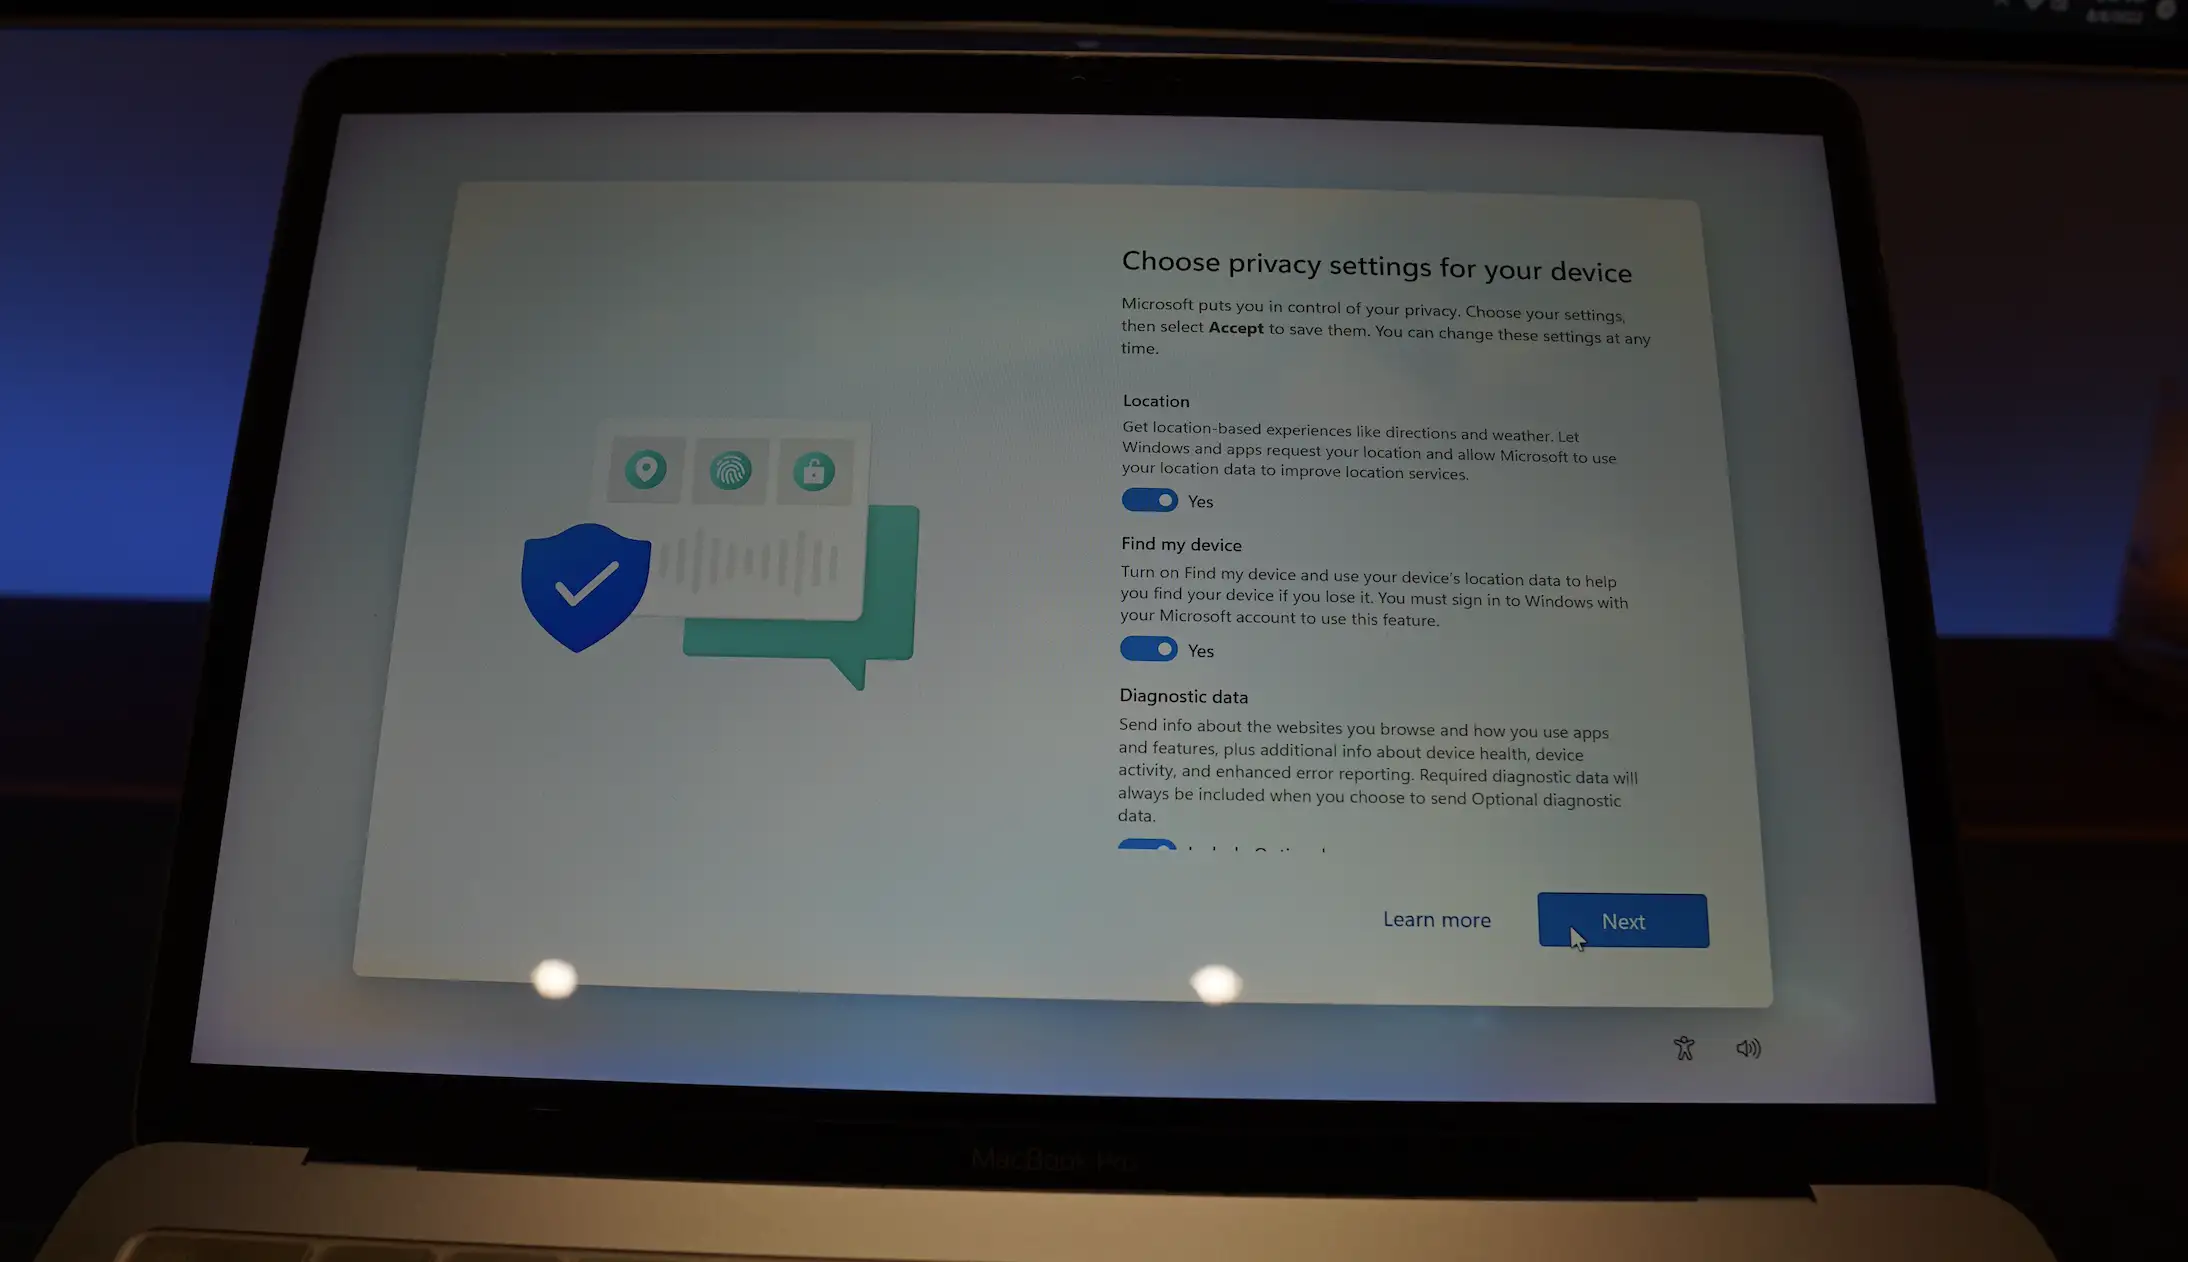
Once Windows 11 is installed, you will see a Boot Camp installer window on the screen. Click on the Next… It will install all required drivers on the Mac.
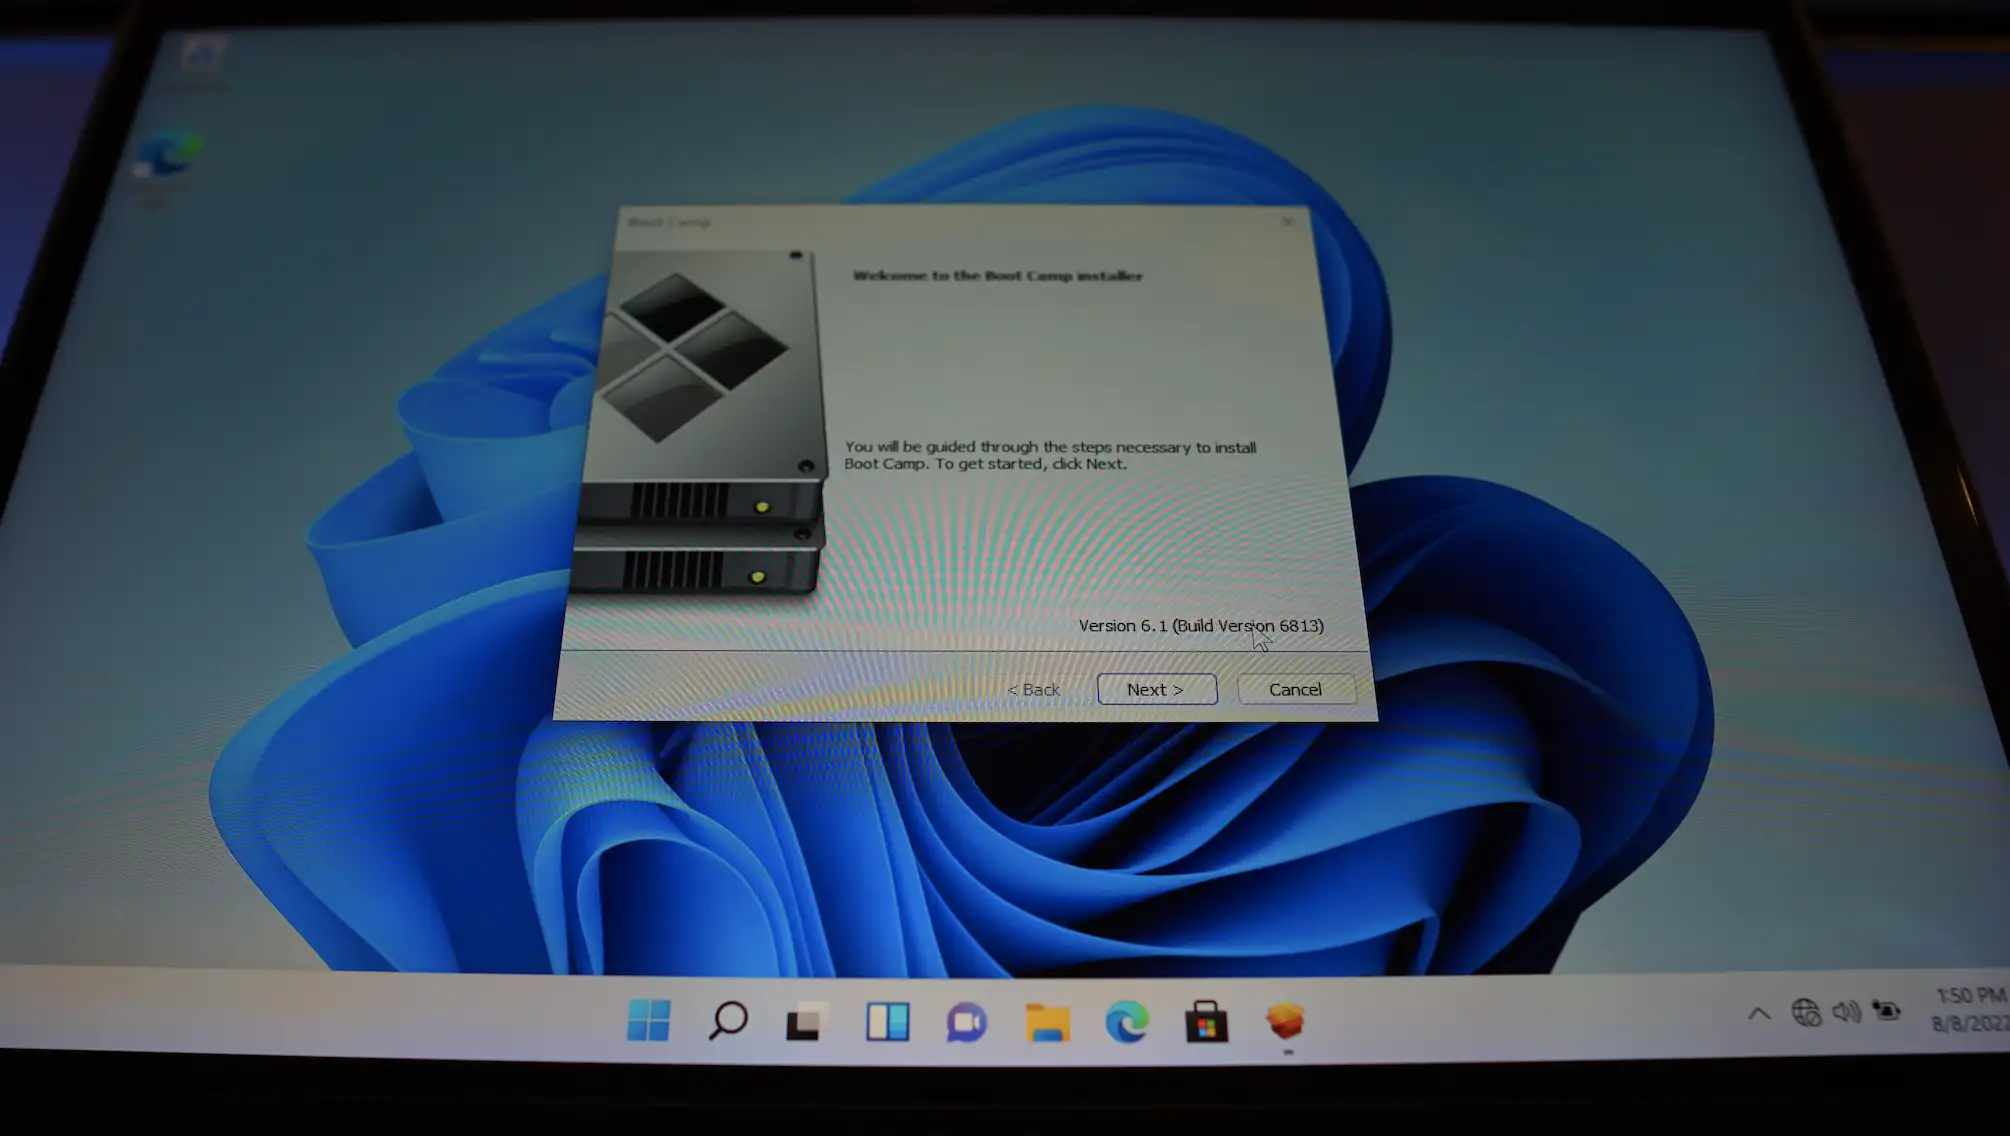
Please wait for the process to complete, and do not interrupt it. Your Mac will automatically restart and boot into Windows 11.
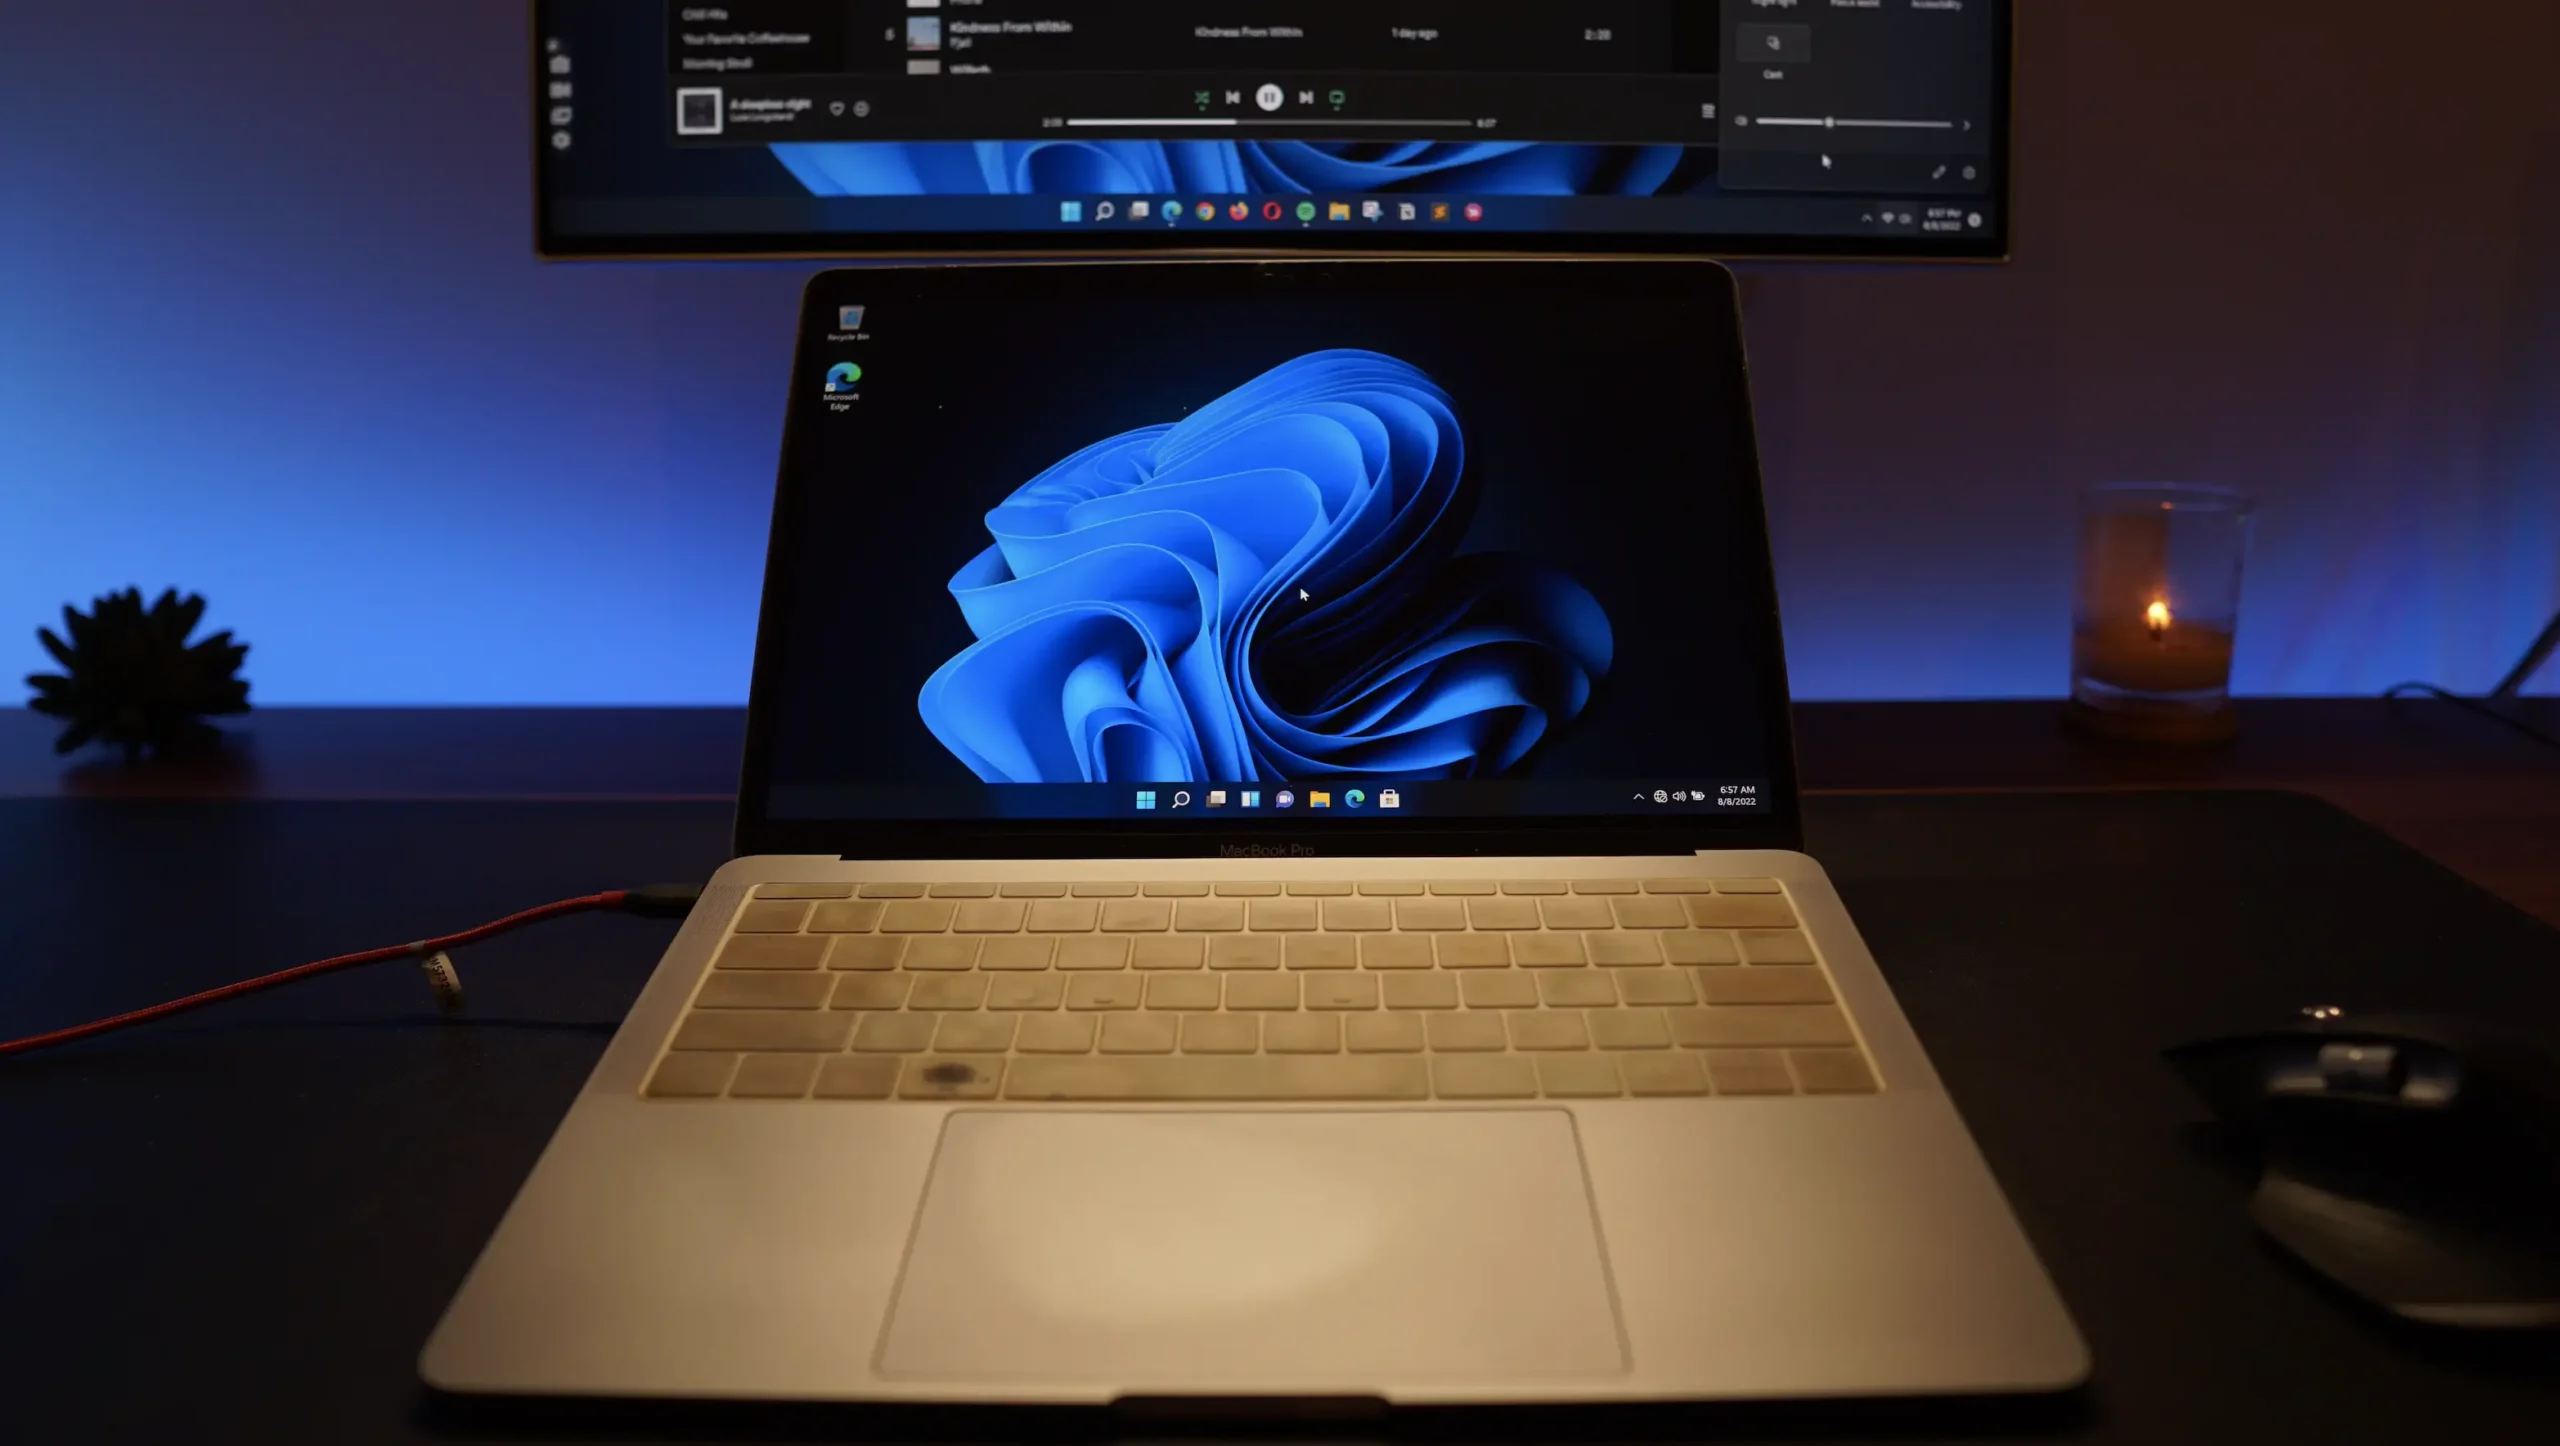
Congratulations! You’ve successfully installed Windows 11 on your Mac and Intel processor.
Switch Between macOS and Windows 11
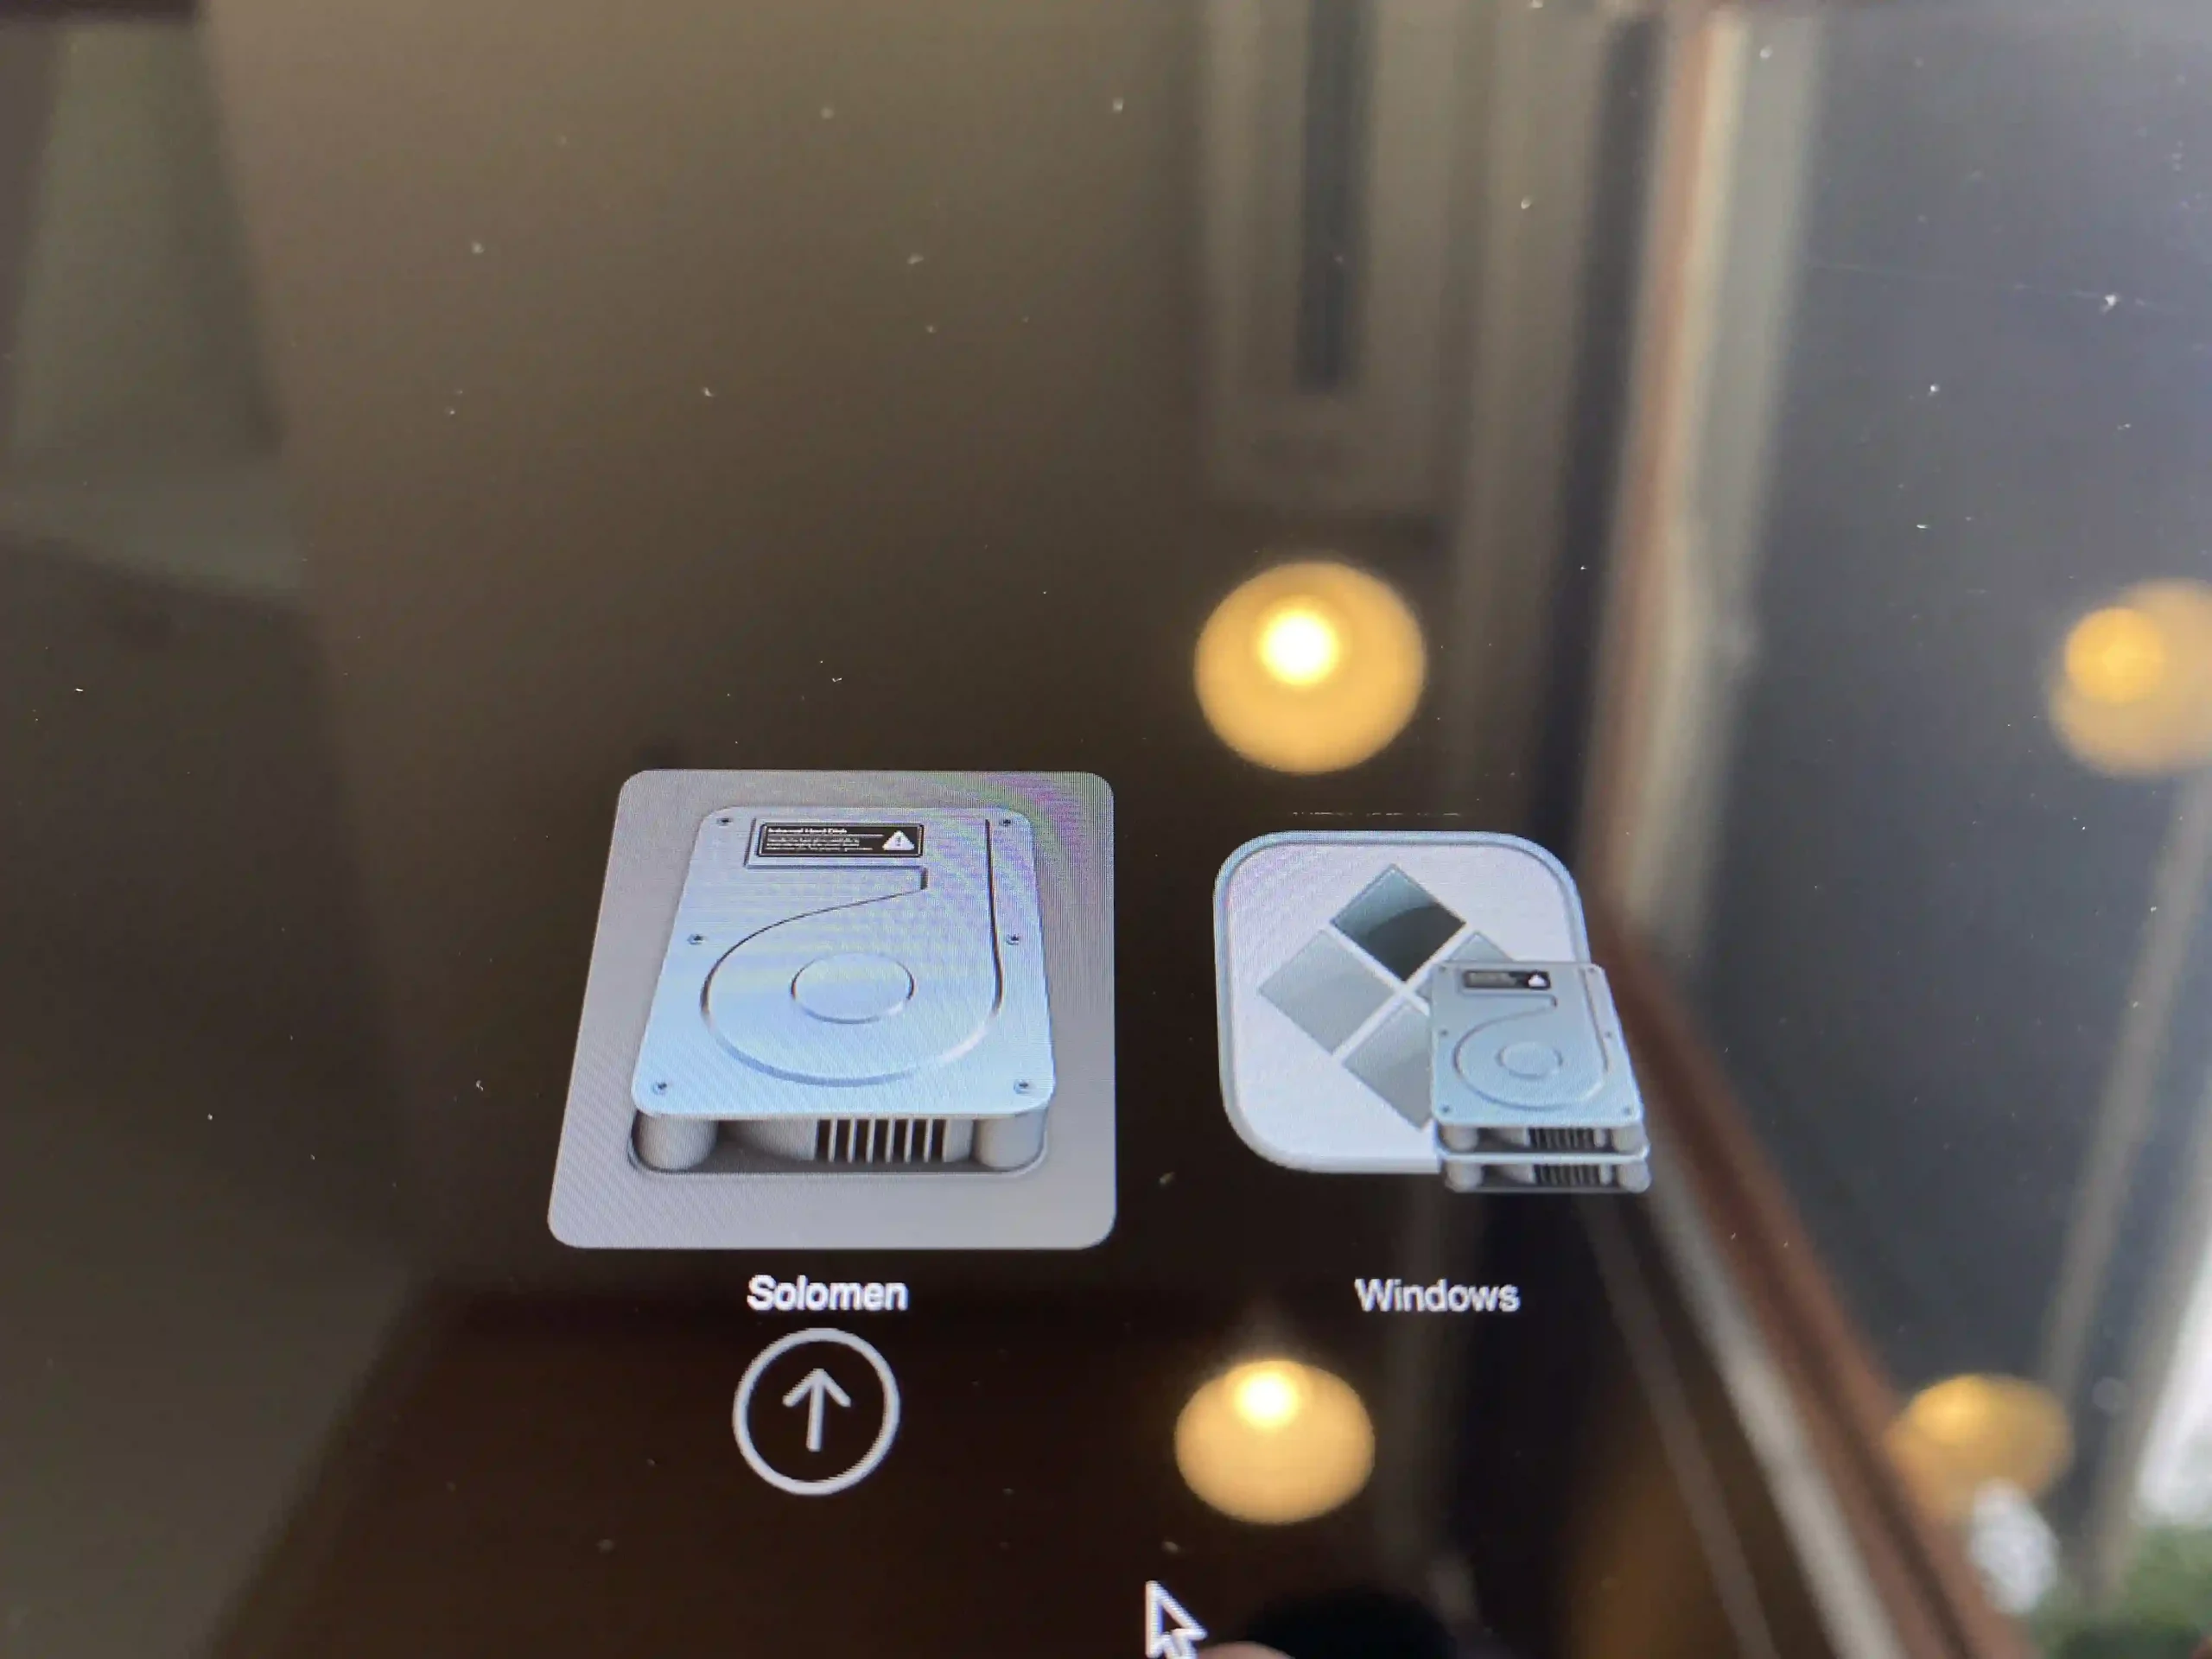
Switching between macOS and Windows is very easy. All you need to do is restart your Mac and hold down the Option (⌥) key while booting up. You will see the operating system that you want to boot into.
Set the Default Operating System
When you boot your computer into macOS, open Preference from the Apple menu and click Startup Disk.
In the next window, you will see all the operating systems installed on your computer. Select Windows 11 and click the Restart… button to boot into Windows 11 by default.
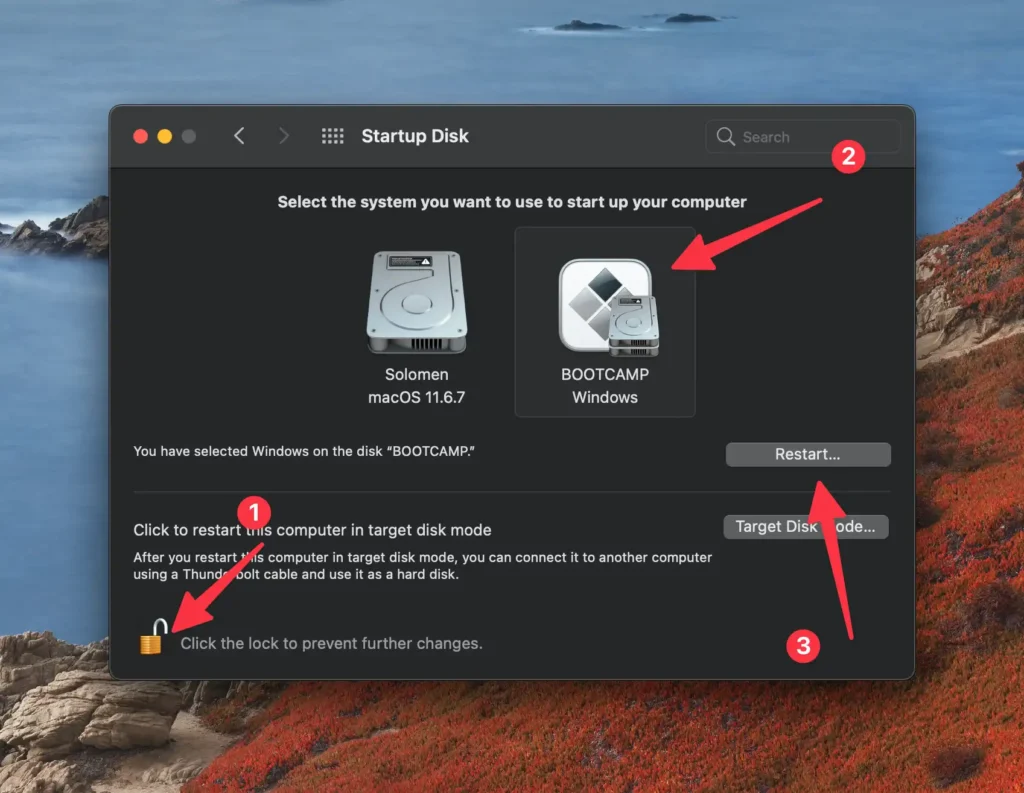
If you want to change it back to macOS, select it from the list and click the Restart… button.
Again, the method described above will only work if your Mac has an Intel processor. If your Mac has an Apple Silicon M1 chip, you cannot install Windows 11 by doing like this post.
Wrapping Up
So, that’s how you can install Windows 11 on a Mac with an Intel processor. Although there are many steps involved in the process, it’s easy if you follow them step by step. If you need or want to run Windows 11 on your Mac, try it.
We hope this article helps you. If you still have any doubts or questions, please let us know in the comment section below. We would be happy to help you out. Thank you for reading, and have a great day!

![Install Windows 11 on a Mac [Intel]: The Full Guide](https://omghowto.com/wp-content/uploads/thumbs_dir/free-up-storage-space-on-android-n59irswgcgtipsup5q90l6asv829rjby28g5r0izi4.jpg)
![Install Windows 11 on a Mac [Intel]: The Full Guide](https://omghowto.com/wp-content/uploads/thumbs_dir/speed-up-a-slow-Windows-n59kkva9flw2e2c97urb6r7h7fcyl9n1oa65ok1wsc.jpg)


