XPS stands for XML Paper Specification and is a file format used to store documents with precise control over the layout and formatting of each page.
Microsoft designed the XPS format as an open standard to compete with Adobe’s PDF, which has been the dominant document printing format for many years. If you’ve ever wondered what an XPS file is, this article should answer any questions.
What is an XPS File?
The XPS Viewer was included as a component of Windows, starting with building 1803 of Windows 10. XPS Viewer is Microsoft’s official application to view and edit XPS documents.
A file with the file extension .xps or .oxps is an XPS document. This format allows for color and resolution independence. It will enable you to manage various options, including printer, transparencies, color spaces in the CMYK color model, and color gradients.
The XPS viewer no longer comes bundled with the operating system in Windows 11. However, Microsoft did give the option to add the viewer as an additional feature to the OS. This guide will show you how to get the XPS viewer on your Windows 11 computer to read an XPS file that you can’t otherwise access.
How to Get XPS Viewer on Windows
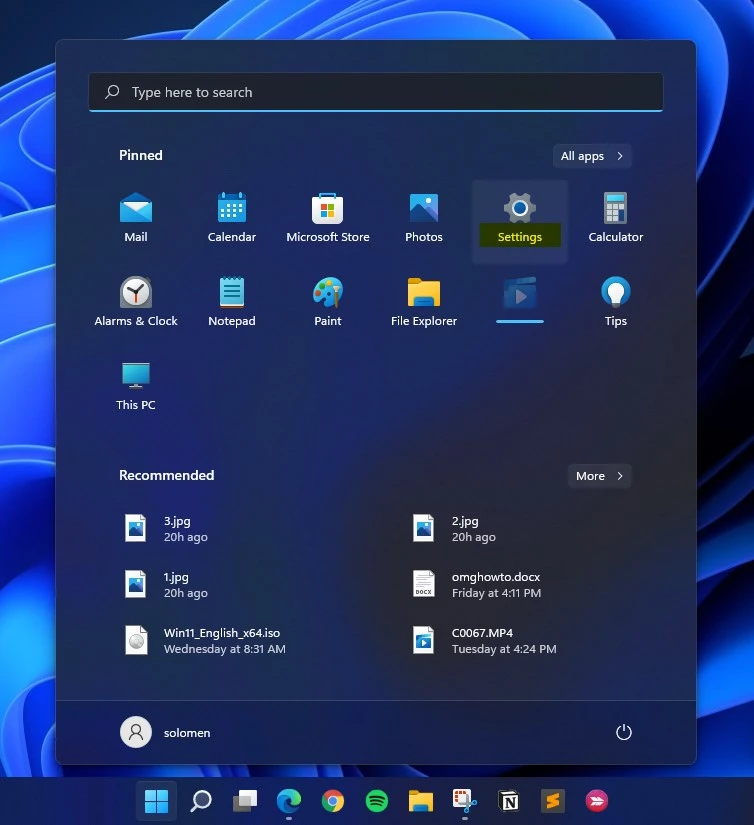
Click “Settings” from the Start Menu to launch the XPS Viewer. Alternatively, holding the Windows+I keys together will open the app.
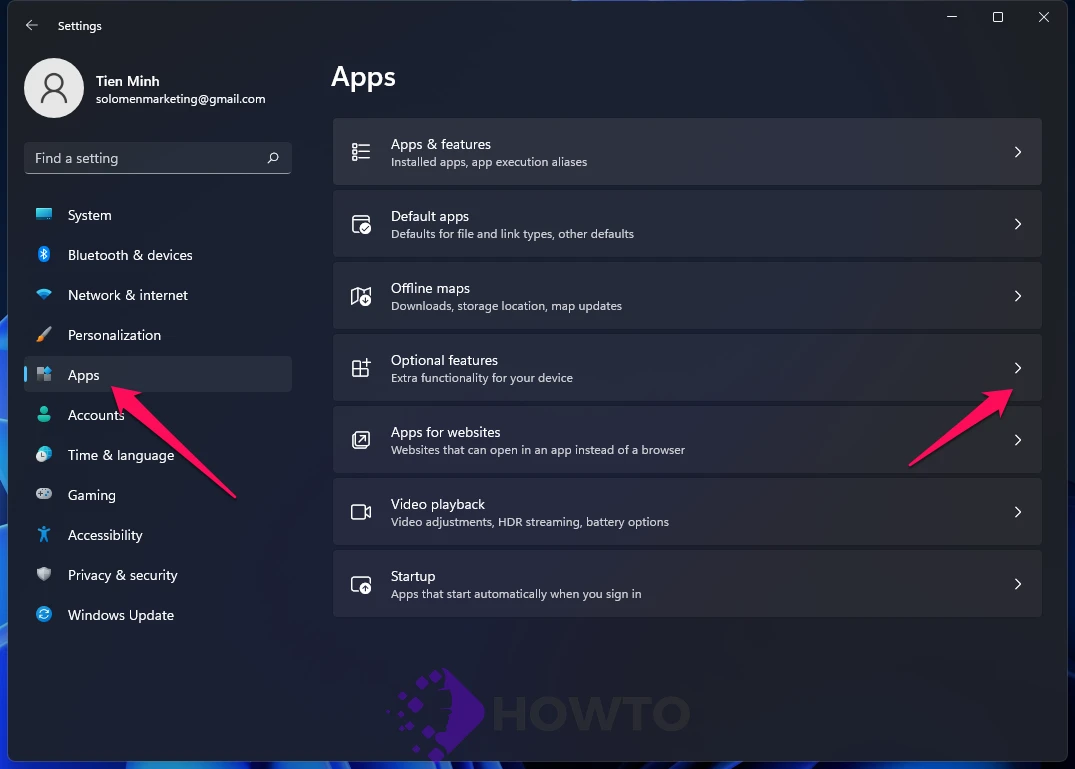
Select ‘Apps’ from the left-hand menu of options in the Settings window. Now, click the ‘Optional features’ tile on the right panel.
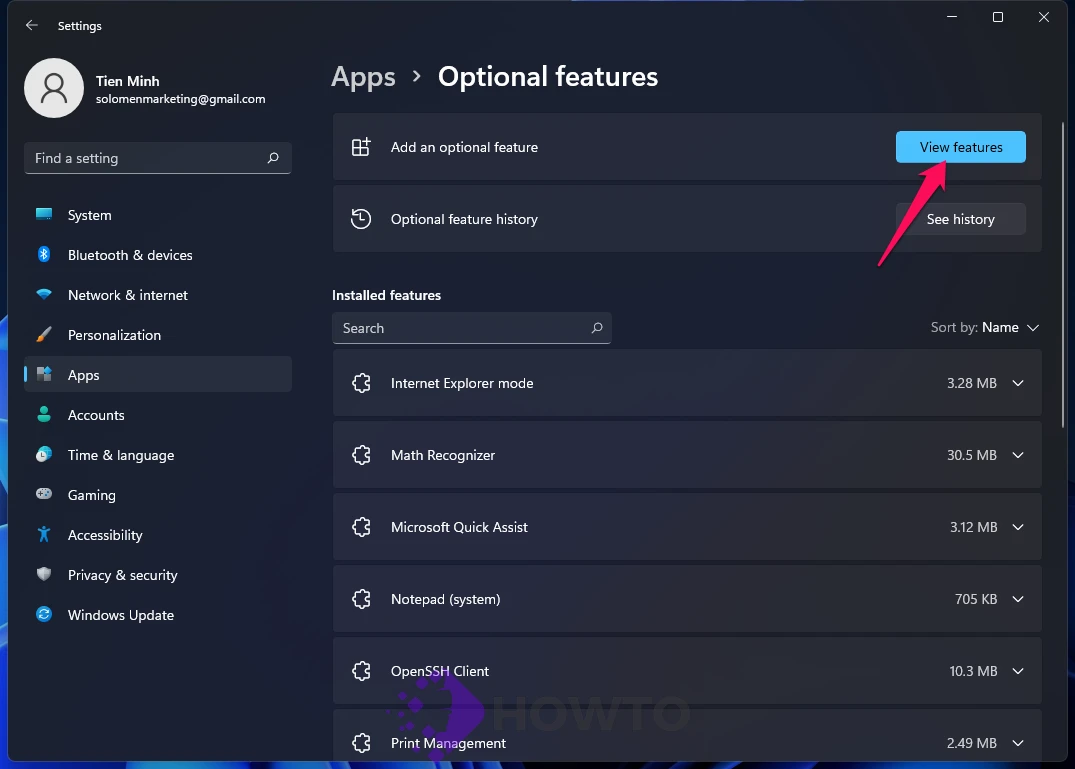
Click the ‘View features’ button on the ‘Add an optional feature’ tile in the Optional features settings window.
A new ‘Add an optional feature’ window will appear. To discover more about (XPS Viewer), type “XPS Viewer” in the search bar. The XPS Viewer functionality will be around 3.27MB in size.
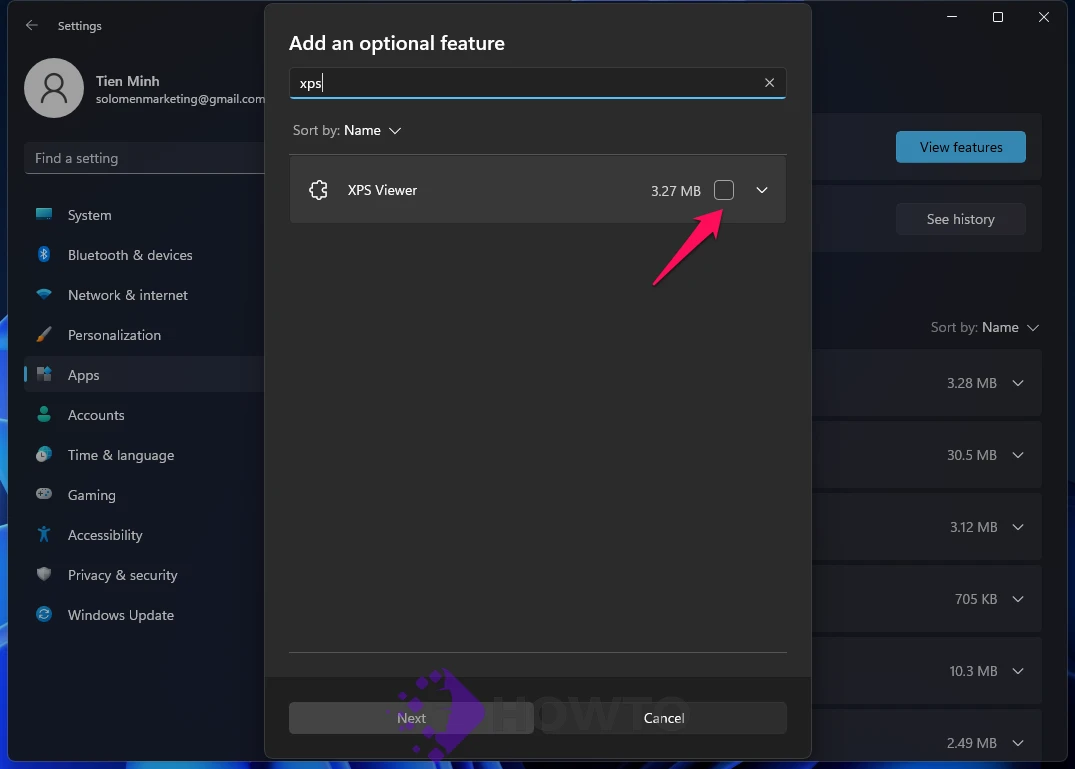
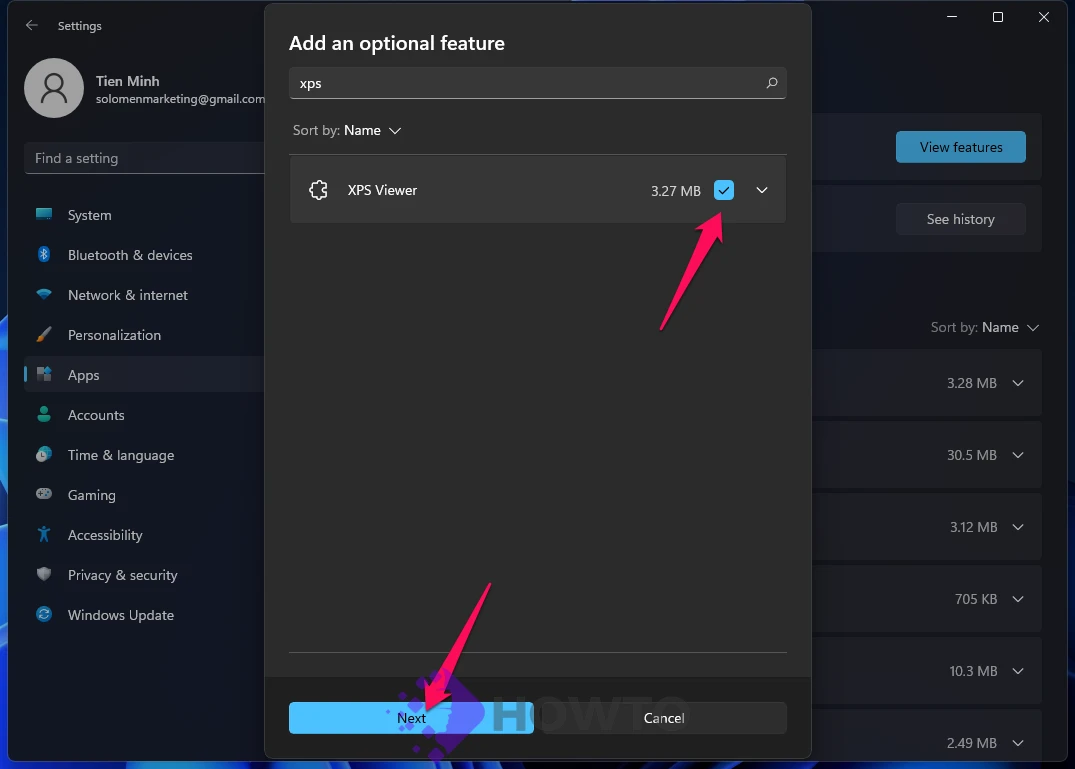
Click the box next to XPS Viewer to select it, then click the ‘Next’ button. After that, click the ‘Install’ button.
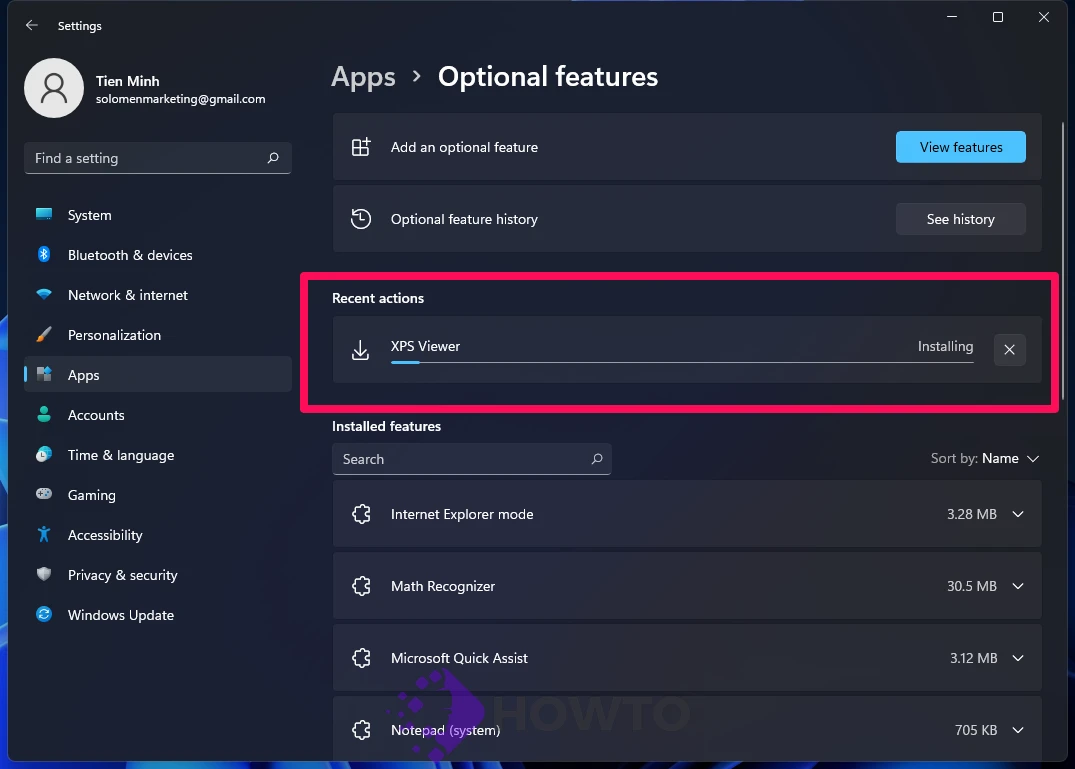
Now, on the Optional features window, look for the ‘Recent actions’ category and see that the XPS Viewer is being installed. Let it sit for a while before you start the XPS Viewer.
Using XPS Viewer on Windows 11
It’s time to utilize XPS Viewer once you’ve installed it. To launch XPS Viewer on Windows 11, search for “XPS Viewer” in the Start menu and select the option from the results.
From the toolbar, click on the ‘File’ option. Then, choose ‘Open…’ from the drop-down menu to find an XPS file.
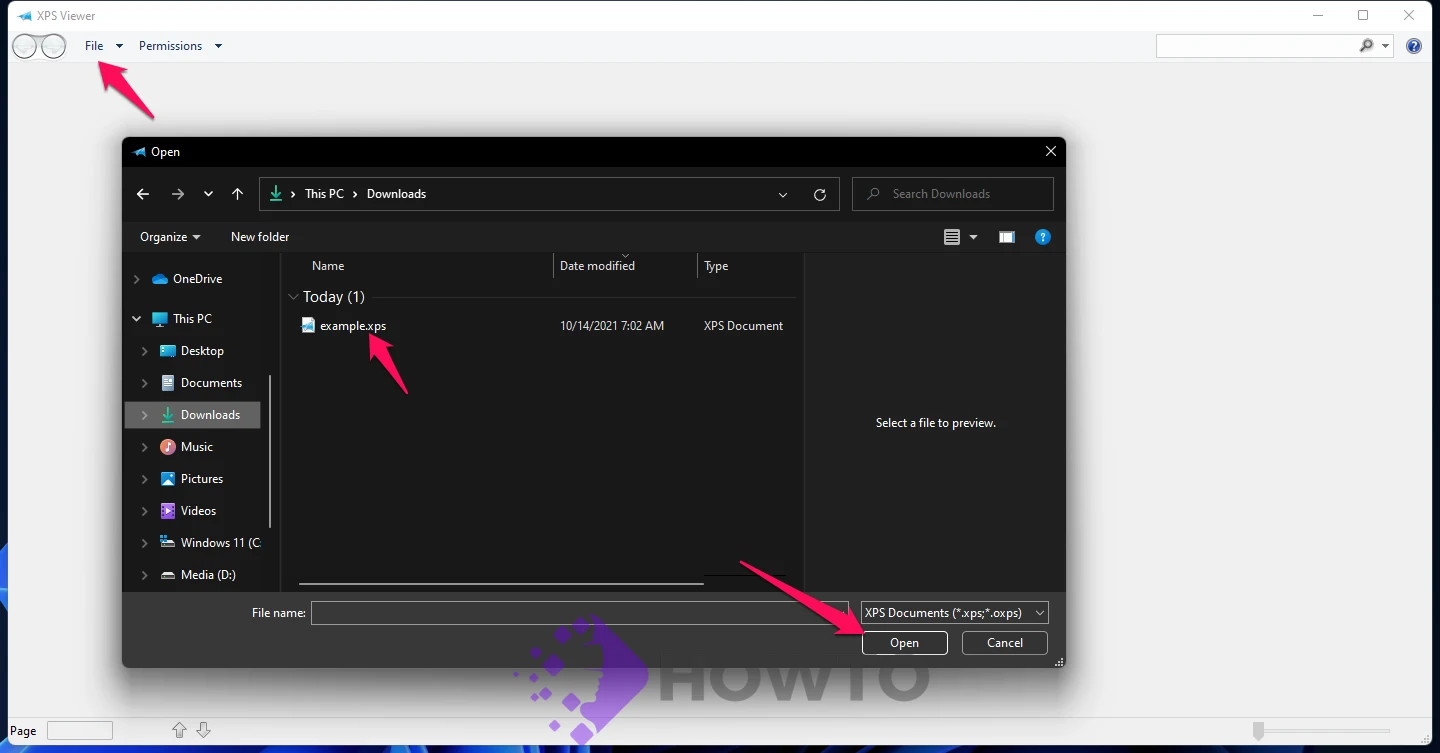
Open the XPS file by navigating to its location in the File Explorer window. After you’ve chosen the file, click Open.
The document will now appear on the XPS Viewer window.
How to Convert .xps or .oxps to PDF with XPS Viewer
You can’t only view .xps or .oxps files in XPS Viewer, but you may also convert them to PDF using the Microsoft Print to PDF function. To do this, you must have the XPS document open. Select the ‘Printer’ icon at the top of the screen.
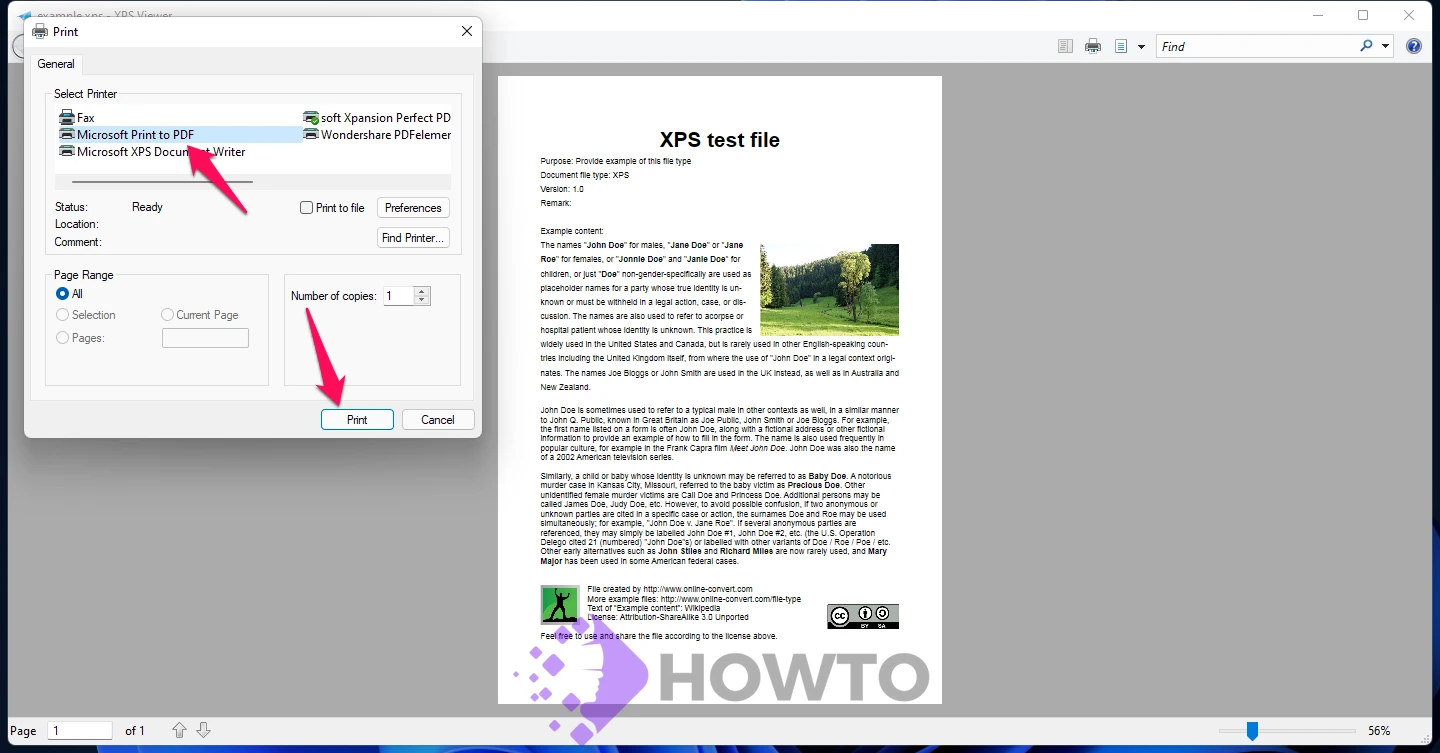
Under the Select Printer selection, choose ‘Microsoft Print to PDF’ in the Print window. Then hit ‘Print.’
If you can’t find Microsoft Print to PDF on Windows 11, check out this article now.
The file will be saved to your selected location in a File Explorer dialog box. Then, go to the folder where you want to keep the converted PDF file. After you’ve named it, click the ‘Save’ button.
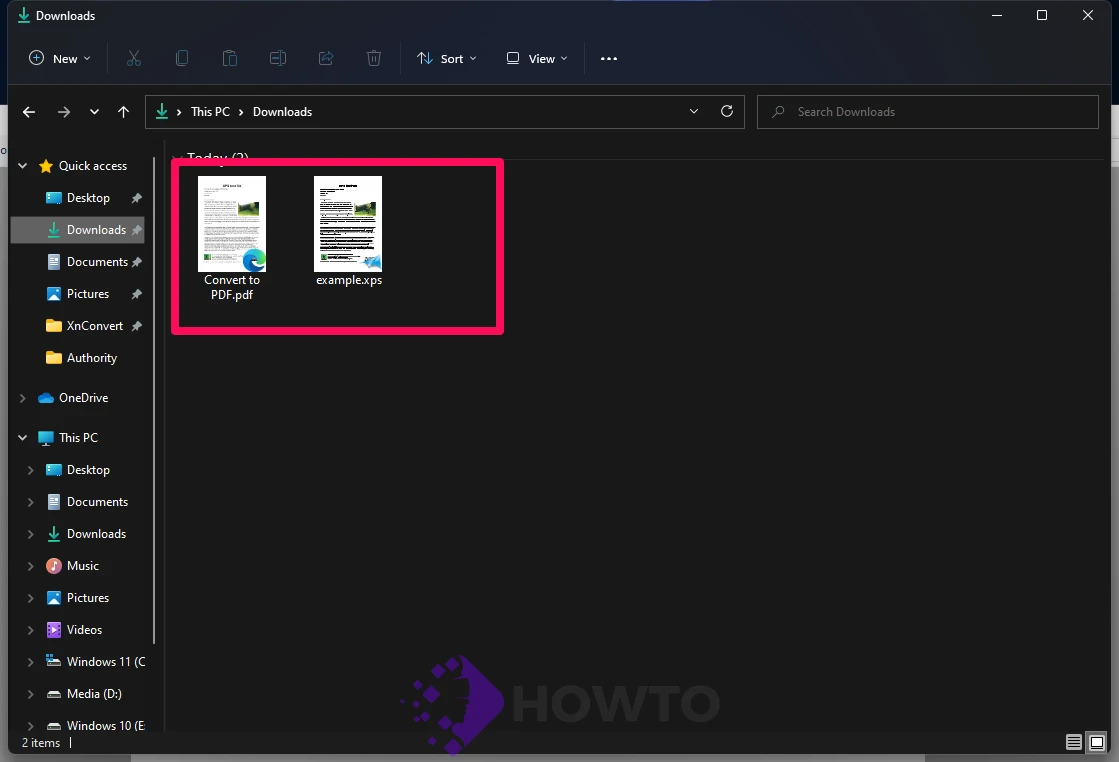
It’s complete. You’ll see the conversion process in a tiny XPS Viewer window, and your converted PDF file will be saved.
XPS Viewer Uninstallation Instructions
If you want to remove XPS Viewer from your Windows 11 computer, follow these simple directions.
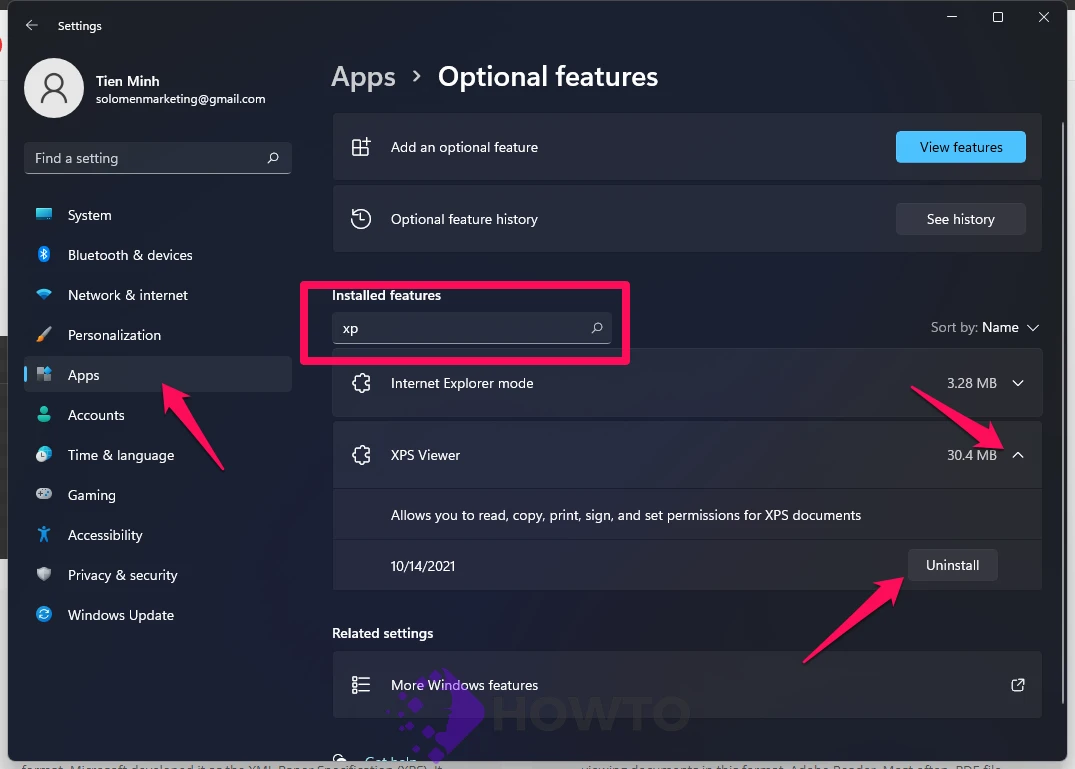
‘Uninstall‘ will appear in the Installed Features section. Click on it. Now, turn off and restart your computer to remove XPS Viewer from your system entirely.
XPS Viewer and Converter for Online
XpstoPdf.com
If you’re in a hurry to convert just one or two XPS documents, several online converters can assist you. XPS to PDF is one such conversion service. It’s a simple conversion site. With this free online converter, you may instantly transform XPS to PDF. There’s no software to install or registration required. There is no watermark on the finished document.
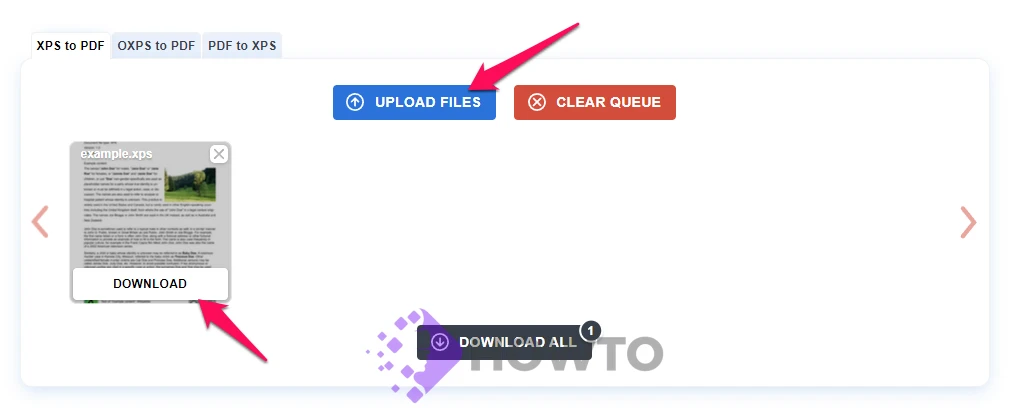
After selecting the appropriate conversion option, you may drag and drop your XPS file (maximum of 20 XPS files ) to convert it to PDF or select the “UPLOAD FILES” button to begin.
On the browser window, the XPS file will be converted to PDF. You may save the file by clicking on the “Download” button. Just wait for the conversion to finish and download individual files or in a ZIP package.
Convertio.co
Convertio is a free tool for converting XPS files to PDF with a few clicks of a button. It’s easy to use, reliable, and fast. Unlike most other tools today, no watermarks or ads exist on your converted PDFs. With Convertio, you can convert any number of XPS files at once, and they’ll all be converted in seconds!
Click on Choose files.

Select Convert.

Wait for a second and click the Download button now.
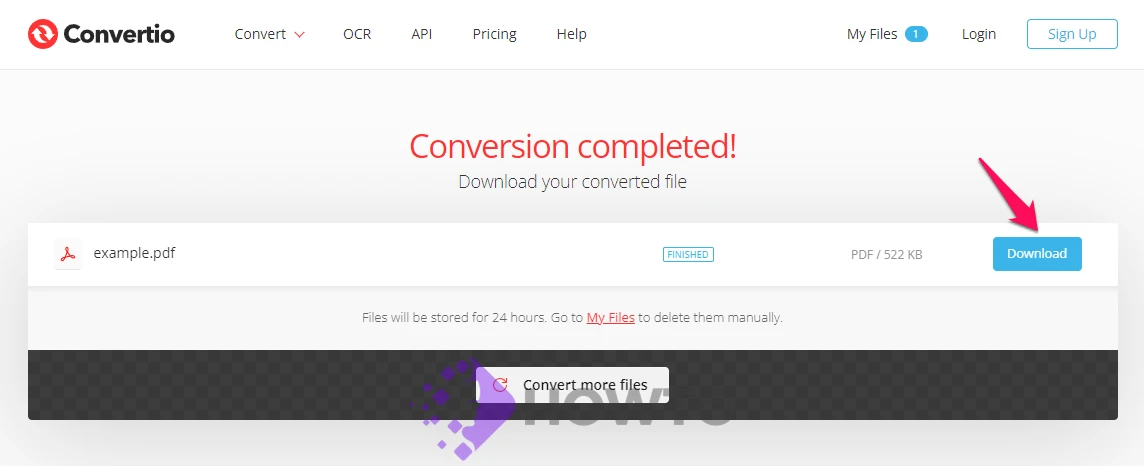
This is how to convert XPS files to PDFs using an online converter.
Conclusion
We hope you found our post helpful. Leave a comment below telling us how you use the XPS Viewer with other applications in your workflows today!


