We all like having our computer to ourselves, but sometimes we have to share our computer with others. If that’s your case, there is only one question on your mind; “How do I create a new local user account on Windows 10?”. Don’t worry; it’s not difficult at all, and in the following guide you will be guided on how to create a new user account in Windows 10, down to the very last detail.
Read more: How to create a new Apple ID
How to Create to New User Account in Windows 10
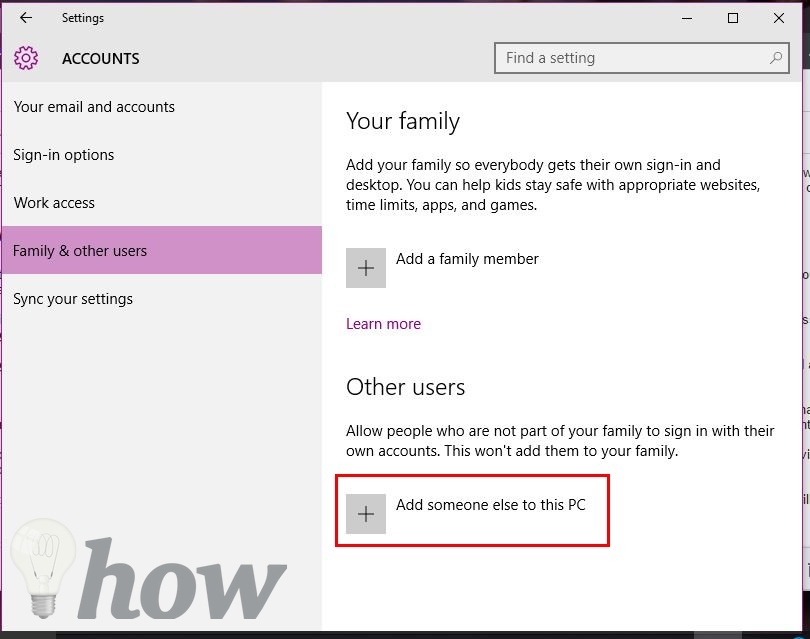
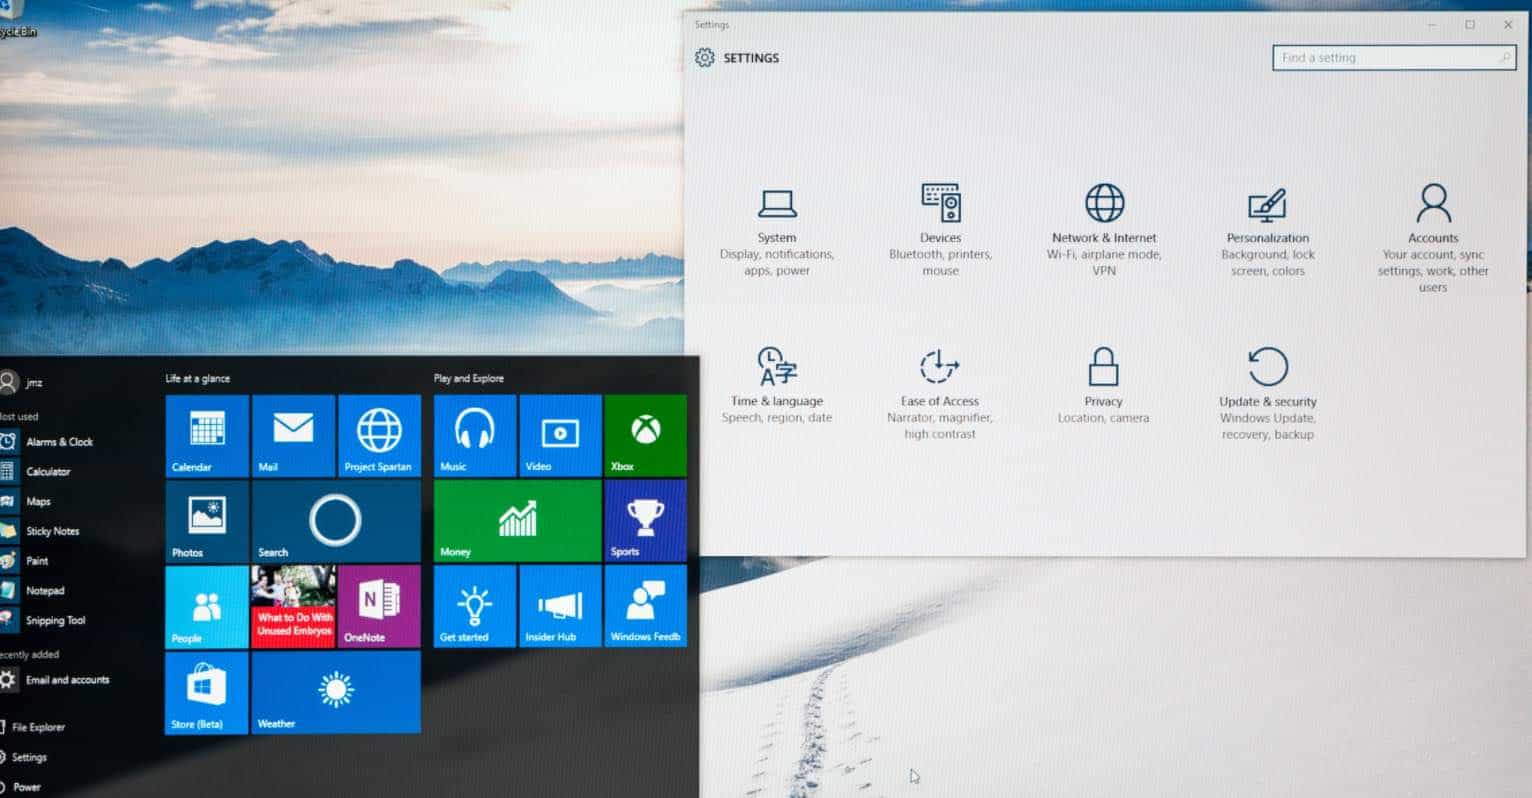
The first thing you need to do to create your new Local User account is to access Settings. You can do by clicking on the Windows menu and selecting Settings. Once you’re in Settings click on Account >> Family and Other Users >> Add someone else to this PC.
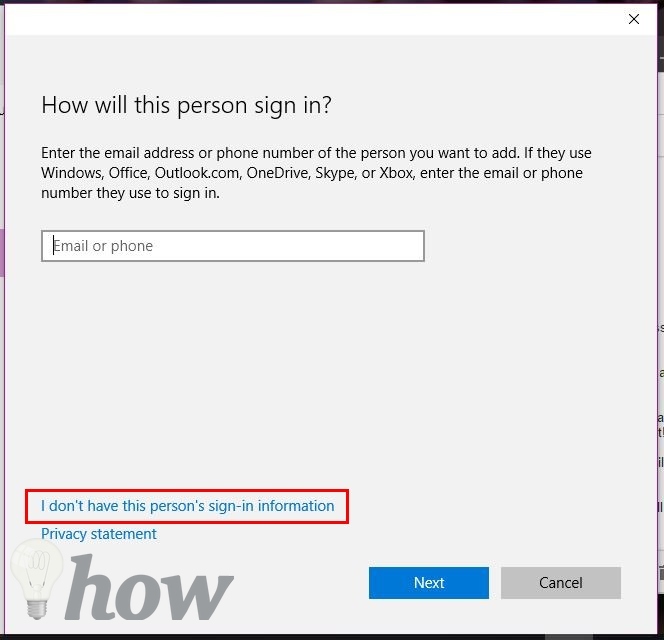
Now, you will be asked how this person is going to sign in, but the best thing you can do is click on where it says, “I don’t have this persons sign in information”. This is just Microsoft’s way of trying to get everyone’s Email.
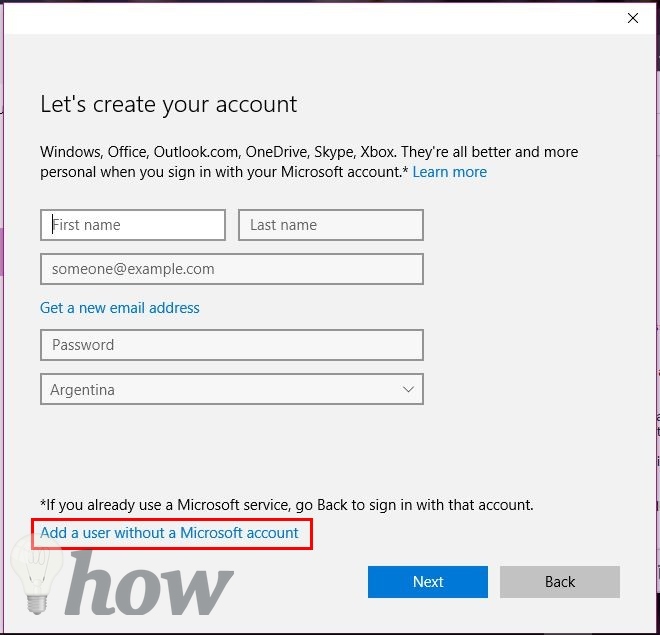
Microsoft is going to insist on getting you an account, but that doesn’t mean your obligated to open on to add a new local user account in Windows 10. Now, click on “Add a user without a Microsoft account”.
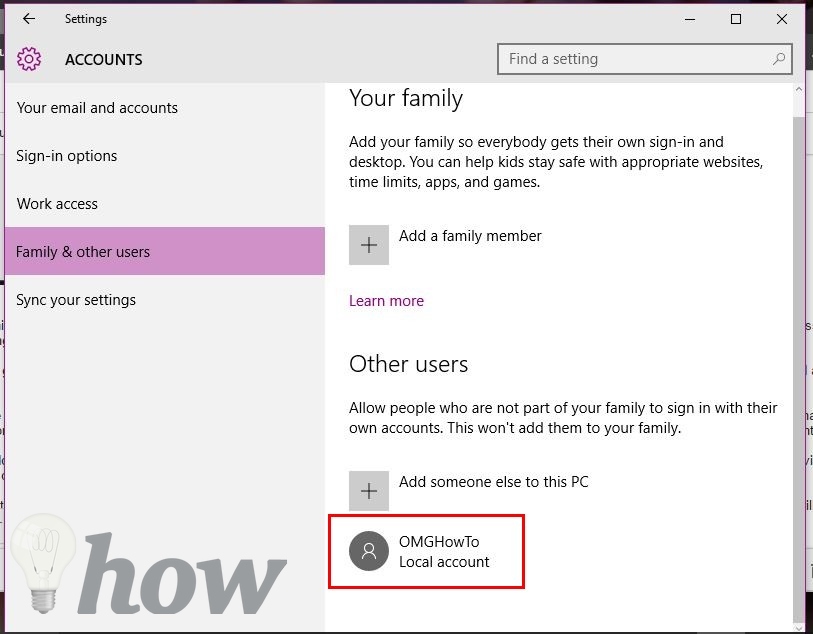
On the next page is where the typing begins. Here you need to type in the username the other person is going to have, a password and a password hint for those days (that are usually often). Once you’re done filling out the form, you will go back to the accounts page, but you’re going to notice something different this time, the new account!
See more: How to Create A Safe And Strong Password
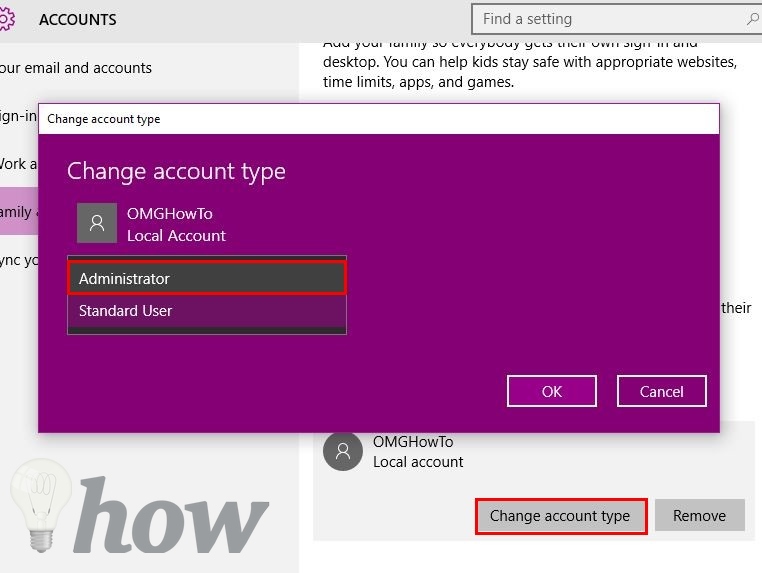
The new account you have added won’t be able to download any software’s or do anything that required administrative. If you want to give this account administrative privileges for some reason, you need to click on the account and select Change account type. Select the drop-down menu right below Account type and select Administrator.
If you no longer need to have that account on your computer, right beside the account you just created, you will also see a Remove button. When you click on that you will be asked if you are sure that’s what you want to do and if you are, select remove account.
How to Add a Family Member to Your Windows 10 Computer
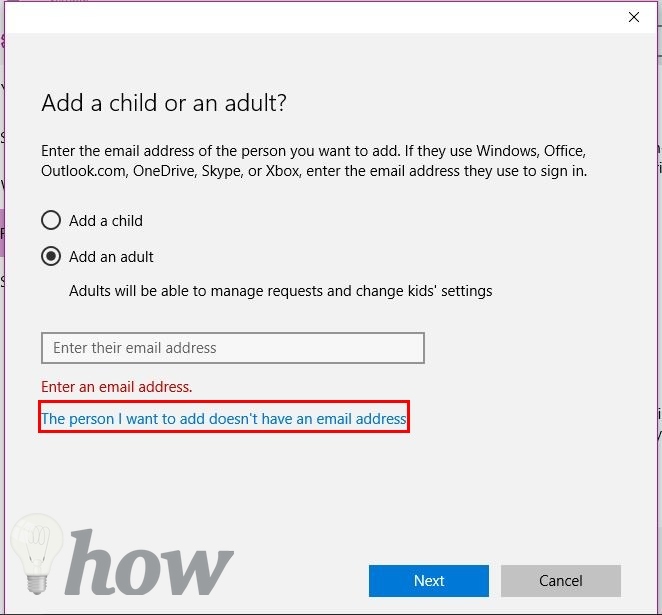
If the person you want to add is a family member, Microsoft has an option for that too. In Family and other users select Add, a family member and choose if the account is going to be for a child or for an adult.
Let’s choose adult and again you will be asked for either an Email address or a phone number. It also gives you the option to add your Email address if you don’t feel like creating an account. If you don’t want to use your email address, you will need to create an account for them.
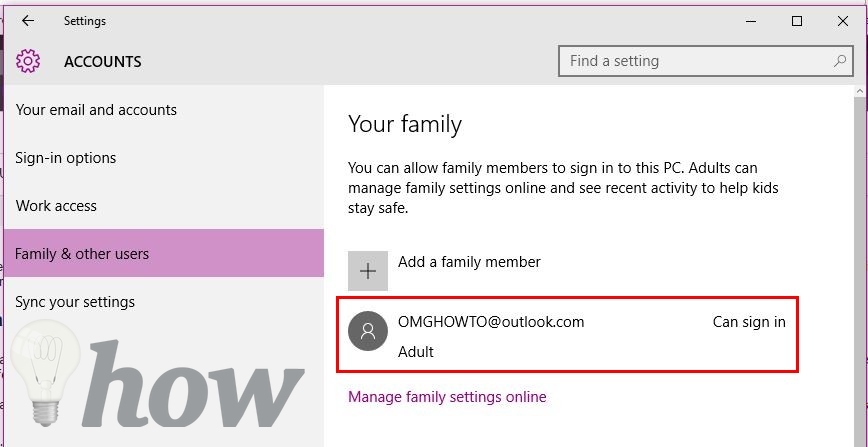
If the person does have an Email address, they will get an invitation and will obviously need to accept it. If the account is for a child, the setup is similar to the one of an adult, but you will be asked to add some restrictions.
For example, you will be asked if you’re going to allow your child to use their Microsoft account online. You can make the necessary restrictions where it says manage family settings online. You can find this option right below the family accounts you created.
Conclusion
I don’t think anyone likes having to share their computer, but sometimes you have no choice. Who do you have to share your Windows 10 computer with? Let me know in the comments.
Read more like this
- How To Manage Your Evernote Devices For Basic User
- How to List User Accounts Using Terminal on macOS
- How to Delete a User Account on Your Mac

