ISO images are super useful when you want to use the complete images of disk files. DVD and VCD storage devices have a lot of useful data. But the era of these secondary storages media files is almost touching its end. We download software and tools from the internet instead of purchasing them from the shops. When we download the software and game file from the internet, we mostly get the ISO files. The only way to use these files and to see their contents is to mount and burn ISO images.
As far was mounting the disk image is concerned, there were a lot of tools. I still remember using Daemon Tools or UltraISO to mount various game image files in Windows 7 and Windows XP. But Windows 10, apart from giving us a lot of powerful and new features, killed the need to use the third-party tools. You can mount ISO Windows 10 using the native facility.
Windows 10 has the built-in software functions which allow you to mount and burn the ISO images in a single click. Before that, users had to use a lot of third-party apps and software which created many problems. But now in Windows 10, you can click on any ISO file and then use the Mount ISO option. But there is confusion. In Windows 7, you used to see the burn and mount button clearly at the top of the options bar as shown in the image below.

But in Windows 10, you do not see the burn and mount buttons so clearly. This made many users think that Windows 10 does not contain the mount iso option. But this is not the case.
Here is how to mount ISO in Windows 10
Mount ISO from Manage
Open the File Explorer and go to the ISO file location or the folder where the ISO file is location.
After you have browsed over to the location, just switch over to the “Manage” tab. Manage tab is the place which shows you the Burn and Mount buttons. Manage tab is always aware of the context and the content of the location of in the file explorer.
It only shows the Mount and Burn buttons when the folder has the ISO image disc files.

Just select the file you want to mount and click on the Mount button from the Manage tab from the top left corner of the screen.

When you click on the mount option, you will be able to see the contents of the ISO file. In this way, you can install the software or game stored in the image file.
Mount ISO by using the Right-Click
If you don’t want to use the Manage tab, you can just use the right-click method.
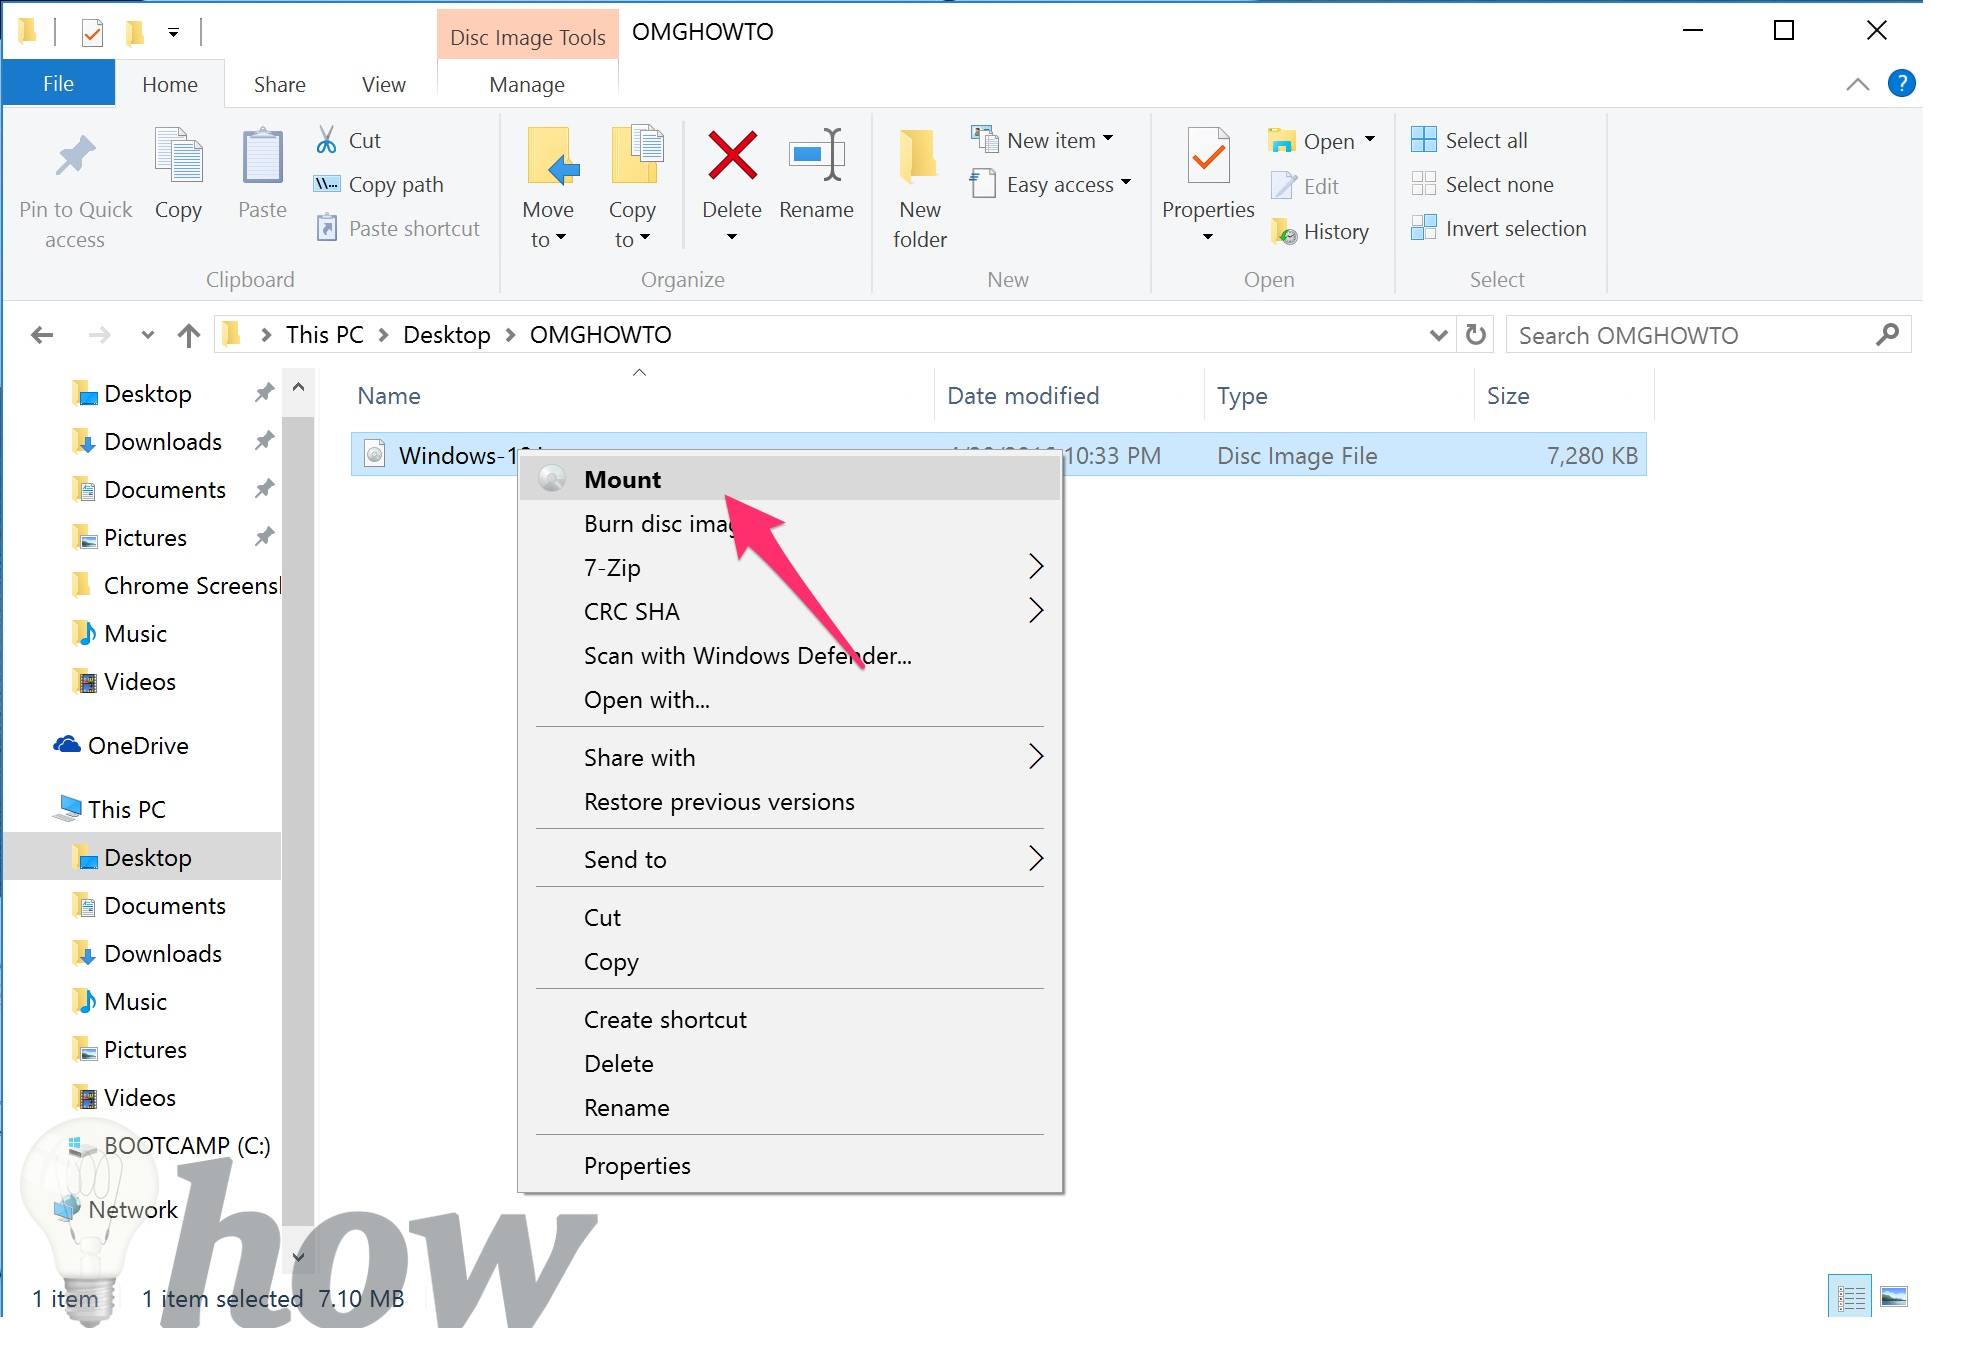
Just go to the file which you want to mount and right click on it. You will see an option “Mount.” Just click it and the image file of the disc will be mounted.

After the mounting process, the file appears as the disk drive in the PC or Computer. It is same as when you insert a physical disk in your laptop or computer, and it shows up on the PC or My Computer. You can double click this disc and use the contents. Such is the power of mounting a disk drive in Windows 10.
How to unmount ISO in Windows 10
If you have used the content and installed the software from the disk drive and now want to unmount disk Windows 10, just right-click on the mounted image and click on the “Eject” button.

This is same as ejecting a disk drive which you inserted in your computer. As soon as you click on Eject, the disk image will be unmounted.
Burn ISO files
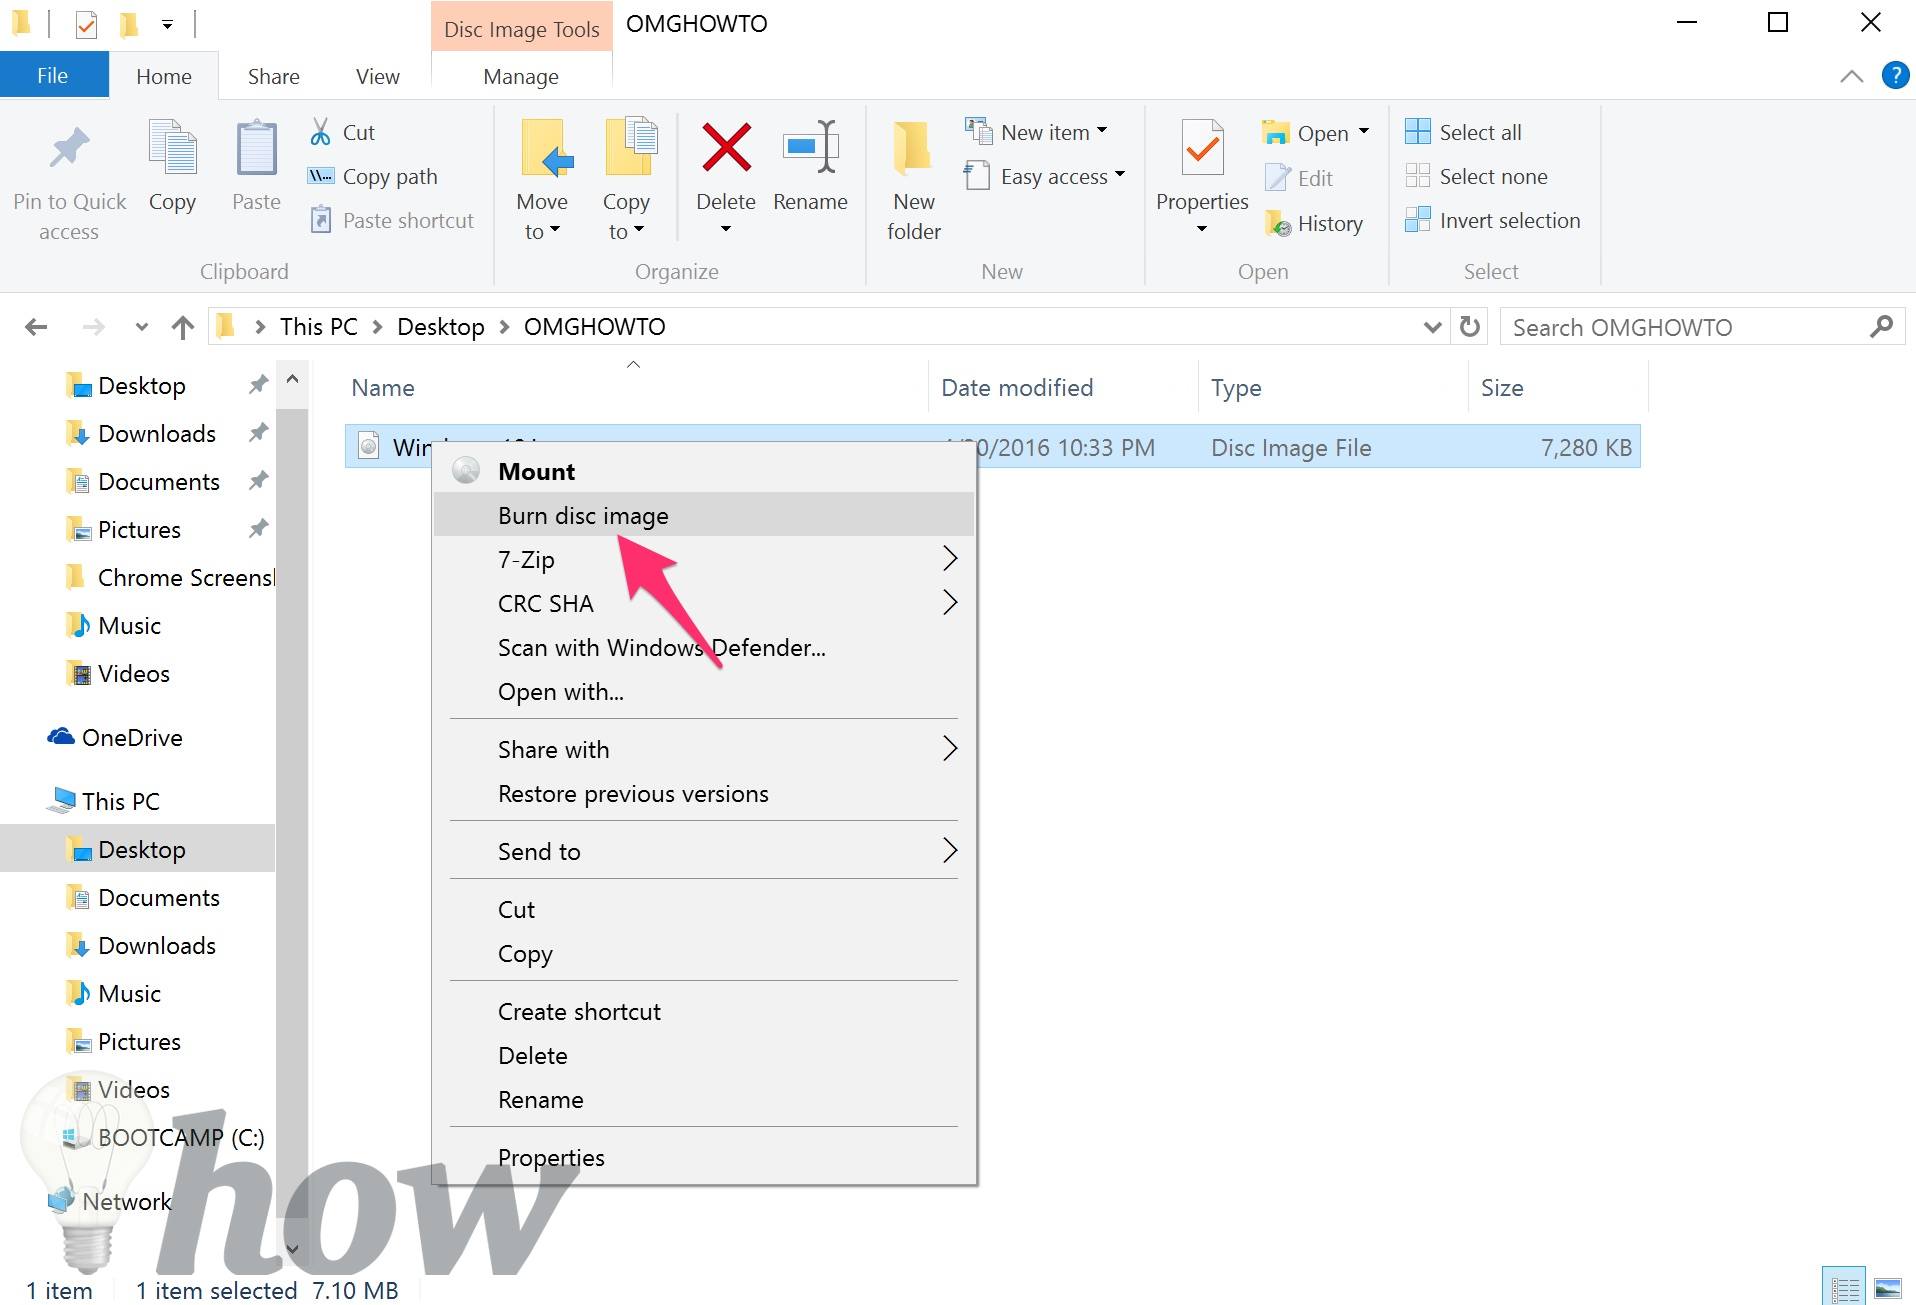
Similarly, you can use the burn image options in Windows 10 to burn a disk image file. You can find the burn image options in the Manage tab and also by right clicking the image file.

Right-Click on the ISO file >> Select Burn disc image option

Select Burn button from Manage Tab
Conclusion
Microsoft made things easy for the people by giving the built-in option. In case you are still unable to mount the disk image or face any confusion or problem, feel free to comment on this post and we will get back to you with a solution.


