Sometimes, people have to share the computer with the other friends or family members. Although the easiest way to share the computer is by creating another account which can be used by another person to login to Mac. However, if both person needs to have the administrative account, you can always protect your personal folders or files with the secret password which will not be accessible by anyone but you.
Fortunately, Apple provides a way to protect the files or folders on Mac but this method is not as simple as it seems. This method will basically create the image of the folder which can be protected using a strong security code. So, this method is not easily understandable by most of the users.
Moreover, anyone without the password can delete this folder, such problems can be overcome using a third party software. Here’s the step by step guide to password protect a folder on Mac using both methods.
1st Method: Password Protect a Folder using Disk Utility
This method is bit complicated as compared to the later one but it does not require installation of a third party program and all you need to have is the password of administrative account of the macOS. Moreover, after securing the folder using this method, you can even delete the original folder without any problems of deleting the precious data from your folder. Here’s how it works:
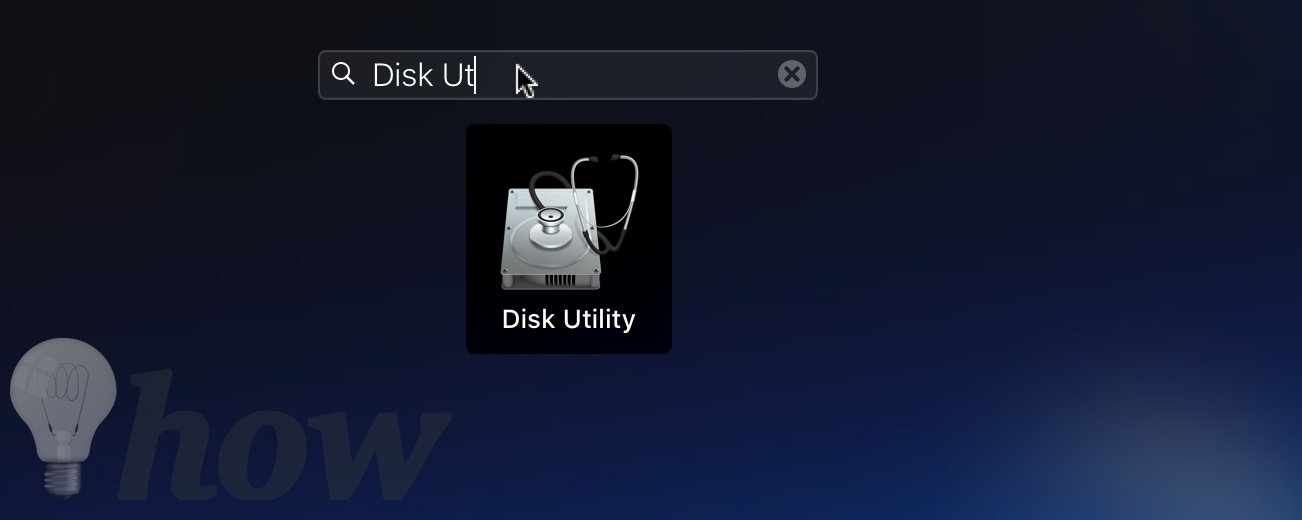
Step 1: Launch Disk Utility on your Mac, if you are newbie and don’t know where is the Disk utility, click on the “LaunchPad” on the dock.
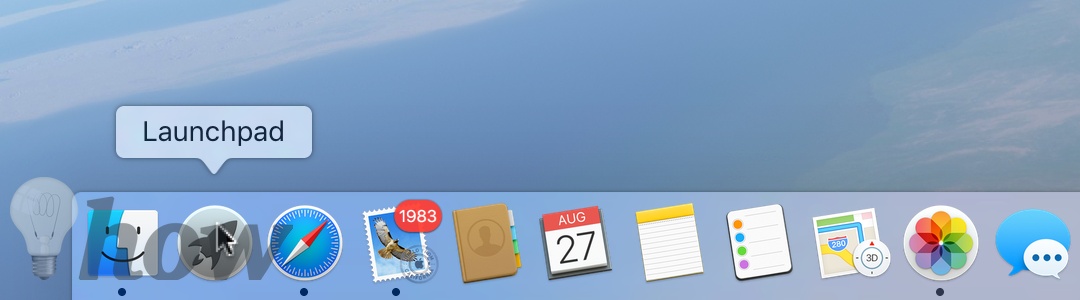
Step 2: Now, start typing the “Disk Utility” and you will see the program right on your screen. Click on it to Launch it on your Mac.
Step 3: Once the Disk Utility is launched, click on the “File” button on the top and click on “New Image > Image from Folder”. You can also use the keyboard shortcut [Shift + Command + N] to start a new image from the Folder.

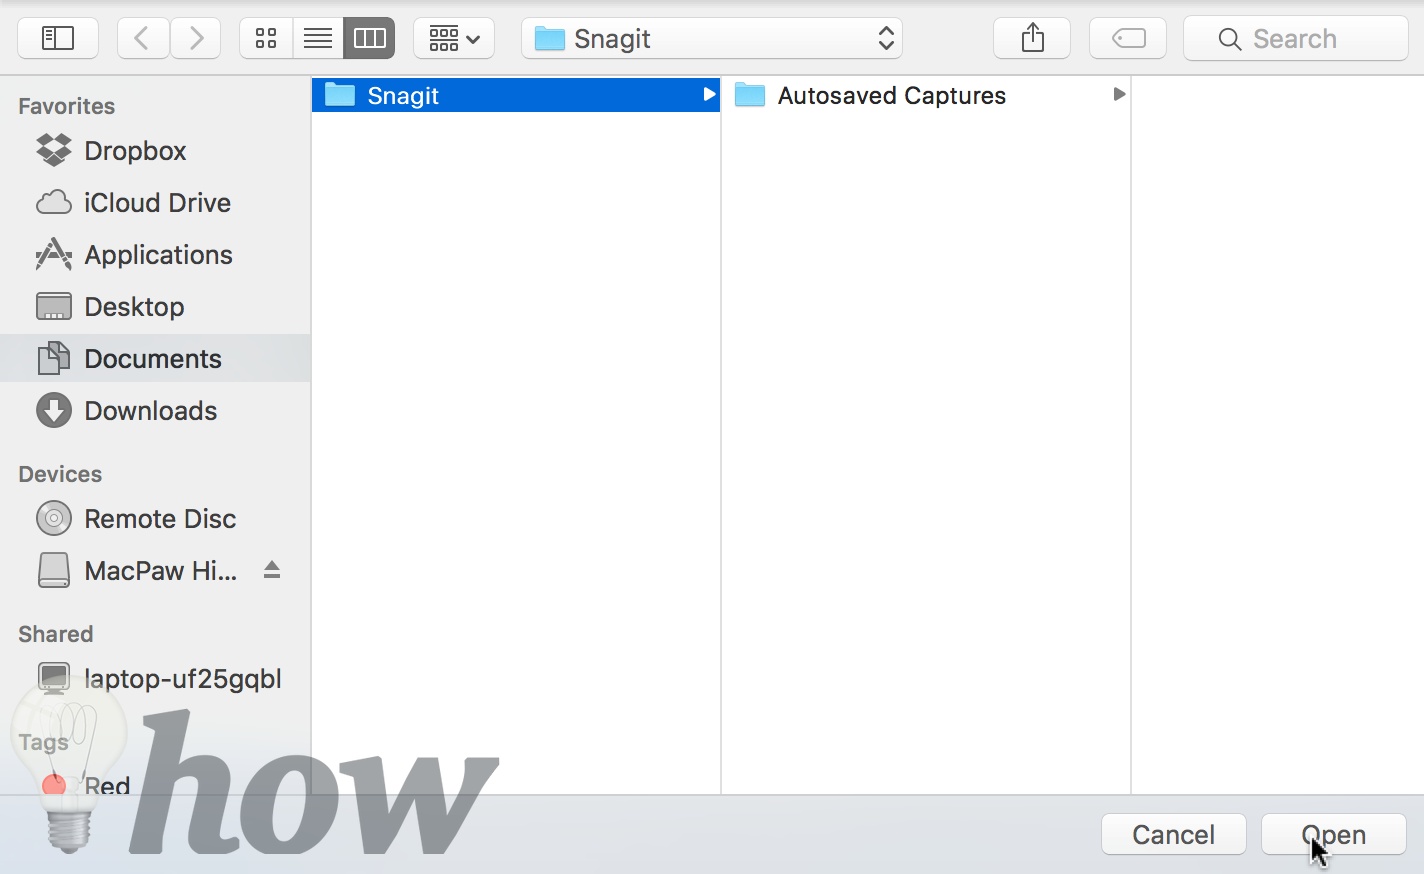
Step 4: As soon as you hit the new image for the folder, it will open the Finder where you will have to select the folder that you want to protect with the password.
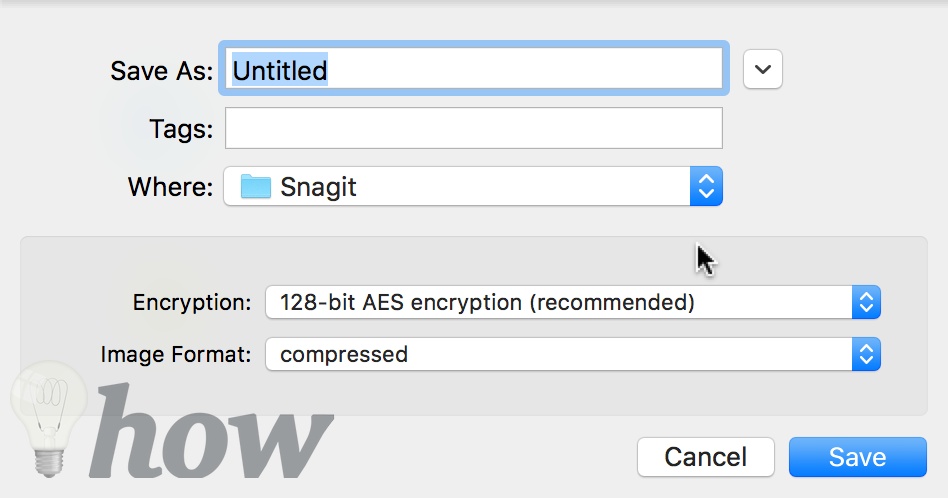
Step 5: On the next screen, enter the new name of the password protected folder, click on where to change the location for the protected folder. You will have to encrypt the folder here, click on “Encryption” and select “128-bit AES Encryption.”
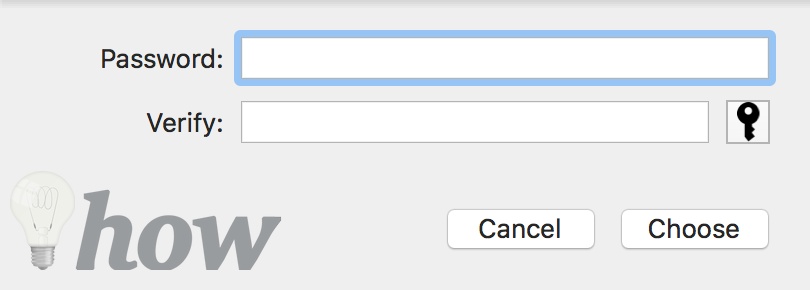
Step 6: It will open another window on the screen, enter the password for this folder in this window and click on “Choose” button.
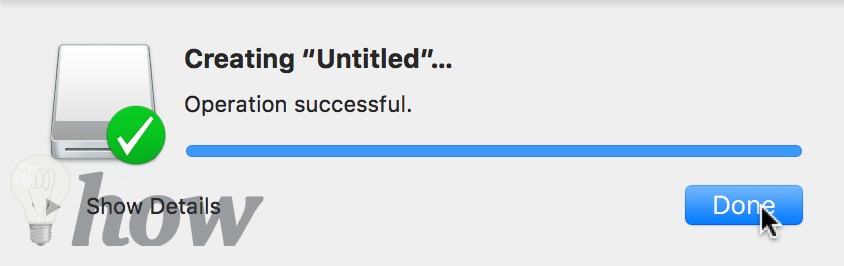
Step 7: Click on “Save” button and it will start protecting the folder with the password. Once the folder is protected, you will a dialogue showing the “Operation Successful”. Click on the “Done” button.
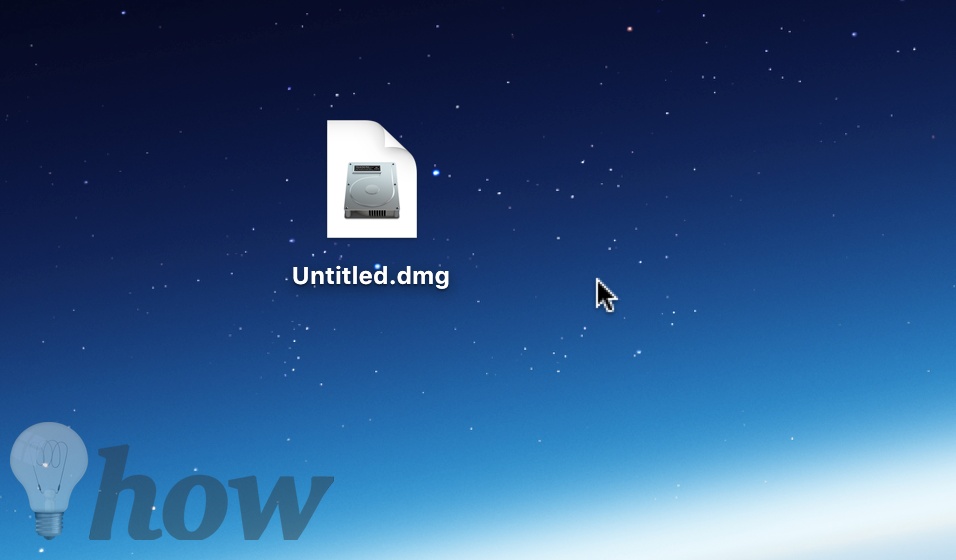
Step 8: That’s it! You will see a new file with the .dmg extension in the output folder.
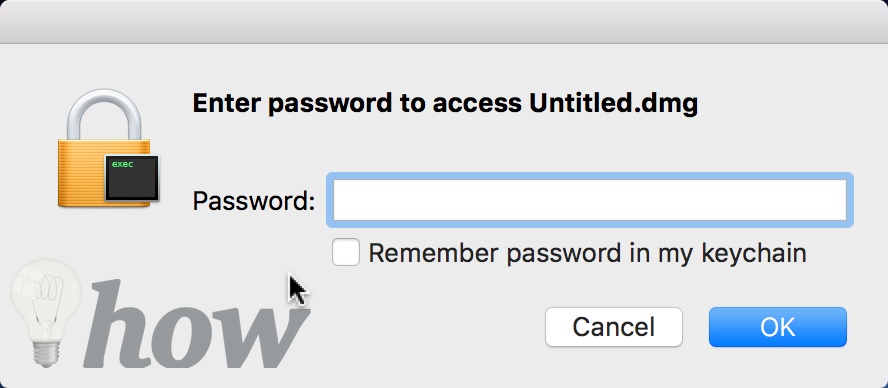
Step 9: Once you double click on the folder, you will have to enter the password of the file.
That’s it! Now, you can delete the already present folder from your computer. Although it seems like a difficult task but it is a great way to quickly add or remove password on a folder on Mac. However, if you don’t want to go through this hassle, you can use the guide mentioned below to add password to folder using a third party application.
2nd Method: Using Third-Party App
All of the third party programs will cost you money to fully function on your Mac. One of them is the Hider 2 which has easy to use interface and does not require any complicated settings. This program will basically create the vault on your Mac where you can save the important files and folders and can even make them invisible from your macOS. As this program is not available on the Mac App Store, so, you will have to purchase it from MacPaw website and install it manually on your macOS.
Click here to purchase the full version of Hider 2 and download the .DMG of the file. After downloading the file, launch it on your Mac and here’s how it will look. Hold the MacPaw Hider 2 and drop it to the “Applications” folder.

On the next screen, click on the “Open” button. If you haven’t enabled the installation from all sources, you will have to go the System Preferences to make changes. Click on the Apple sign in top left corner and click on “System Preferences”, hit the “Security” and open the program.

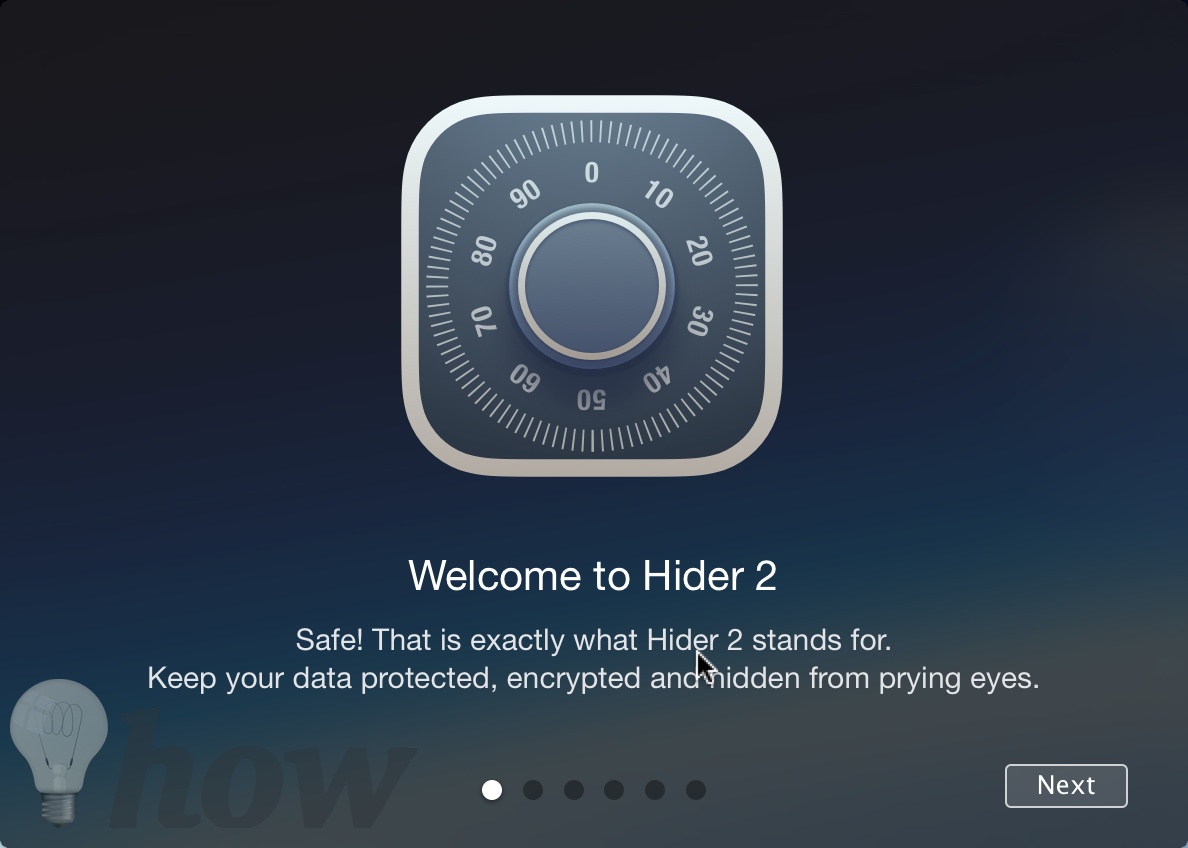
Once the application is installed, open it on your computer. Click the “Next” and read about the features of the Hider 2.
Finally, enter the password for your folders on the last screen and click on “Create Vault.”

Now, you will have to select the secret place for your vault. We will recommend you to select one of the deep folders where no one will think of searching. After selecting the location, click on the “Save Vault.”

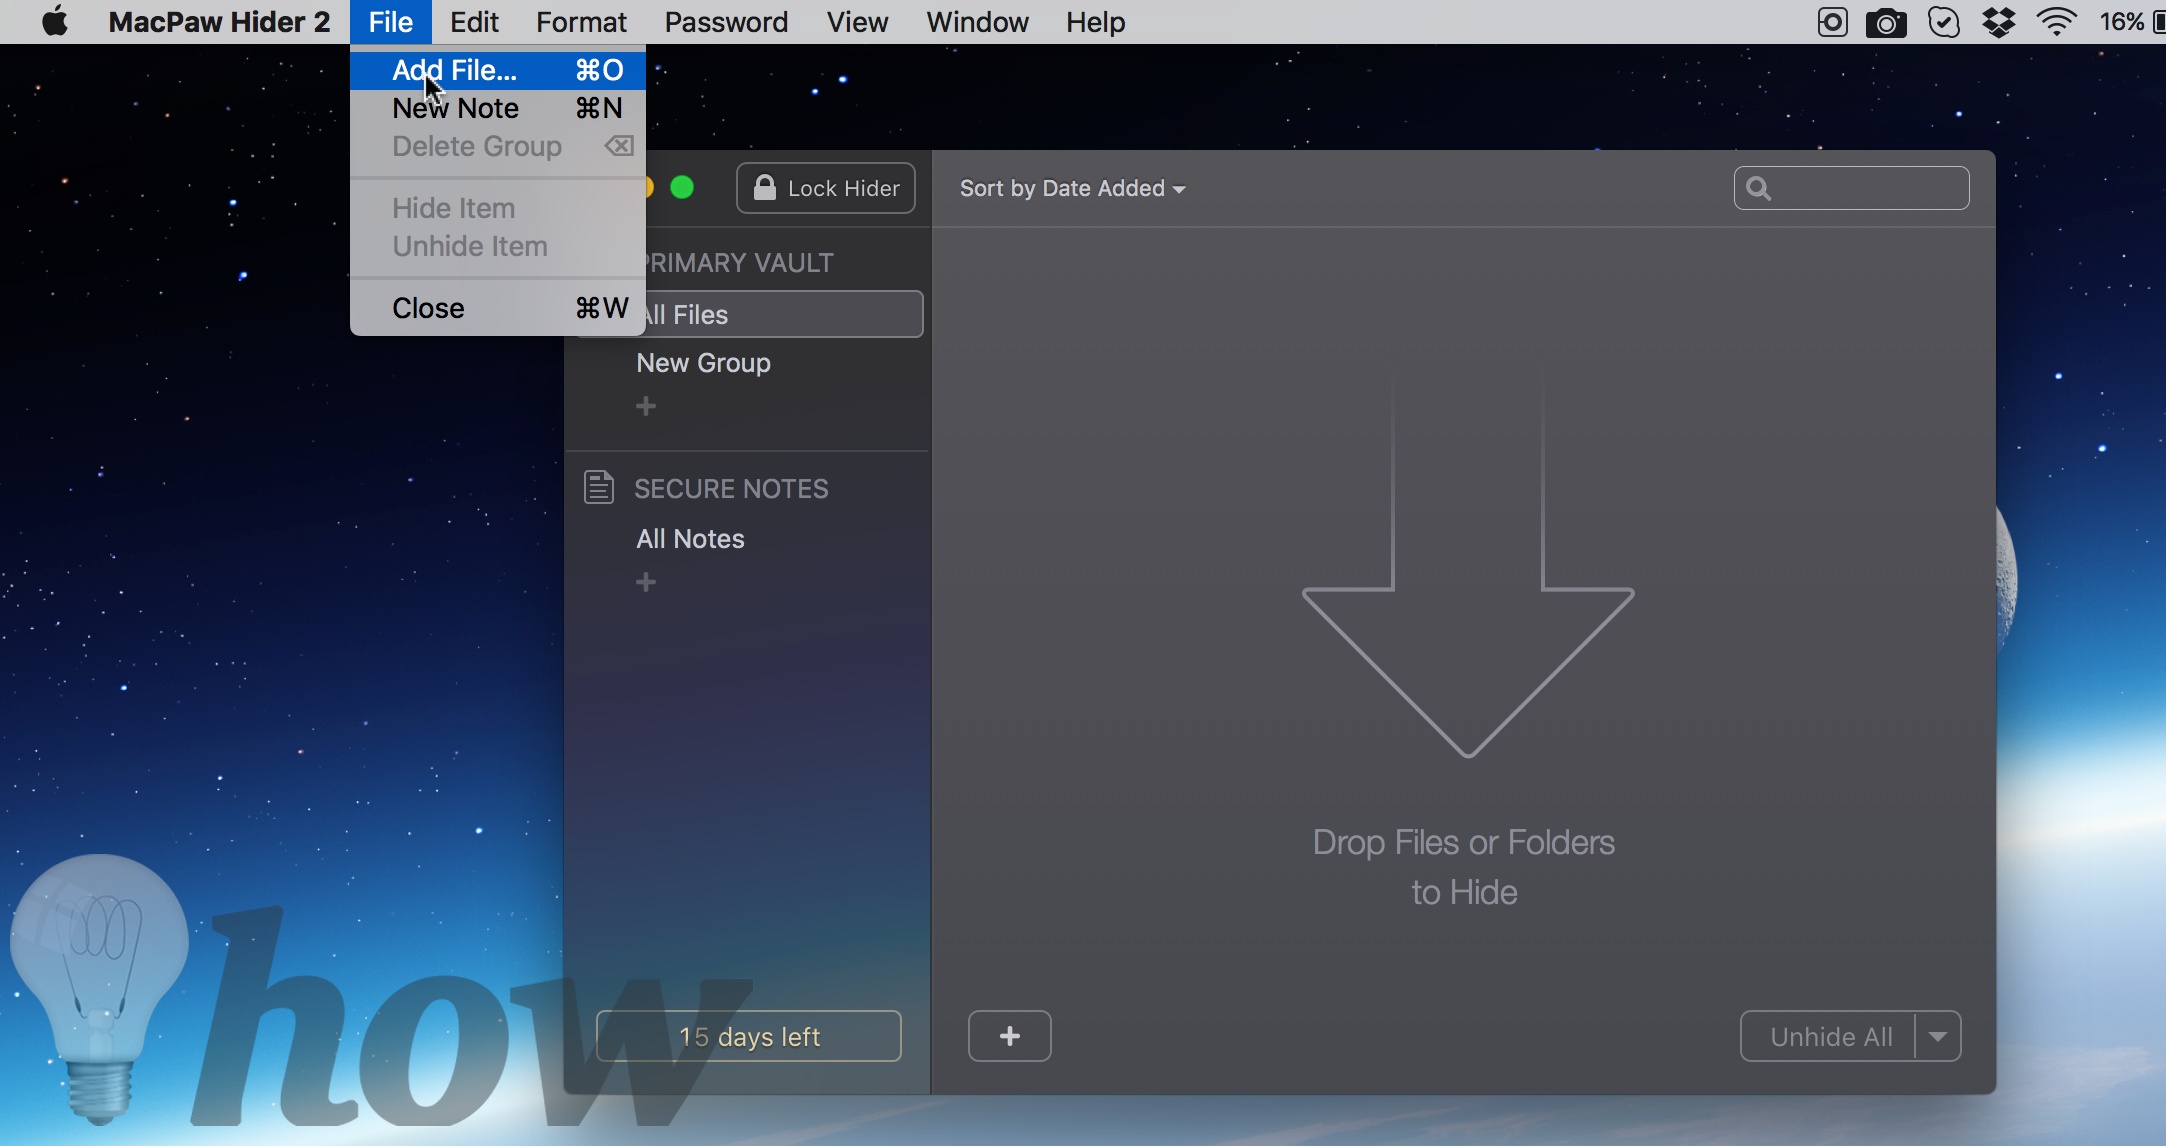
That’s it! This program is all set, now, you can add files or folder to protect them using a strong password. Click on the “File” and select “Add Files”. Select the folders or files that you want to protect.
If you have added all files, the folder will become invisible from your Mac. In order to make it Visible again, you can enable the option right next to it. Now, you will have to minimize the program, click on the “Lock Hider.”

Here’s how it will look like on your Mac, you can enter the password of your account to see the locked folders or files.

Remove Folders from Hider 2 to Unlock Them Permanently
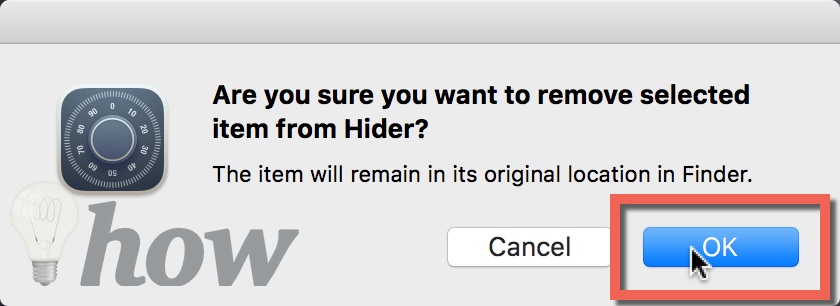
Launch Hider 2 and tap with two fingers on the folder. Now, select the “Remove Item from the List.”

On the next screen, click on “OK” Button as shown in the screenshot below.
That’s it! You have permanently unlocked the folder from the Hider 2. There is no deny in the fact that the second method is way better as compared to the first method to protect folders using a password. The only advantage that the first method has is that it is absolutely free of cost and does not require an installation of any third party application.
Other great programs which can be used to lock folders on Mac includes “Protect Files” and “Concealer” and both of them will cost $19.99. Which method do you use to protect files or folders on your Mac? Let us know in the comments section below.
Read more like this
- Dashlane Review – Keep All Your Passwords in One Place
- How to View Your Saved Wifi Password in Windows
- How to Create A Safe And Strong Password
- How to Password Protect a File on Mac
- Best NTFS Apps For Mac