There is no deny in the fact the iPhone is one of the most popular smartphones in the world and the biggest reason behind the success of iPhone is the combination of software and hardware on an iPhone. The operating system on iPhone is called iOS and is closed OS which will not let you directly copy or extract anything from the iPhone.
You will have to use software on your computer to transfer the datas from your iPhone. Whenever you connect your iPhone to Mac or Windows PC, it is shown as a camera, and you can easily transfer Photos from it. However, if you have tons of photos, it will become tough for you to differentiate between those pictures.
Practically, there are plenty of ways of transferring photos from iPhone to the computer. You can either connect the iPhone with USB cable or use wireless network as known as Wi-Fi to transfer these pictures. Here’s the detailed guide on transferring photos from iPhone to the computer. If you’re looking for a repla cement Lightning cable for your iPhone, we listed the best lightning cable you can buy right away. Be sure to check them out.
How to Transfer Photos from iPhone to a Computer (4 Methods)
Using USB cable
This method is useful for all those users who don’t have a good internet connection, have a lot of pictures or videos or have a USB Cable. This is so far the easiest way of transferring the photos from your iPhone to a computer. However, the way of transferring photos to Windows Computer is different than Mac.
1. Transfer Photos to Mac using Photos
Connect your iPhone to the Mac, and it will automatically open the iPhoto for most of the users. However, if it doesn’t, go to the Mission Control and open Photos from there or you also find from LaunchPad >> Click on Photos icon.

Here you will find all the photos present on your iPhone. If you want to Import all the photos from your iPhone to Windows PC, just select Import All, otherwise, select some photos and click on Import selected button as shown in the screenshot.


2. Transfer Photos from iPhone to Windows PC using Photos App
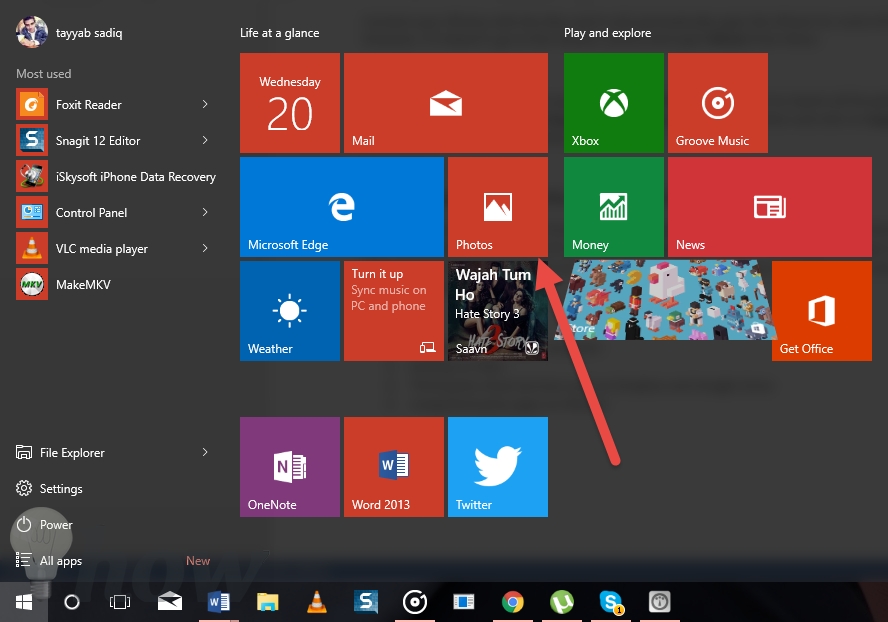
The method to transfer photos from iPhone to Windows PC is pretty much similar to the Mac. Connect your iPhone to the Windows PC and Click on Start Menu. Search for Photos and open it. This method will work for the Windows 8 and 10. If you are using Windows 7, you can simply open the connected iPhone to transfer the photos.
On the main screen of the App, click on the Import button as shown in the screenshot below.

It will start searching for all the photos and videos on your iPhone.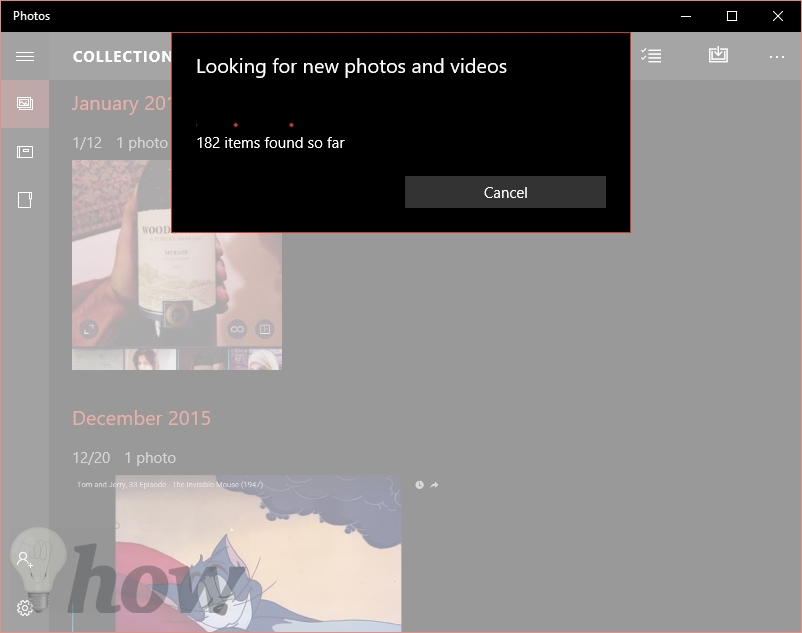
It may take a second or two depending upon the number of photos present on your iPhone. Now, it automatically selects all the photos, so, if you want to move all photos, click on Continue. Otherwise, click on Clear and only select the photos that you want to transfer and then click on Continue.

On this screen, you can select the location of imported photos and there is another option that will let you delete photos from iPhone after copying them to your PC. After selecting the appropriate options, click on Import button.

That’s it! This process may take some time depending upon the number of photos that you want to transfer.
Use iCloud on iPhone and Computer
This method is suitable for those users who have an internet connection but don’t want to go to the hassle of connecting their iPhone with the computer using lightning cable. However, you will need an internet connection to use this method and iCloud should be enabled on your iPhone and Mac.
The only drawback of this method is that you only get 5GB free for iCloud to store your personal photos and data from different apps on iPhone. First of all, you will have to enable the iCloud and photo stream on your iPhone.
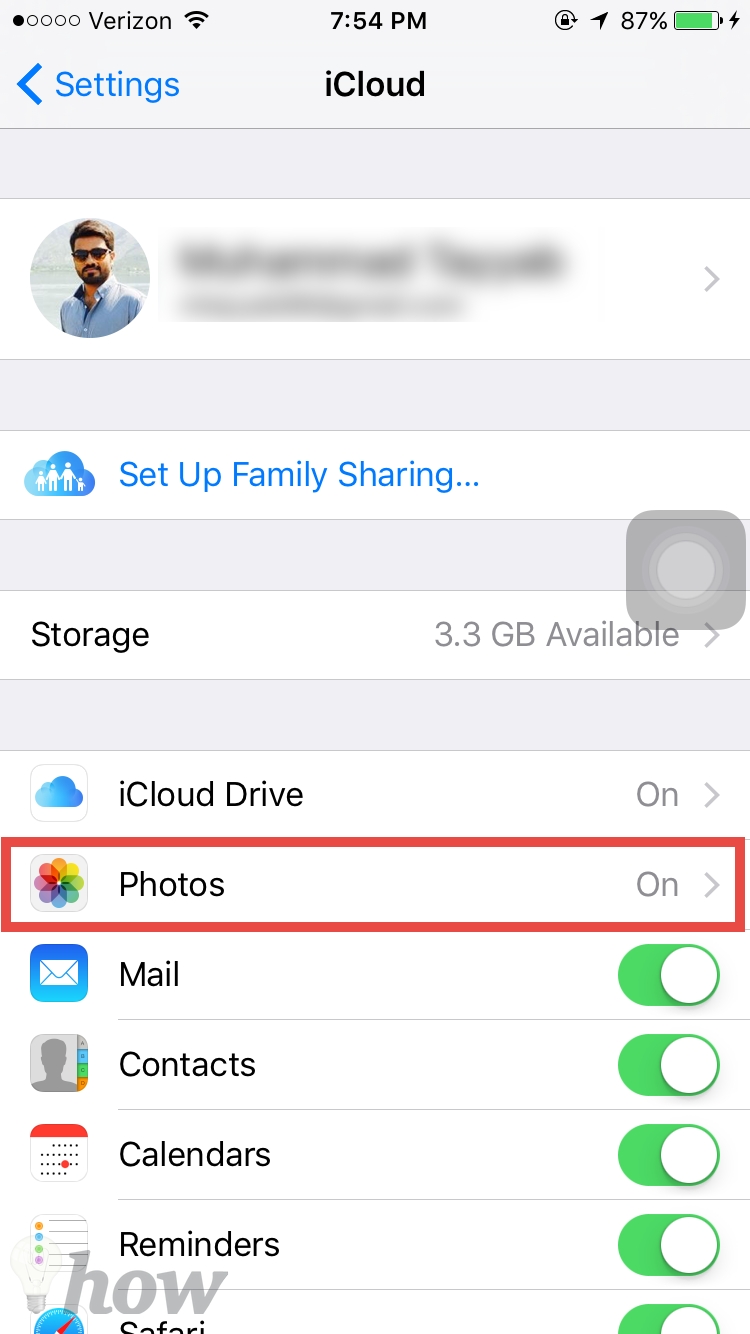
Go to the Settings on your iPhone, scroll down and tap on the iCloud.

If you haven’t already enabled the iCloud on your iPhone, login with your Apple ID and password to activate it on your iPhone. Here’s how it will look like. After logging in, click on Photos.
Now, make sure that you have enabled all the options on this page such as upload to my photo stream, iCloud Photo Library and Upload burst Photos.

That’s it! You have enabled the iCloud on your iPhone, now, Go back to install and enable on your Windows PC and Mac.
For Mac Users:
For Mac users, iCloud comes built-in the MacOS. Simply click on the Apple logo in the top left corner. Select System Preferences.

Click on iCloud and login to this Mac with the same iCloud account that you used on your iPhone.

Login your iCloud account

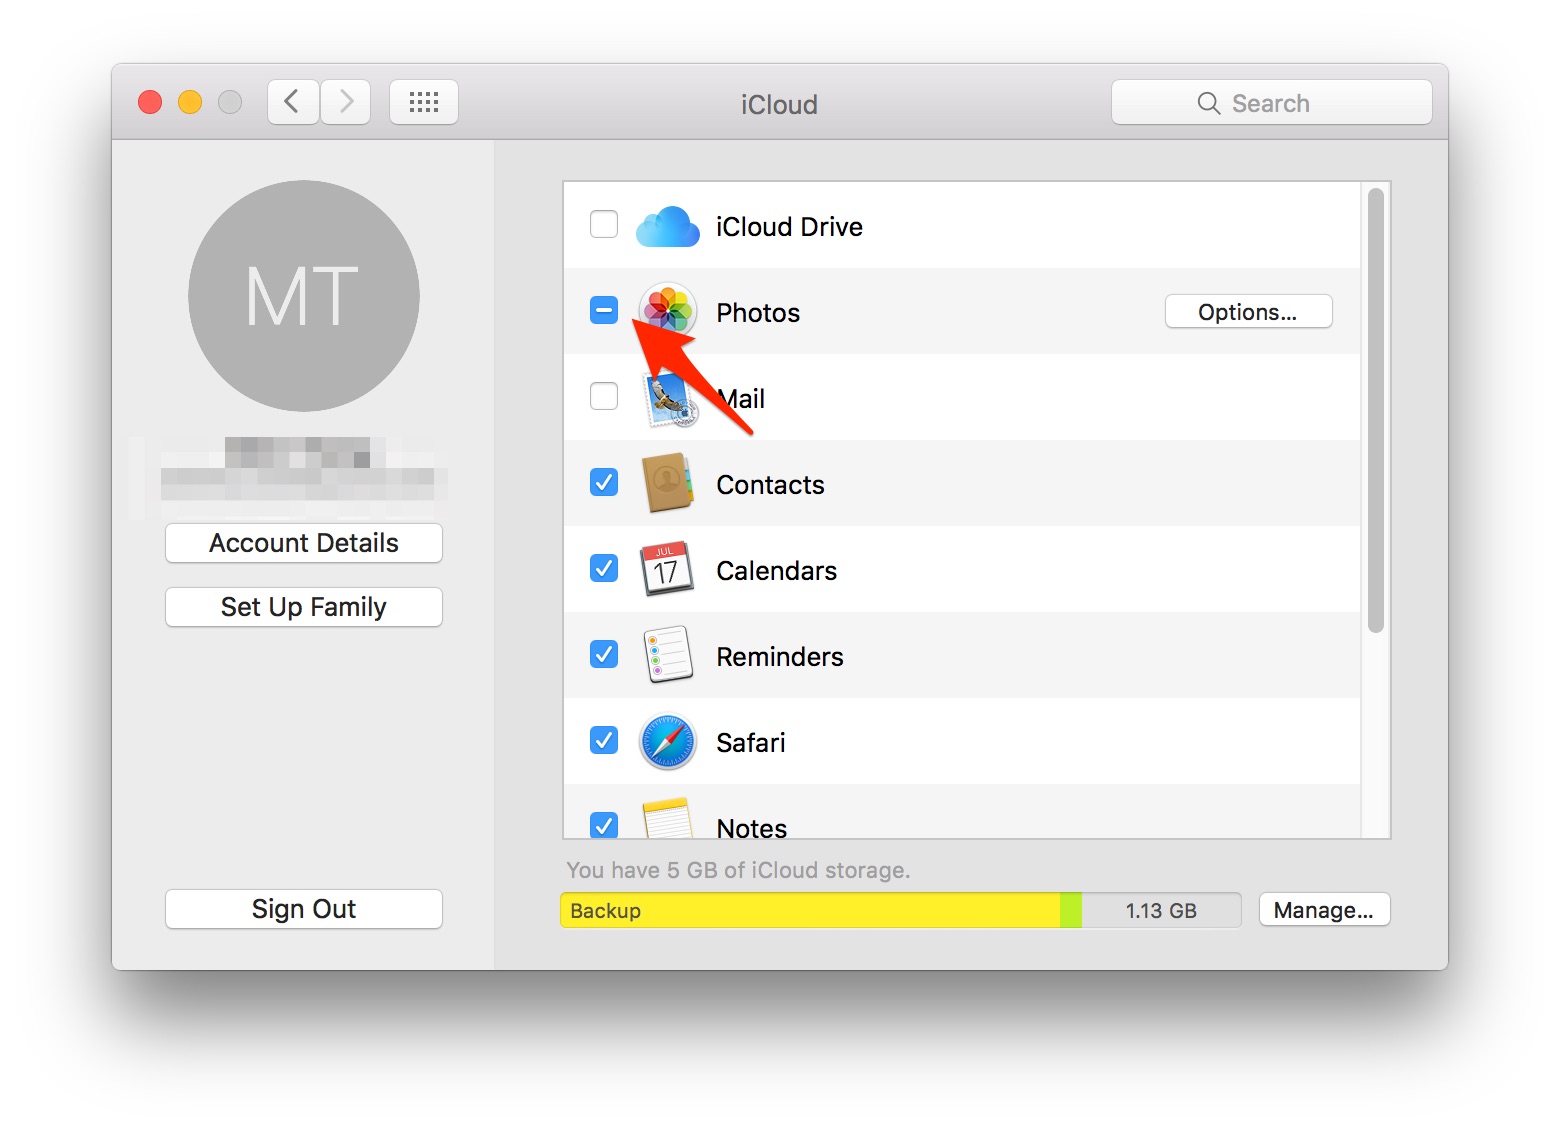
On the next screen, make sure that you have enabled the Photos on your iCloud account on Mac.
For Windows Users:
As iCloud doesn’t come preinstalled with Windows, so, you will have to download the latest version of iCloud on your Computer. Click here to download the iCloud Drive on your computer. After installation of iCloud, login with your Apple ID and password. Make sure to use the same Apple id that you used on your iPhone.
After adding all the details, you will be navigated to the following page, Enable the Photos and click on the Options to reveal more settings related to the iCloud Photos.

On the options, you can change the iCloud Photo Library, download the Photostream from your iPhone and can upload the new photos to your iCloud account.

That’s it! By this way, photos from your iPhone will be automatically transferred to your PC.
Use Third-party Cloud Services
Another way of sharing files from iPhone to a computer is by using the third-party cloud services such as Google Drive, Dropbox, Box, Mega etc. Out of these third party cloud services, Dropbox and Google Drive are the most reliable and widely used around the world.
The best part about Dropbox is that it has an amazing user interface for the mobile application. It has application for both the Windows Computer and macOS and works approximately same. Here’s how you can transfer the photos from iPhone to a computer using Dropbox.
Real also: Best Photo Storage and Sharing Sites
Go to App Store on your iPhone and download the Dropbox.
If you already have an account, login using that account on your iPhone. However, those users who don’t have an account can use the signup process to make a new account. After making a new account, if you want Dropbox to upload the photos on your computer automatically, click on Settings and enable Camera roll.

However, for those users who don’t Dropbox to upload the photos, click on Files and select the folder where you want to upload the photos.

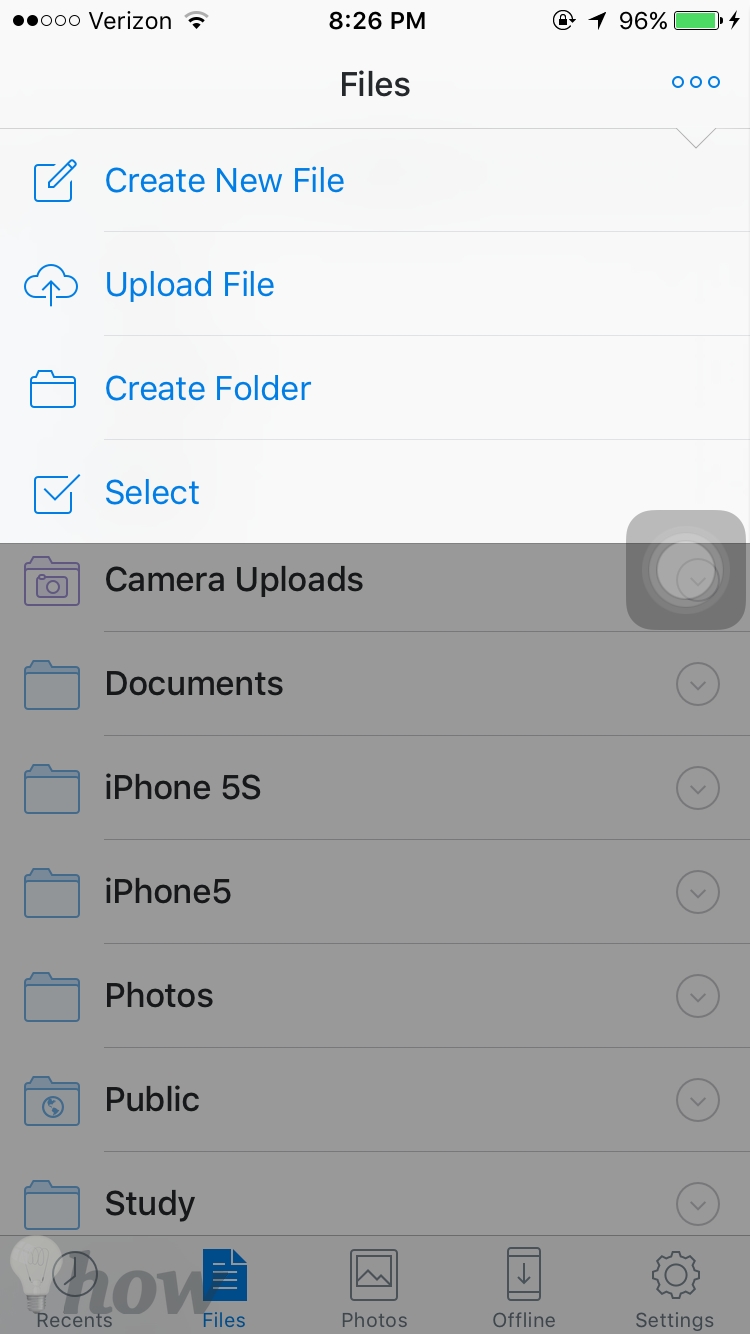
Now, click on the three dots in the top right corner and select the Upload File. Select the appropriate photos and wait for it to complete the upload process.
Now, Go back to your PC and download and install the Dropbox app on your computer. Click here to get Dropbox app for Windows or Mac. After installation, login with your username and password. It will show all the photos from your iPhone on your computer.
Using Third-Party Apps on iPhone
Apart from using the native and third-party cloud-based services, there is an alternative method available to transfer photos from iPhone to PC using third party photo transfer apps from the App Store. Most of these apps work in a great way and come in the lite version and paid version.
Lite version will let you transfer only a few photos from your iPhone to a computer. However, Pro version promises to transfer unlimited photos between your iPhone and PC. Yes, you can also transfer the photos from iPhone to PC using these applications. One good example is the Wi-Fi Photo Transfer (iTunes Link).
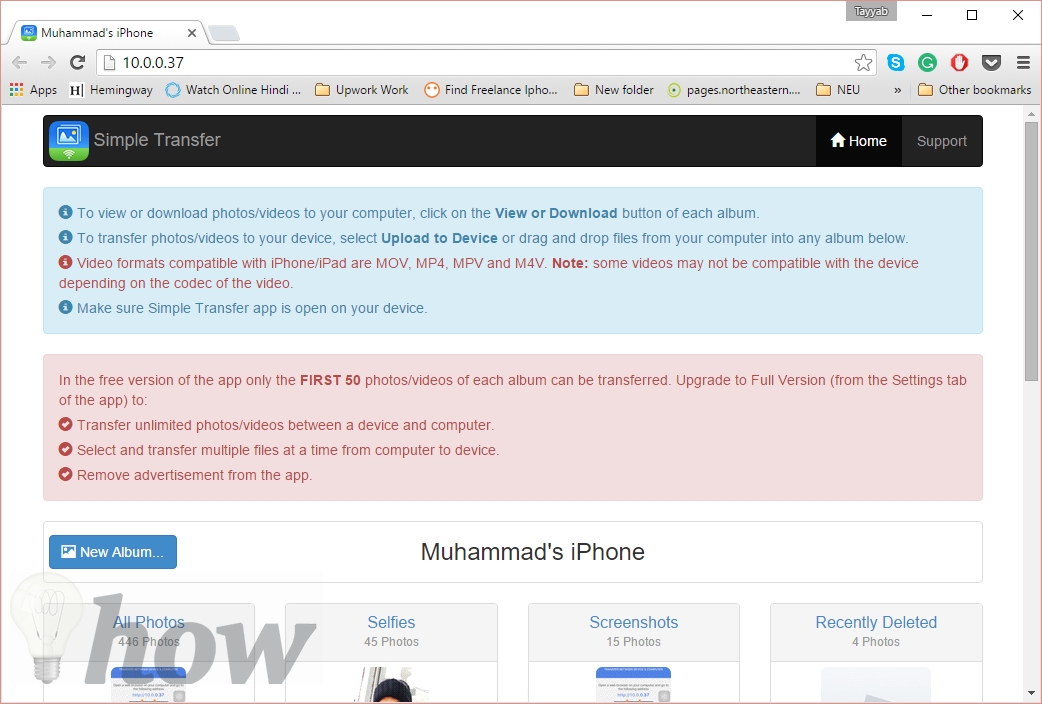
After installation of this application, launch it on your iPhone. On the main screen, you will find the address.

Now, go to the web browser on your computer and write down the same address as shown in the screenshot below. On this screen, you will find all the albums and photos present on your iPhone. You can either copy them to a download them or add new photos to your iPhone as well.
Conclusion
All of these ways have their own pros and cons, and some require USB connection with the PC while others need Wi-Fi to transfer the photos. However, despite all of these difference, we use Dropbox and find it one of the fastest and perfect tools to transfer the photos. Which one do you like? Let us know in the comments section below.