Voice memos are the perfect way to record the lectures, tracks or speech on your iPhone, iPod Touch or iPad. However, being a closed operating system, it is not as easy as it seems to download the voice memos from your iPhone to the computer. Previously, the only ways to transfer the voice memos from iPhone to the computer was using the iTunes or third-party program on your computer.
On the other hand, in the newer versions, you can directly mail the voice memos to yourself or can upload to a folder on Dropbox. However, if you don’t have the internet connection or want to transfer the voice memos to your computer, you can use the second or third method.
Transfer Voice Memos From The Application
Although this is not a direct method to transfer the voice memos from the application to your computer, yet it still works pretty well. You can mail yourself the voice memo and can later open the same Email on your computer to download that voice memo.
Similarly, you can also use the Dropbox or other applications. We are using the Dropbox application on the iPhone and macOS, so we can easily transfer the voice memos to a folder on the Mac.
Using this method, you will have to individually transfer the voice memos and it cannot be used to transfer all voice memos at the same time. Here’s how this method can be used to download voice memos from iPhone.
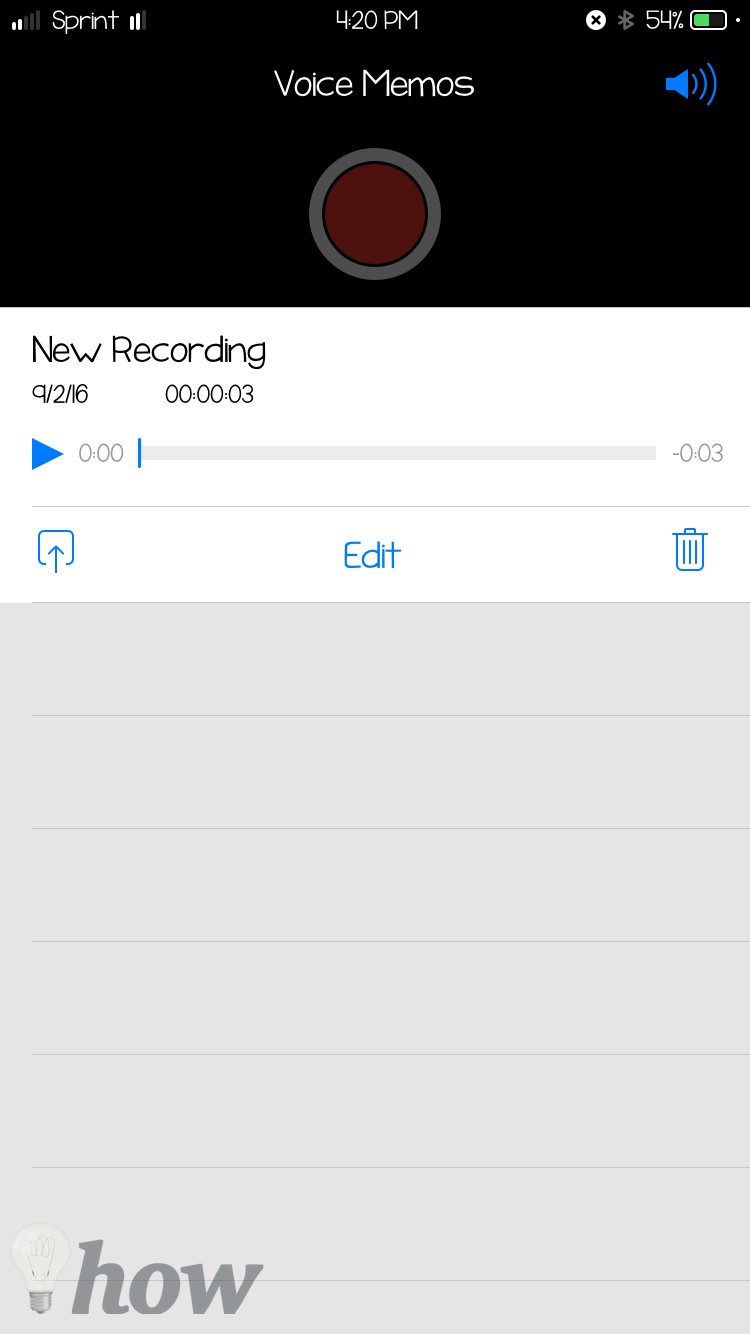
Step 1: Open Voice Memos application on your iPhone or iPad and tap on the “Voice Memo” that you want to forward. Once the voice memo is opened, tap on the little arrow button on the left side of the memo.
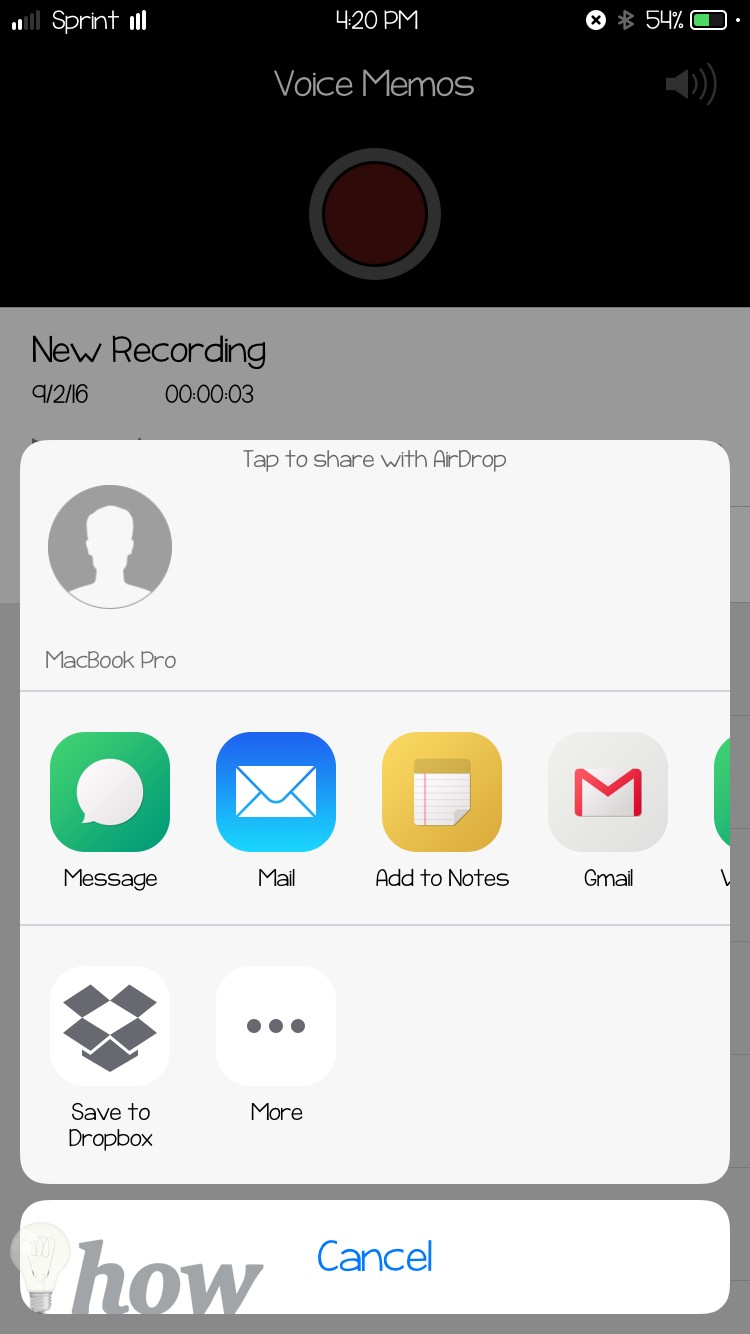
Step 2: Now, you can select the application that you want to use to save the memo. You can either mail this voice memo using “Gmail, Mail, Dropbox” or similar applications. We are using “Dropbox” in this tutorial. Tap on the “Save to Dropbox” on the bottom of the screen.
Step 3: Finally, select the folder where you want to save the voice memo and tap on “Save” button as shown in the screenshot below.
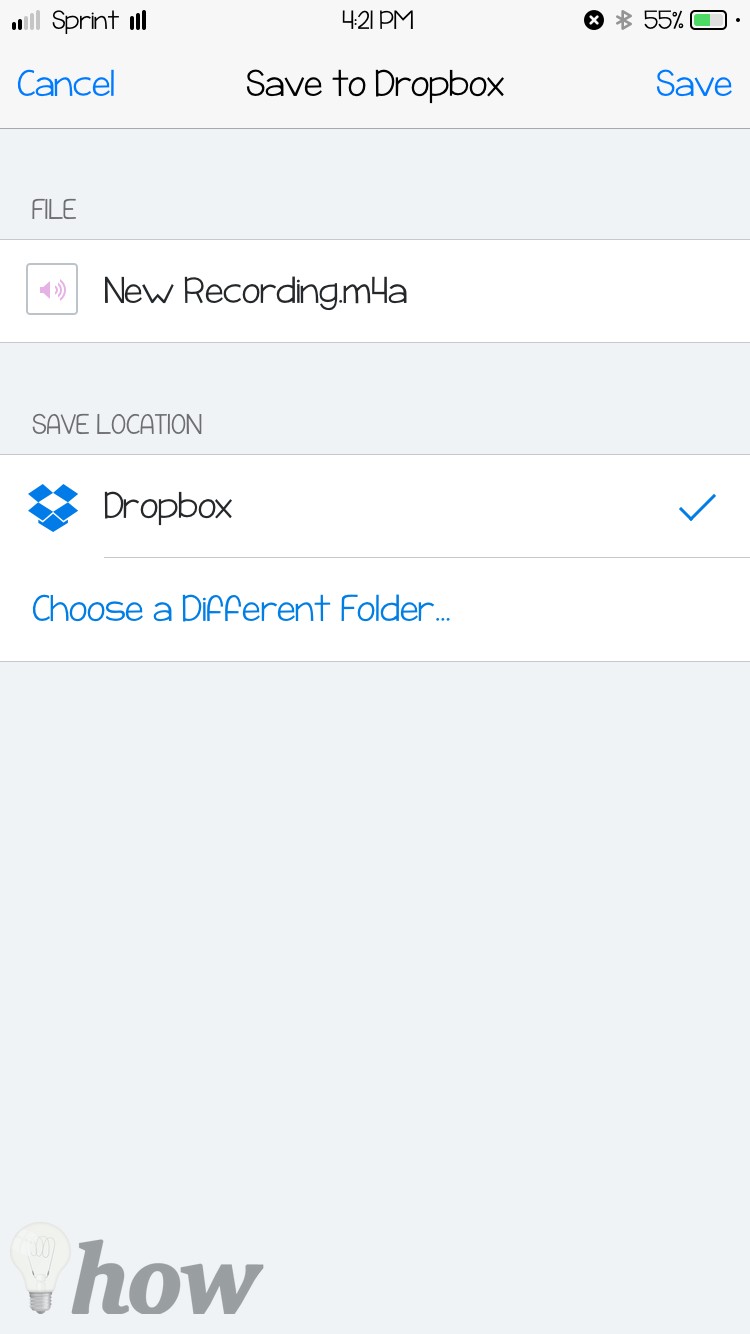
That’s it! The voice memo will be uploaded to the Dropbox account and you can access this file by opening the Dropbox account.
How to Download Voice Memos from iPhone using iTunes
This method works equally well on both Windows or macOS but is only good for those people who have synced the music library of iPhone to the library of iTunes. If you haven’t synced the music library, this method will delete all the present tracks on your iPhone.
However, if you are using the Apple music service, the tracks will be automatically transferred to your iPhone or if you have already purchased tracks from iTunes store, you can download them again.
Step 1: Connect the iOS device with USB cable and launch iTunes on your computer. Once the program is opened, click on the little iPhone icon on the screen.
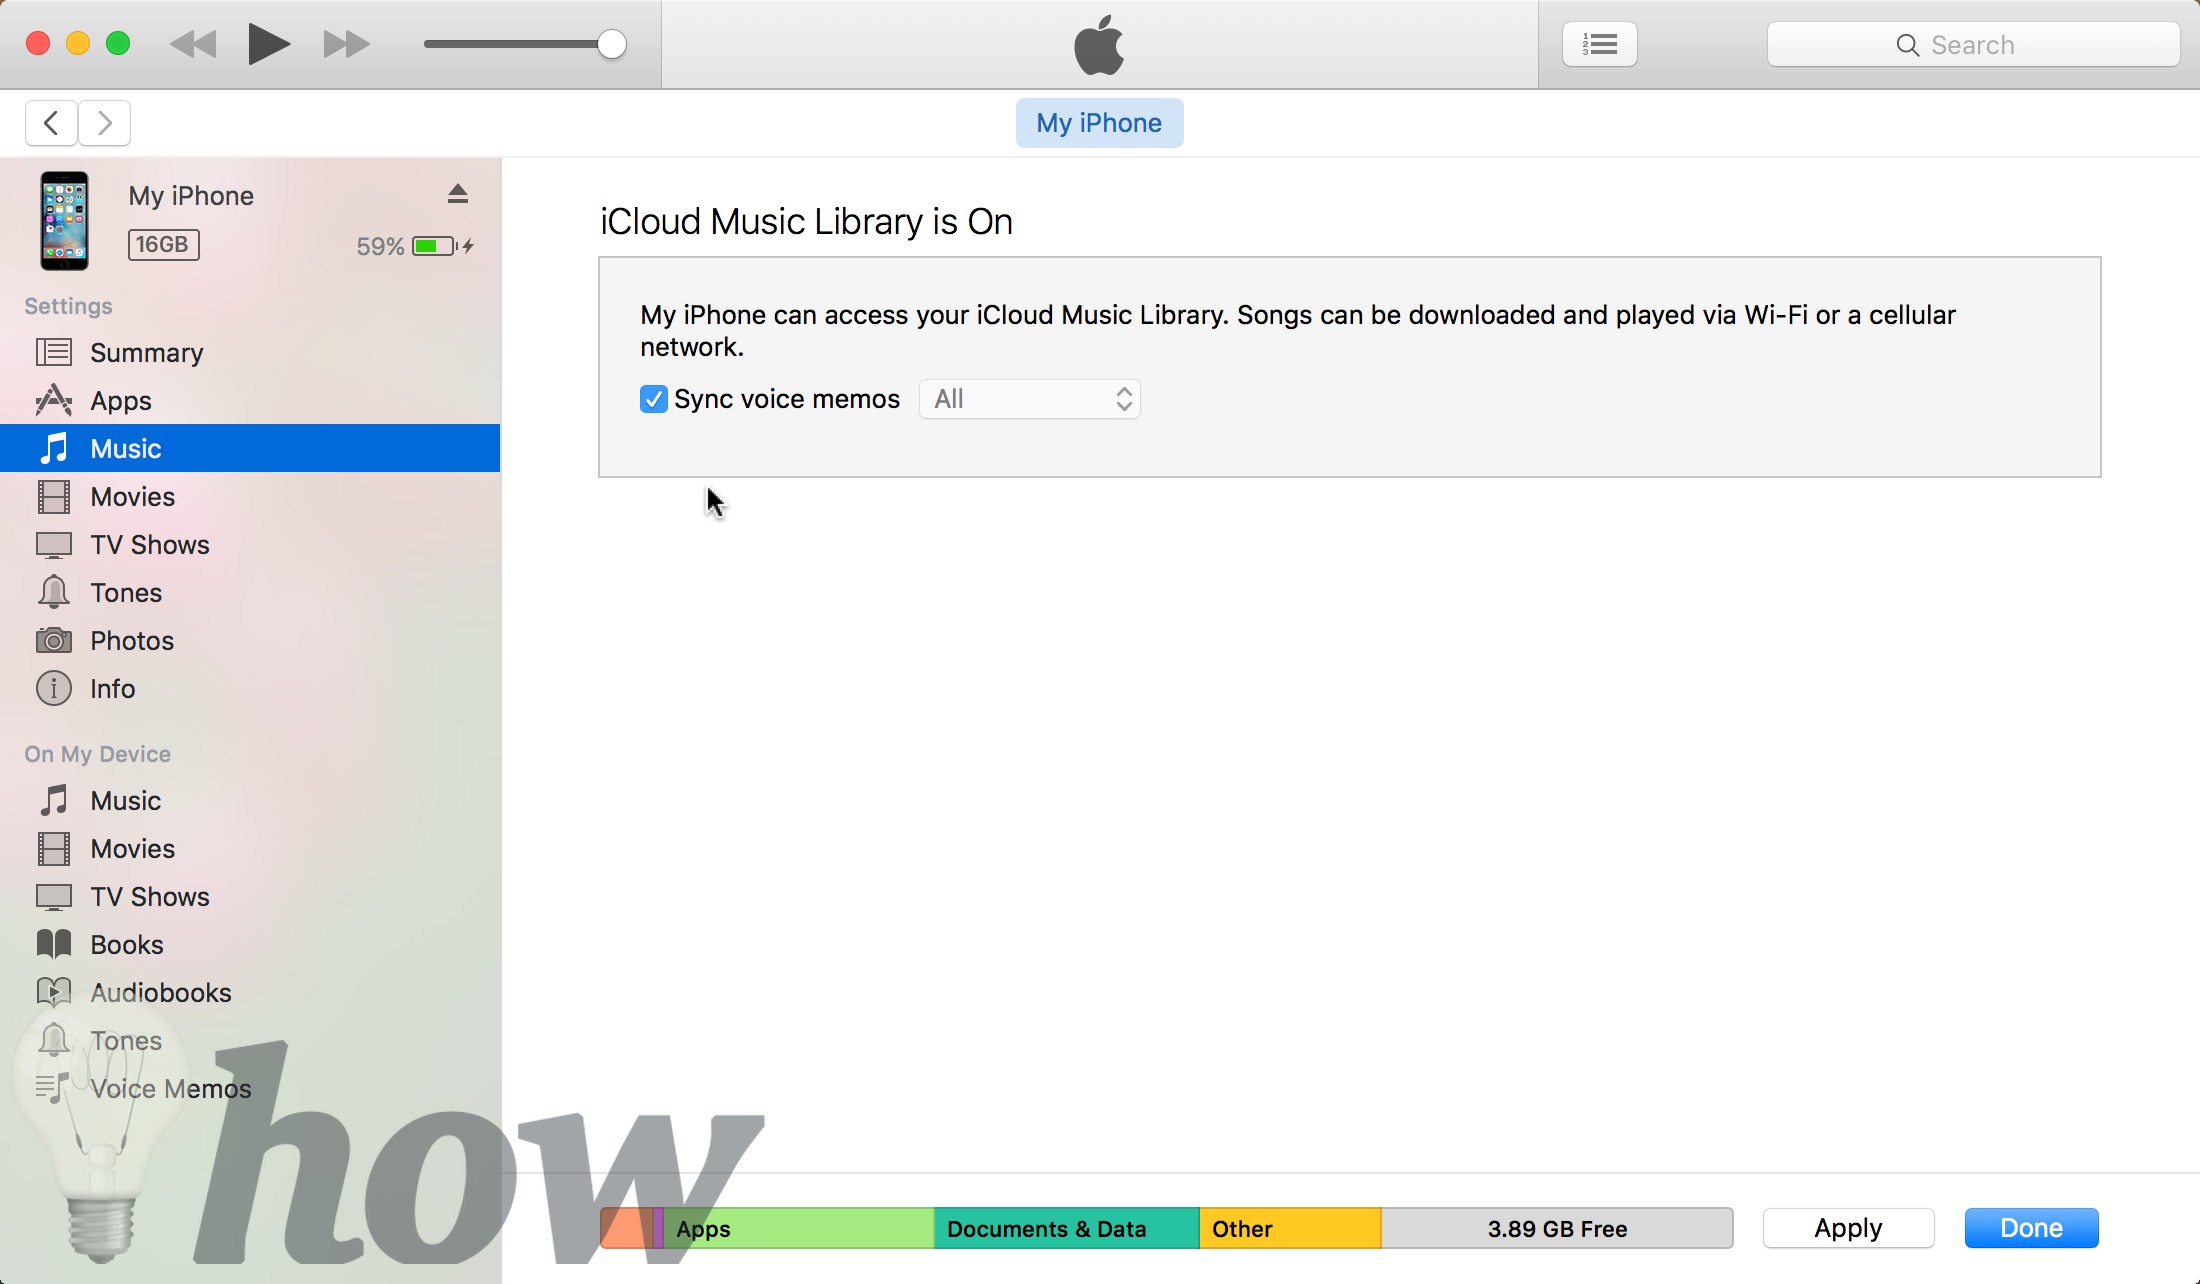
Step 2: Here you will see all the data present on your device. If you are using iCloud Music library, you will find the “Voice memos” under the “Music” tab in the iTunes. Click on the “Music” and check the “Sync Voice memos” on the right side of the iTunes.
That’s it! If you have plenty of music on your iPhone and do not want to lose it, you can use the third option which is perfect to download tens of hundreds of voice memos together within few seconds.
Using Third Party Application on Windows or macOS

There are plenty of applications available for Windows and macOS which can be used to transfer the Voice Memos and do not even require the iTunes.
One of the best application is iExplorer with the user-friendly interface which can transfer the voice memos in few seconds while the other application is iFunbox which will also easily transfer the voice memos but transferring to iTunes is not possible using the iFunbox.
Both the applications are available for Windows and macOS and the iFunbox is absolutely free of cost while iExplorer will cost you some bucks. Here’s how you can use both applications to download voice memos from iPhone.
1. Using iExplorer
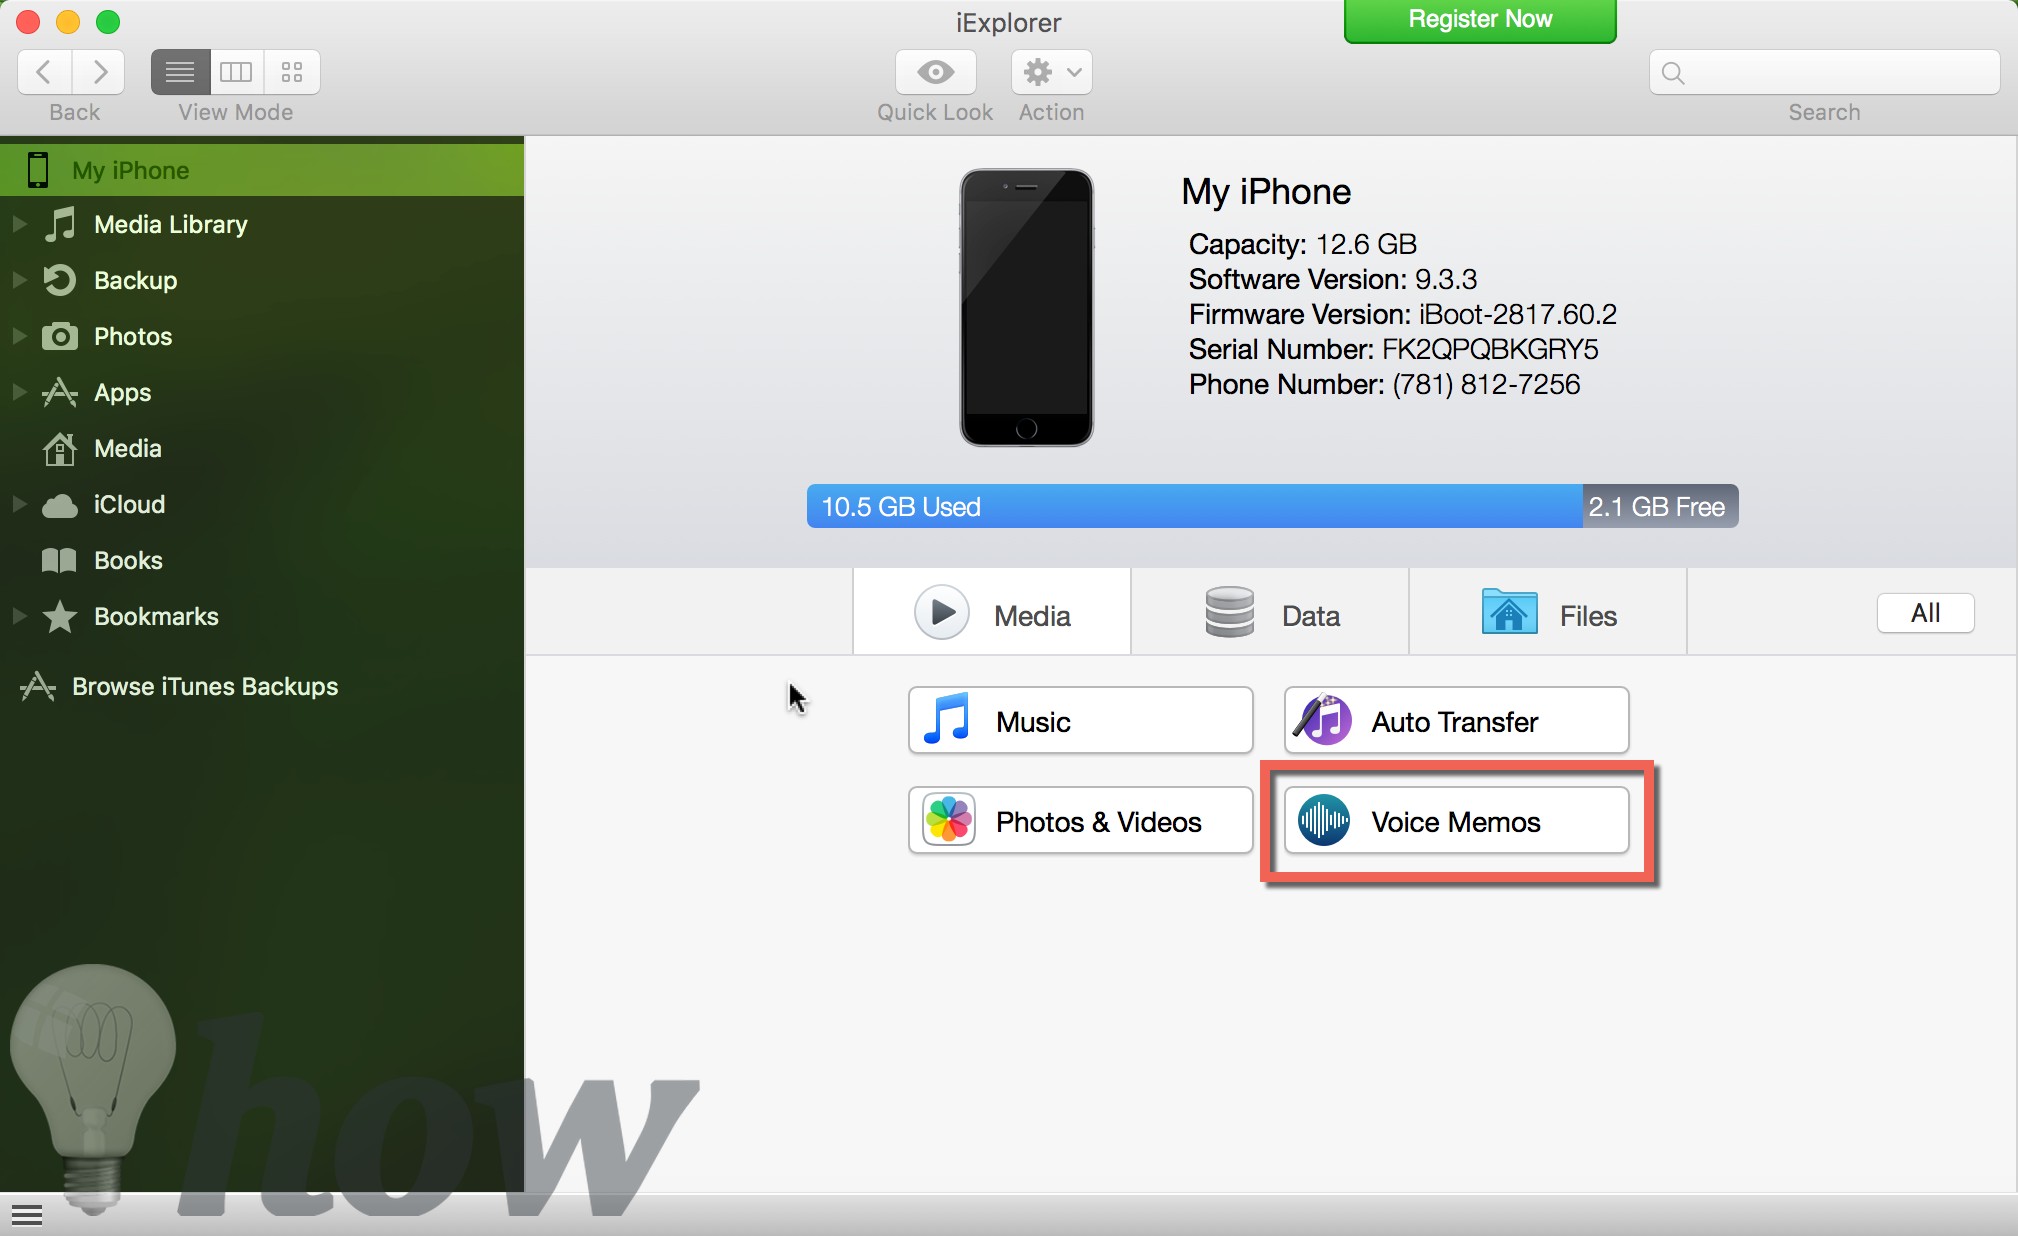
Buy and download the application on your device. Connect your iPhone with the PC and launch iExplorer on your computer. You will see the voice memos button on the main screen. Click on it.
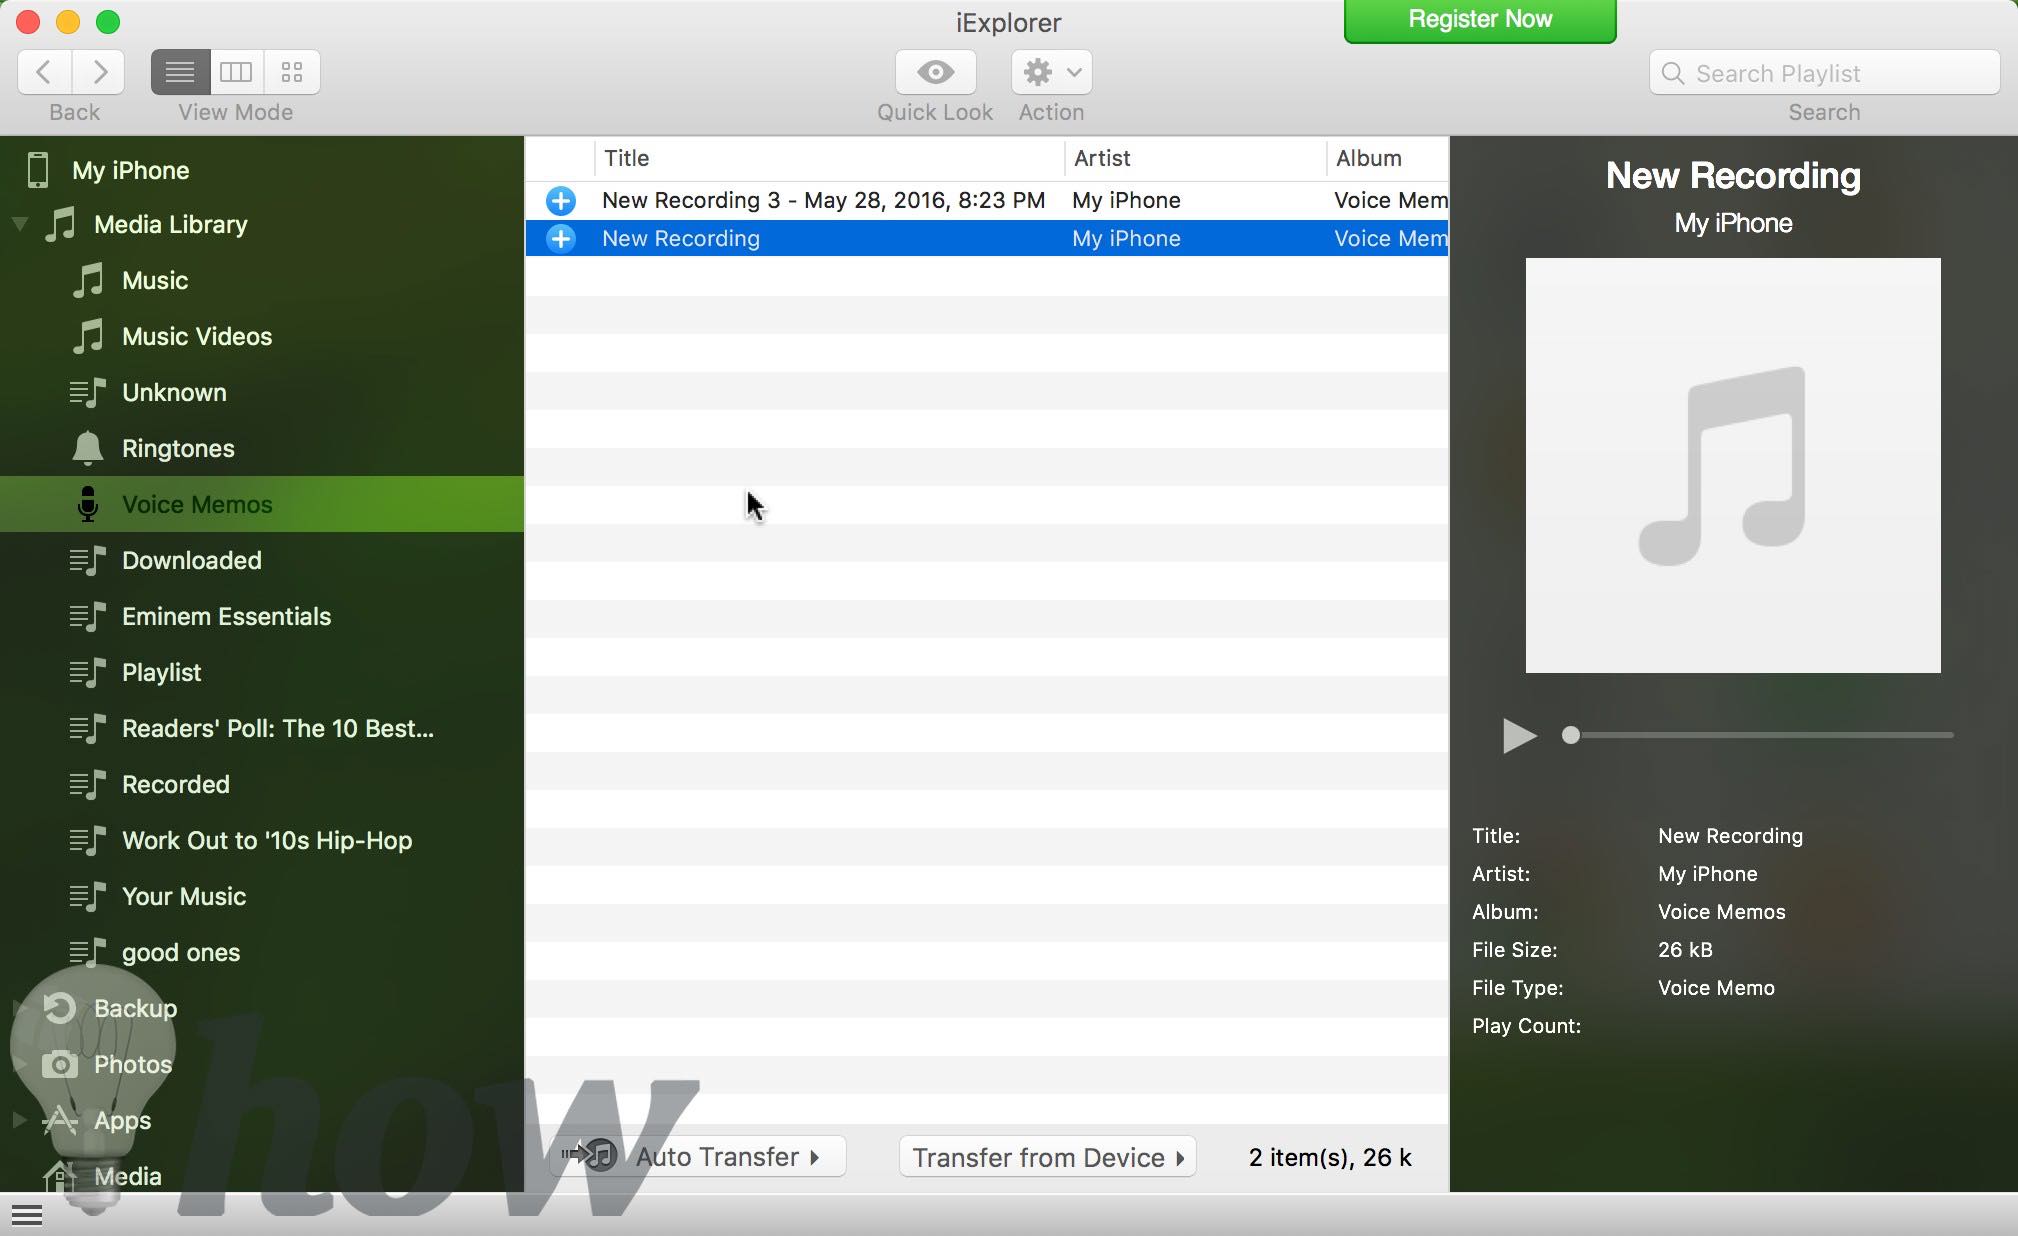
On the next screen, you will see all the voice memos present on your iPhone.
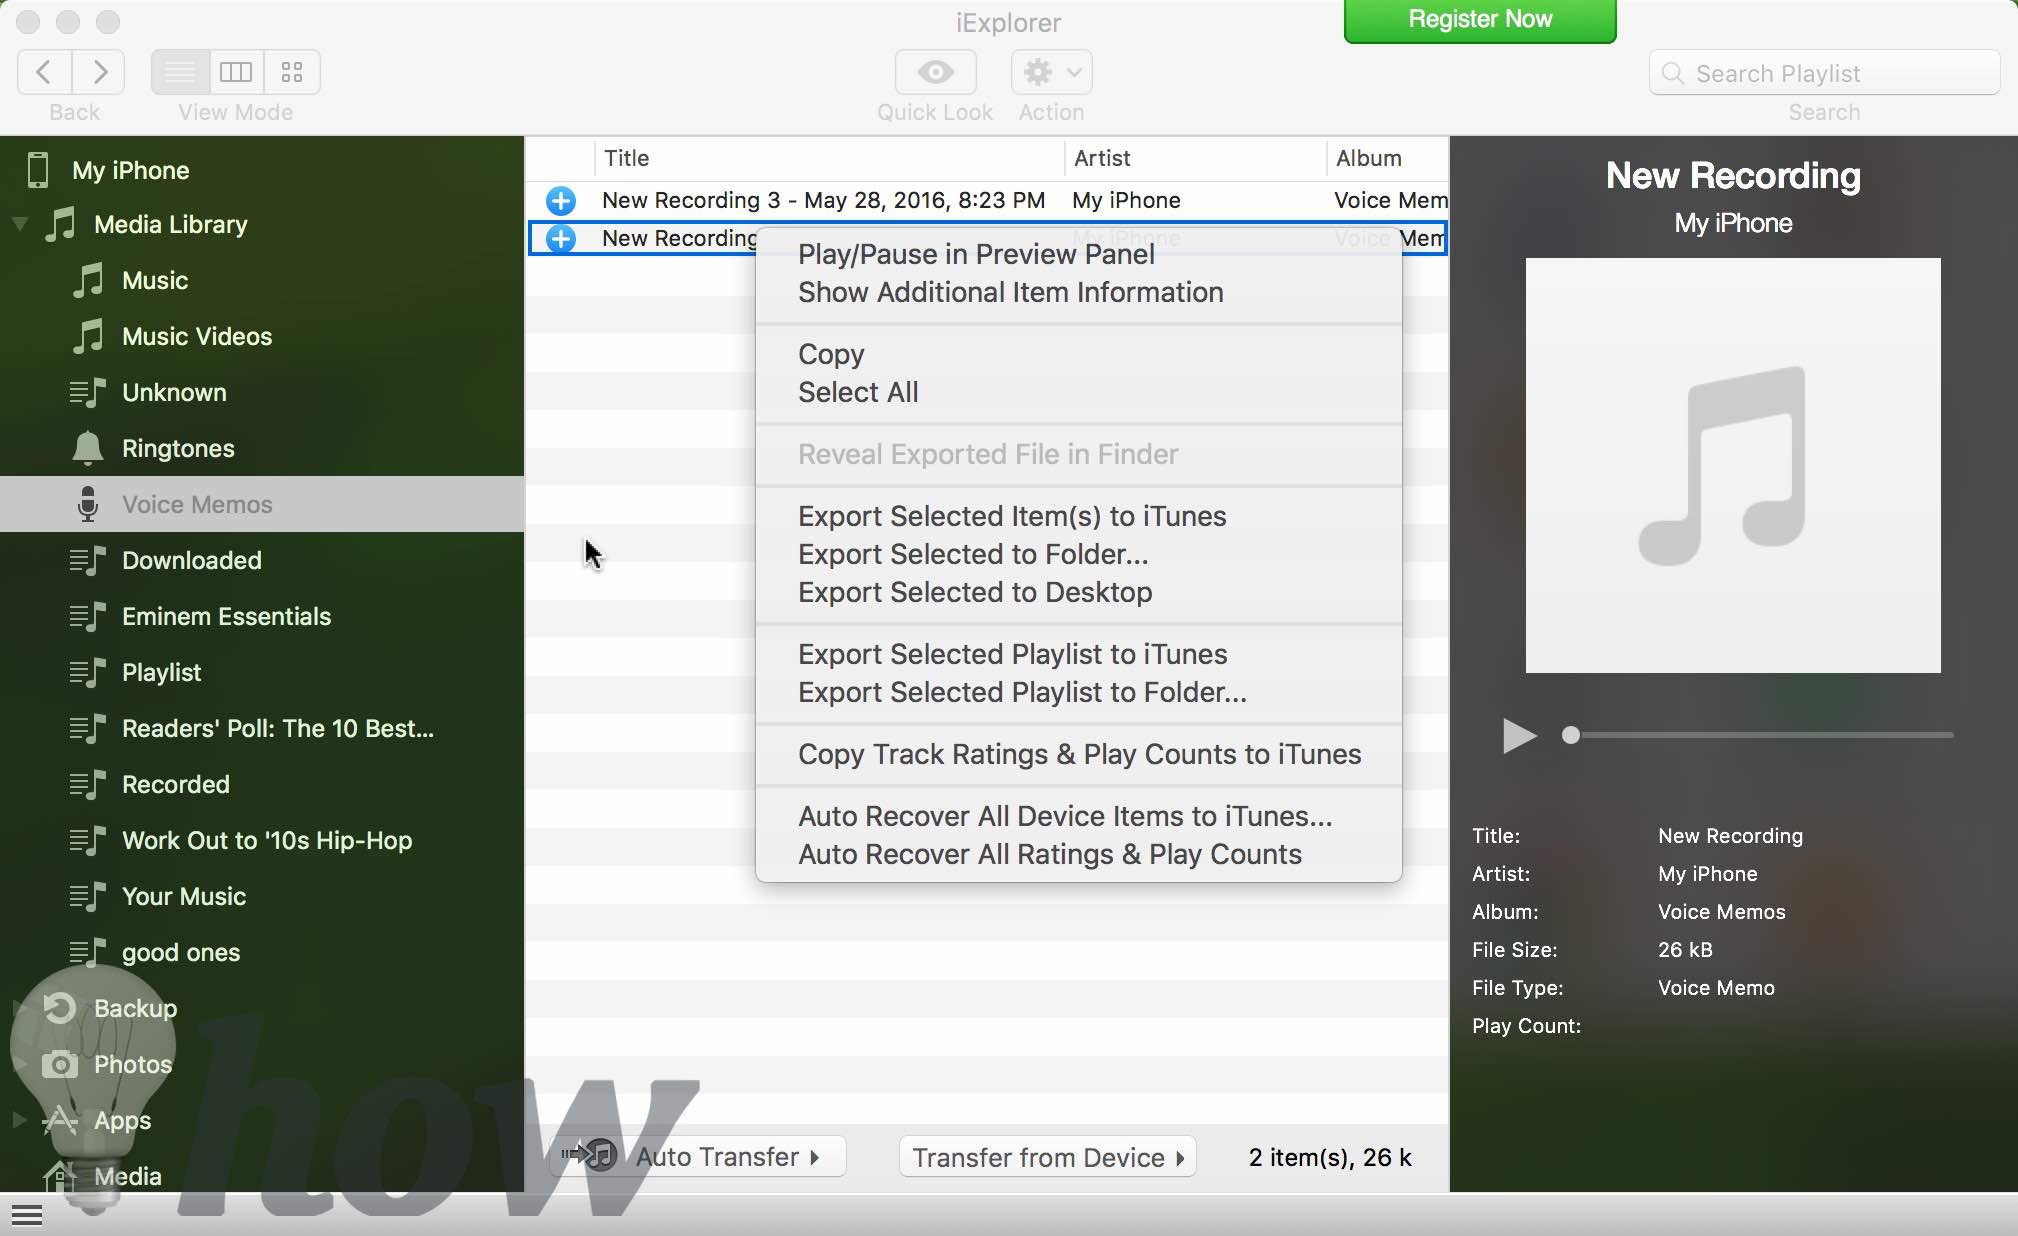
Select the voice memos that you want to transfer to the computer and right click on it. You can export these voice memos to a Folder, Desktop or iTunes on your computer.
2. Using iFunbox
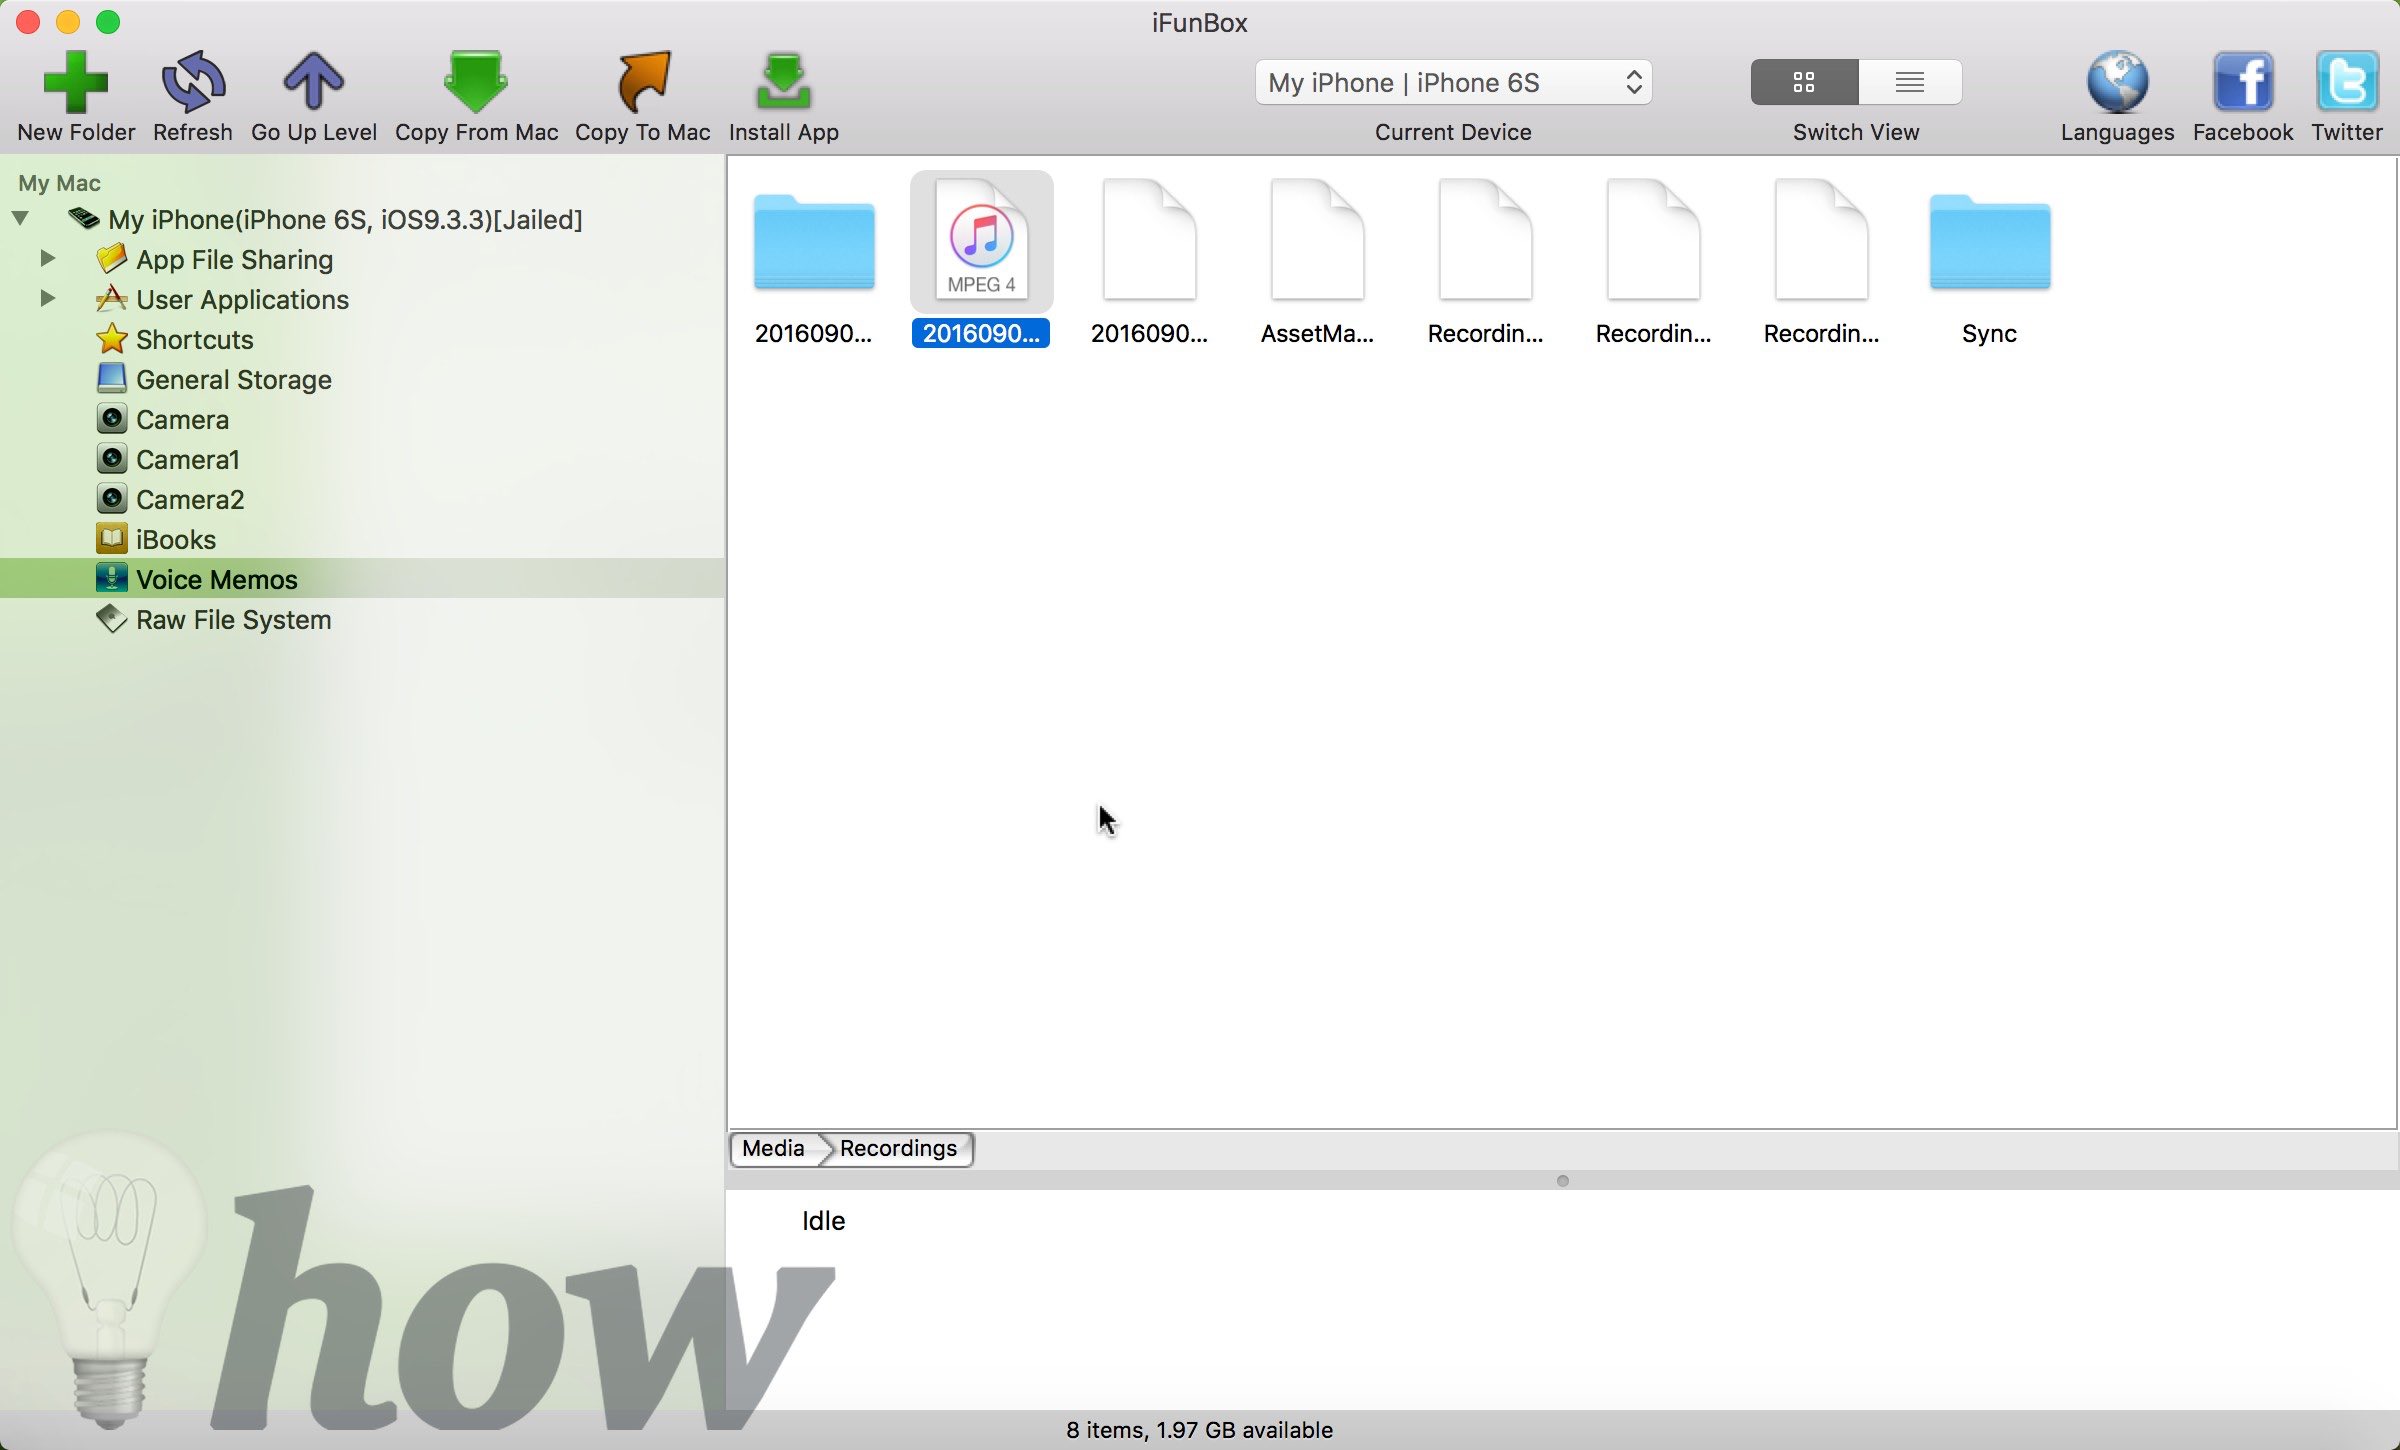
Open iFunbox on your computer and connect your iPhone using the USB cable. You will see the file system of your iPhone on the left-hand side of the screen. Click on the “Voice Memos” and here you will see different voice memos present on your iPhone.
Unlike iExplorer, iFunbox will not rearrange and name the memos in the same way. One can simply pick up the voice memo and move it to the desktop or any other folder.
Conclusion
If you want to transfer the multiples voice memos at once, the best way is to transfer them using iTunes or iFunbox. On the other hand, the first method is perfect to send one voice memo to someone or your computer.
Which method did you use? Let us know in the comments section below.
Read more like this
- How to Prevent iTunes From Backing Up Your iPhone
- How to Change Your Apple ID or iTunes Password
- How to Add Ringtones to iPhone