The web browser that we see every day while surfing the internet on our computer, smartphones and tablets are not as simple as they seem. Behind every web address, there is a very complex numeric Internet protocol (IP Address) which is regulated by the domain name servers (DNS).
Generally, these DNS server addresses are controlled by the internet service providers that you are using, however, changing them to a desired or a third-party DNS addresses have certain advantages over the DNS provided by the internet service providers. One of the biggest benefits of changing your DNS server settings is the improvement in the internet speed.
Apart from it, it can also be used to improve the increase the reliability of the internet or to enable the parenteral control on your devices, accessing the blocked website in your country or protect your web from the Internet attacks such as phishing attacks. Changing DNS address is different for every device, here’s the step by step guide on how you can change on different devices such as Windows OS, macOS, Android and iOS.
How to Change DNS Address on macOS
Changing DNS address on macOS is one of the easiest tasks, and you do not have to be a professional to do. Your new DNS can be DNS address from the Google or any other third-party free or paid service. We will recommend you to use the Google DNS address which is pretty simple and free of cost. Here’s how you can change it.
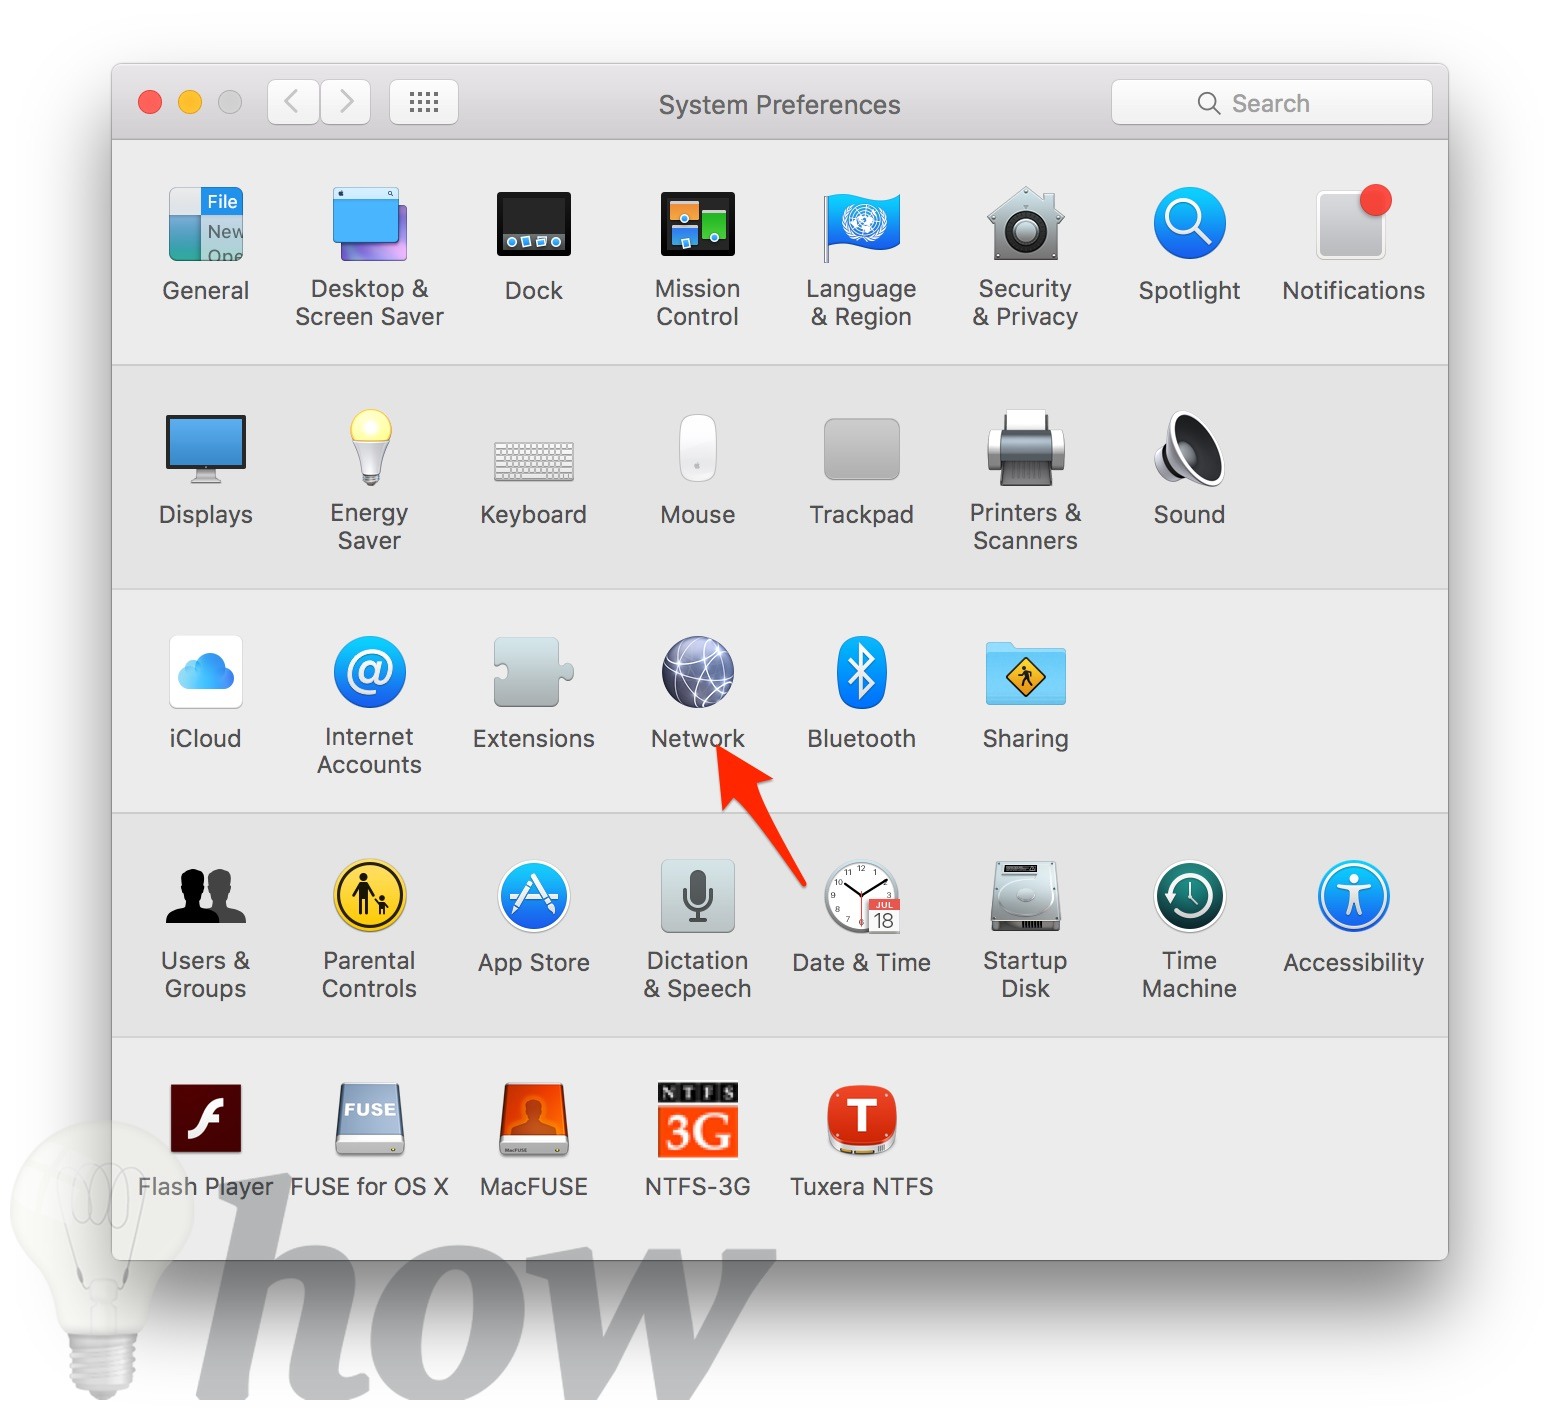
On the main screen of your Mac, Click on the Apple logo in the top left corner and select the System Preferences

On the next windows, Click on the Network, which can found on the third row of this window.
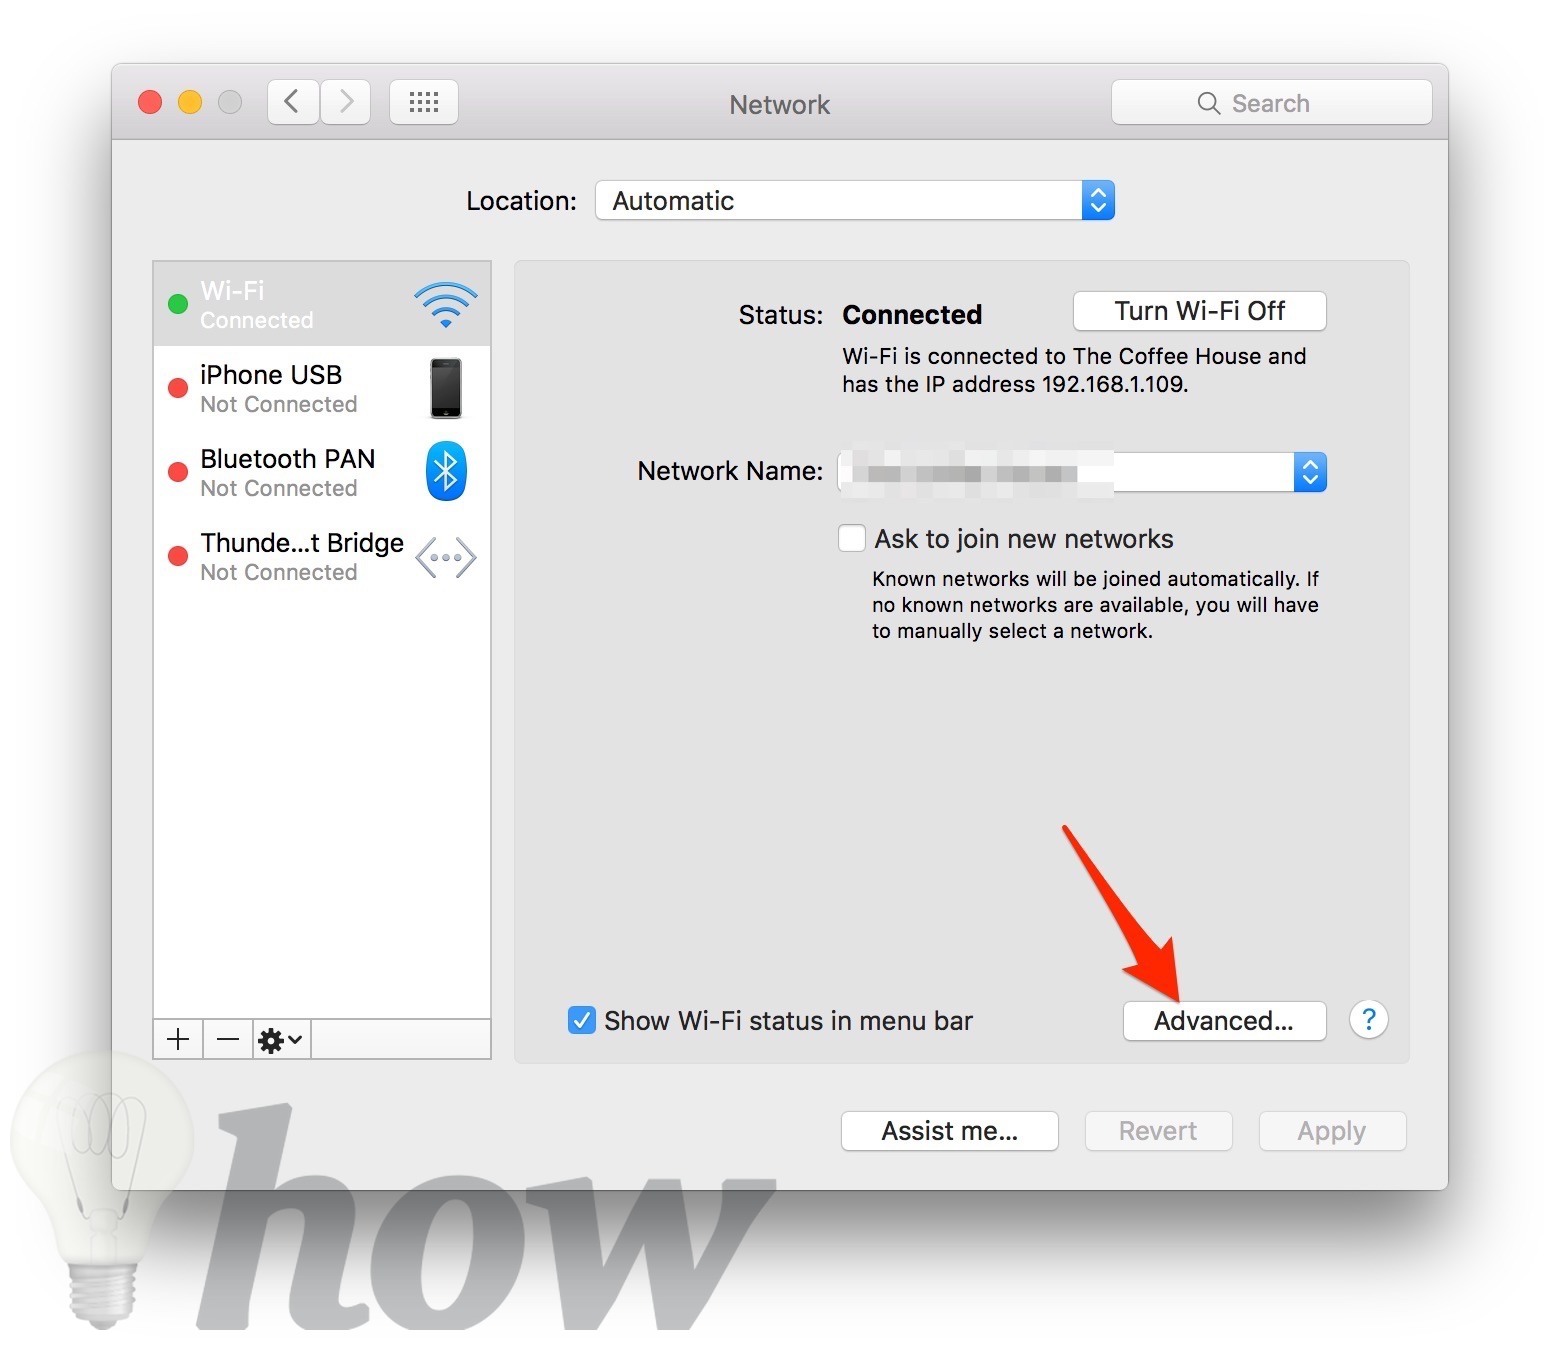
It will show all the networks around, select the network for which you want to change the DNS address; it can either be the Ethernet or the Wi-Fi. If your Mac is connected to the internet, it will be automatically selected, click on the Advance button.
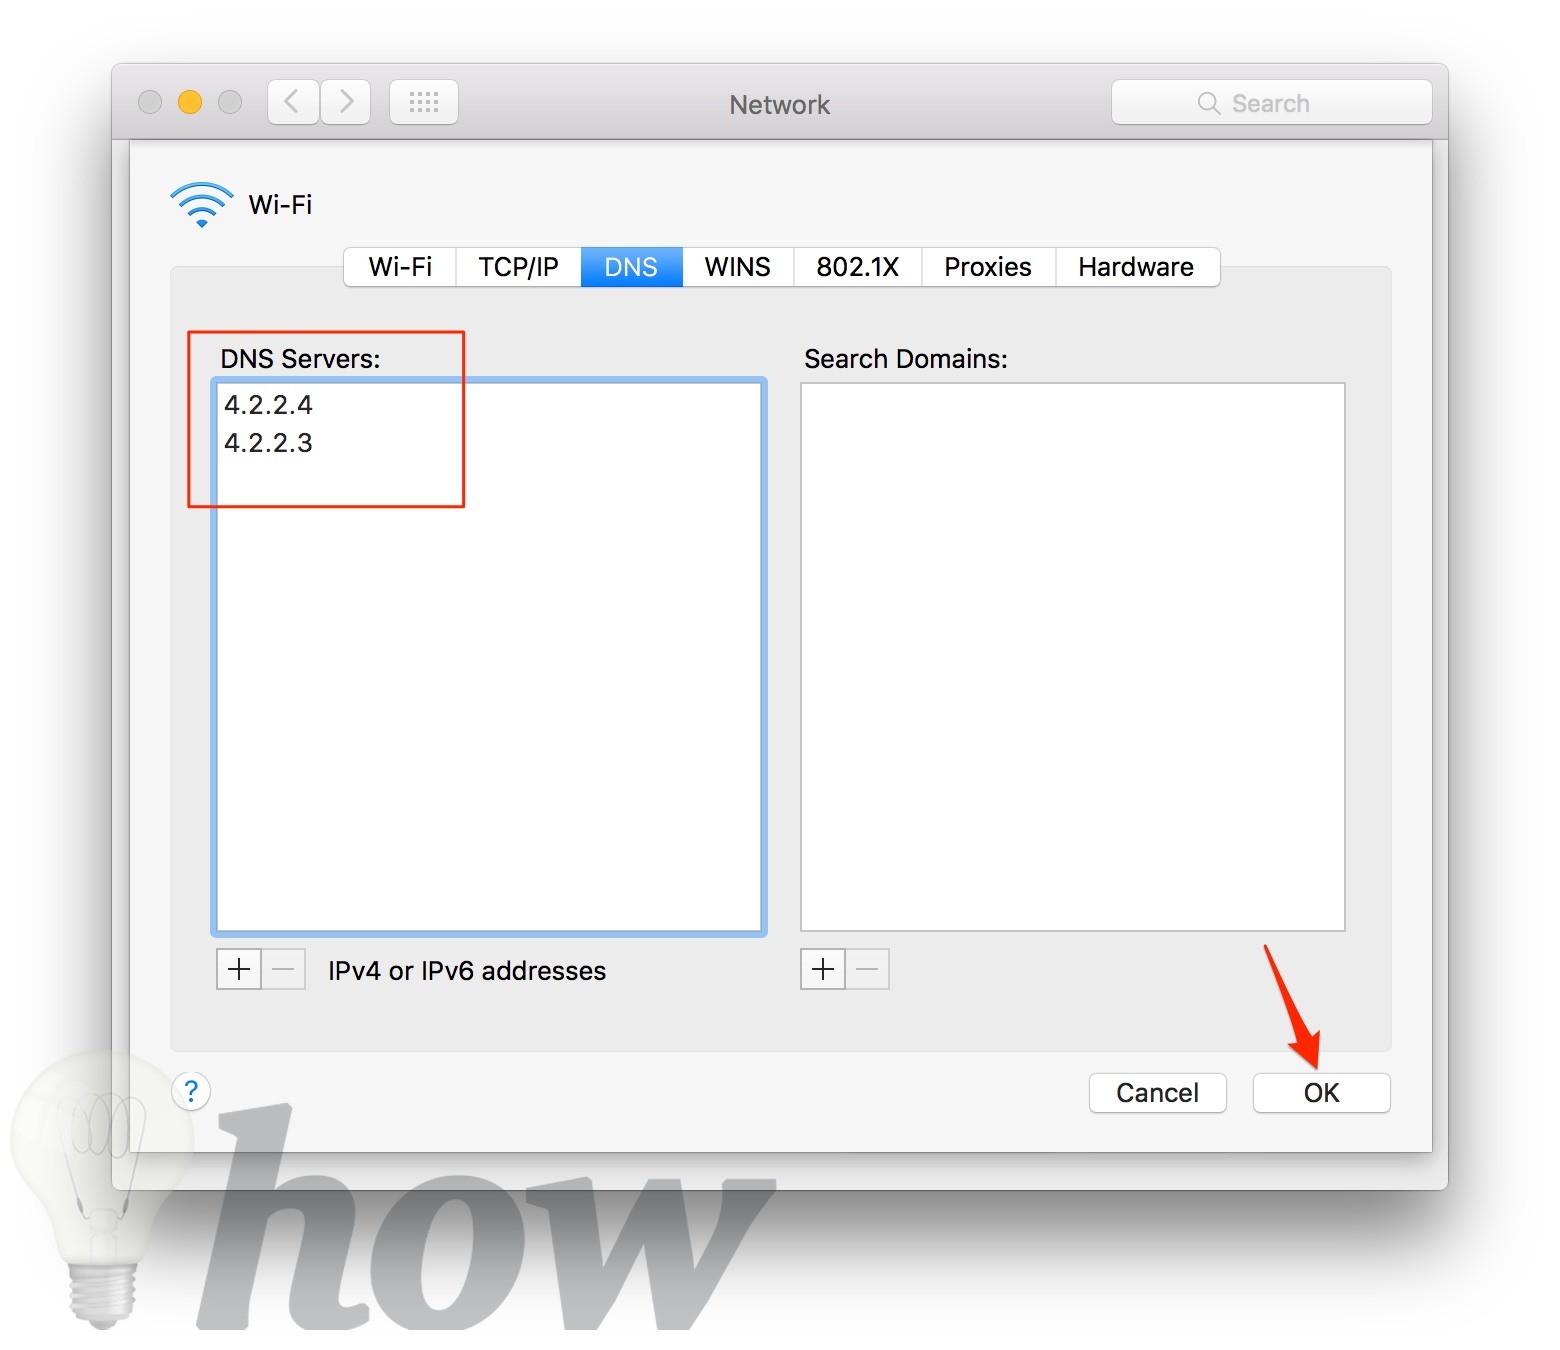
Click on the DNS settings in the next window and click on the “+” button to add a new DNS address. After selecting it, click on OK to save the settings.

That is it! Your DNS address is changed; now you can change it for the different purpose to block the website or increase the speed of the internet connection.
How to Change DNS Address on Windows
All versions of windows provide the same steps to change the DNS address on your computer. However, it is little complicated as compared to the Mac because it involves many steps. Here’s how you can do that.
Right Click on the Wi-Fi or the Ethernet icon in the bottom right screen of your desktop. Now, select the Open Network and Sharing Settings.

Click on the connected internet connection as shown in the screenshot below, it can be the Wi-Fi connection or the Ethernet connection.

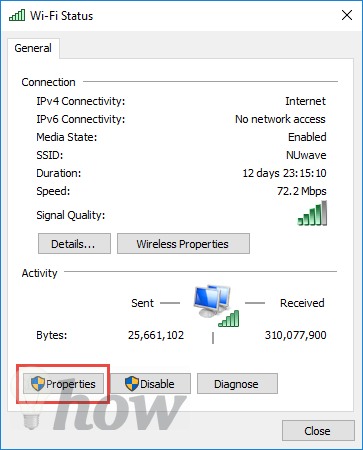
It will open a new window showing the speed and information of the internet connection. Click on the Properties.
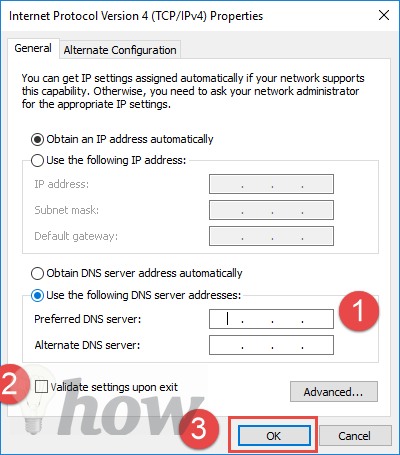
In the Wi-Fi properties, Click on the Internet Protocol Version 4 (TCP/IPV4) and click on Properties again.

The next screen will let you change the DNS address on your Windows PC or tablet, select the Use the Following DNS Address and write down the new DNS address. Don’t forget to check the box showing “Validate Settings Upon Exit” and Click on OK at the end.
That is it! DNS Address on your Windows computer is changed; it may take a few seconds to be efficient and sometimes may require restarting your computer.
Read also: How to check computer specs
How to Change DNS Address on iOS (iPhone, iPad)
Just like macOS, Apple provides the easiest way to change the DNS address on the iPhone, iPod Touch and iPad. The best part of this method is that it will work on all iOS devices running any version of the software and here’s how you can change it.
Go to the Settings on your iPhone and Click on the Wi-Fi

Click on the little “I” button next to the wireless connection that you are connected to, as shown in the screenshot below.
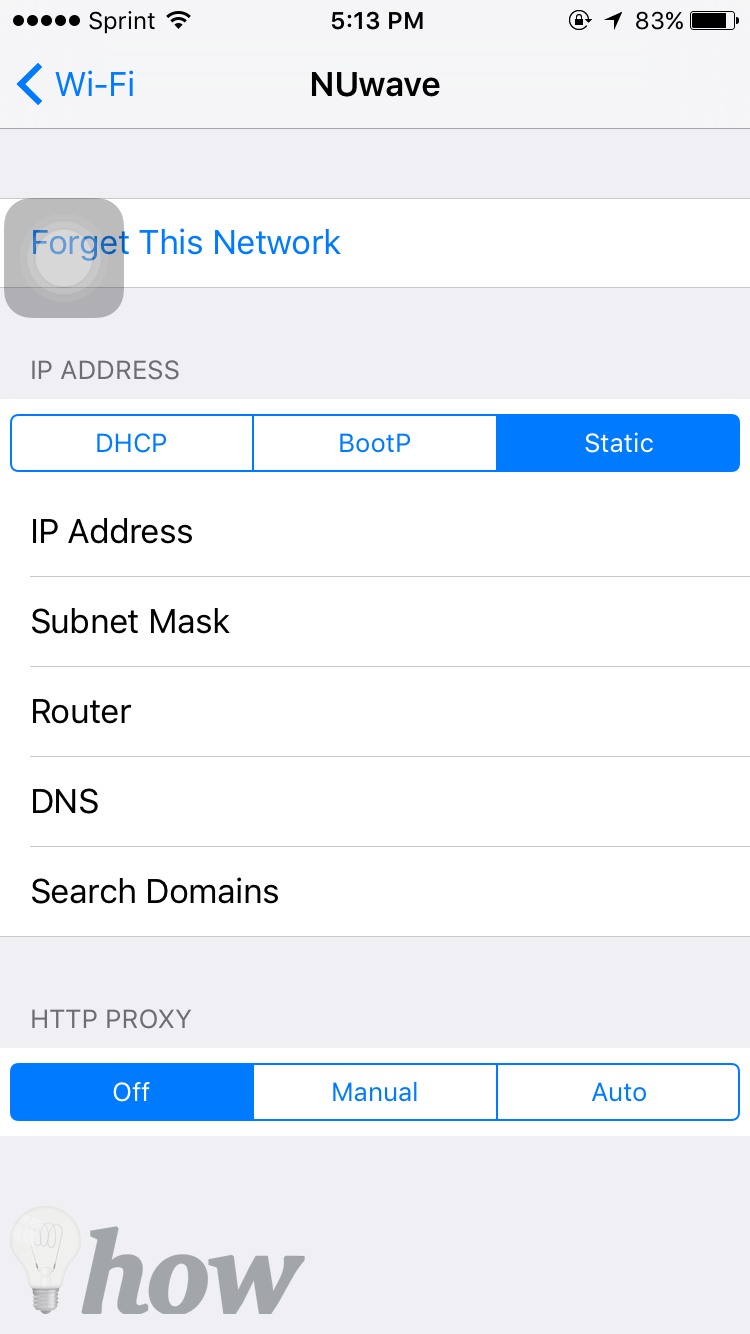
Now, Tap on Static and then tap on DNS to write down the new DNS address for your iPhone.
Exit settings and you will see new DNS working on your iPhone, iPod Touch and iPad.
Read also: How to Block Websites on iPhone
How to Change DNS Address on Android Devices
Android is an open source operating system, you can either use some applications or the manual method to change the DNS address on your Android device. Applications will let you change the DNS address with just one tap, however, using the manual method is although a little longer, but you do not have to install an application full of Ads to change the DNS address.
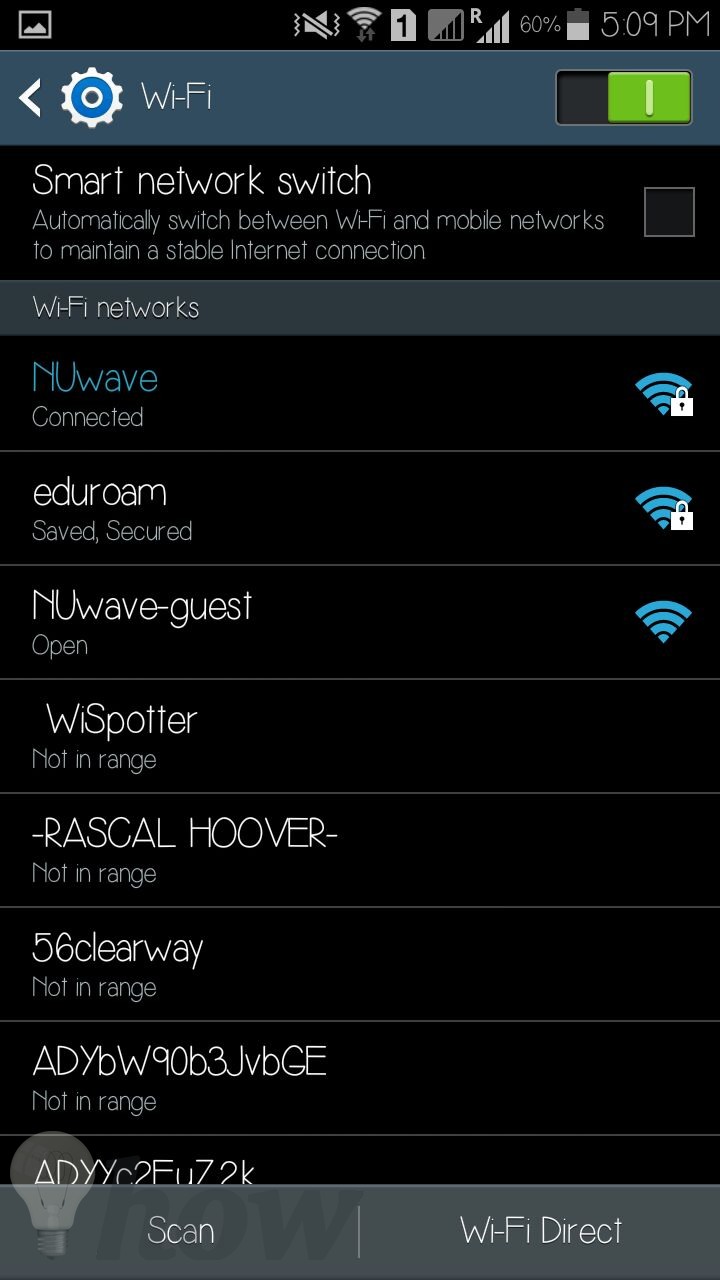
This method may vary for some Android devices. However, most of the steps are approximately similar for all devices. Go to the settings on your Android Device and click on the Wi-Fi under the connection on our Android device.

Tap on the connected Wi-Fi network.
A pop-up will be shown, Tap on Modify Network Config
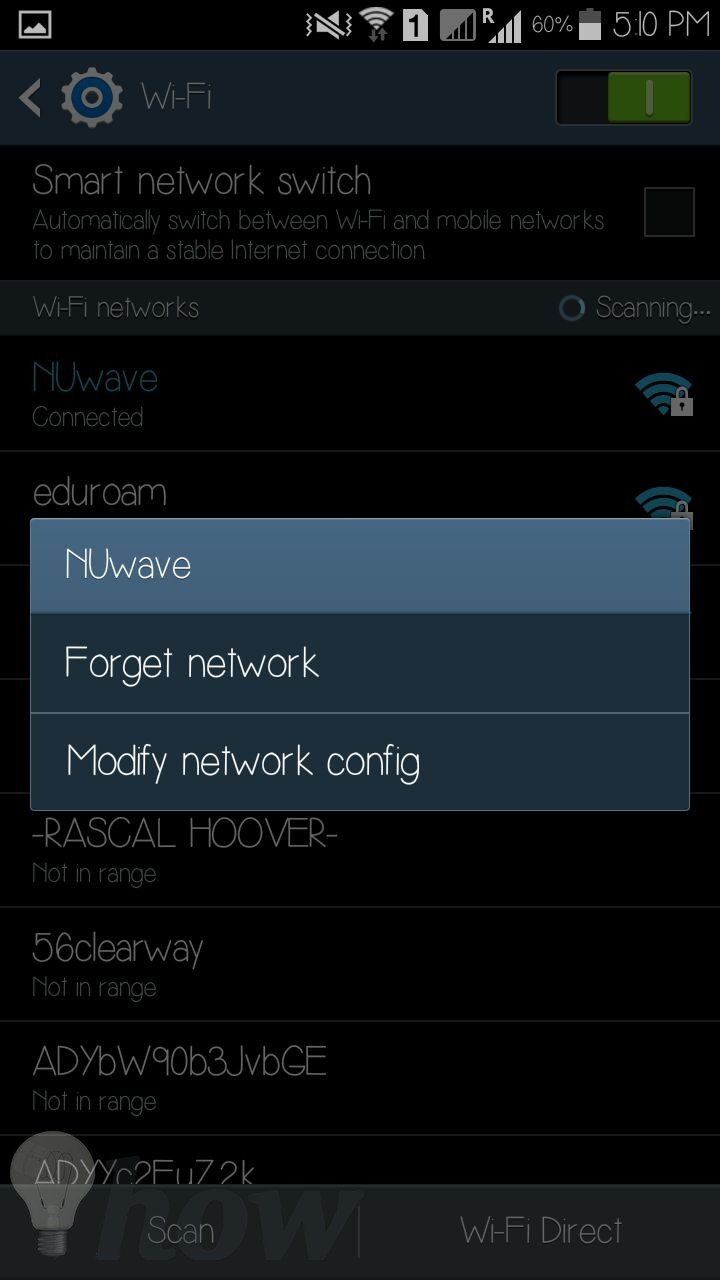
On the next pop-up, change the IP Settings from the DHCP to Static.

Now, two more fields will be shown for DNS 1 and DNS 2 where you can change the DNS address on your Android device.

Tap on OK to save the settings on your Android device.vThat is it! You can now perform different functions to visit the blocked website in your country or restrict internet on your device.
Read also: How to Change Default Browser
![How to Change Your DNS Server Settings [PC and Phone]](https://omghowto.com/wp-content/uploads/thumbs_dir/Best-Ultrawide-Monitor-For-Macbook-Pro-qjvhxdh2o2n4ntpwqoxpp01ej2swtoohbl5gzs16po.webp)
![How to Change Your DNS Server Settings [PC and Phone]](https://omghowto.com/wp-content/uploads/thumbs_dir/How-To-Connect-LG-Sound-Bar-To-Wifi-2-pmwj1vmqhk6amezufl2qr1r51id0lro9glsqwjtkjg.webp)